Sous Vide Whole Chicken (Not Poached) Two Ways
You must try this sous vide whole chicken because it’s going to be the juiciest, tenderest, and most flavorful chicken you’ll ever make. Note: It’s not poached!
When it comes to sous vide whole chicken, so many recipes on the internet are poached. There is a good reason for that, which I will explain shortly.
If a poached chicken isn’t something that sounds attractive to you, I am happy to tell you that I’ve discovered two foolproof paths to a perfectly juicy, golden-brown whole chicken with crispy skin without having to add any chicken stock to your cooking bag.
In this article, I’ll show you exactly how to sous vide whole chicken safely with both methods step by step. Keyword: safely!
Before we get into it, though, a common question that I get frequently is why cook a whole chicken sous vide? Here’s the answer.
- Why Sous Vide Whole Chicken?
- How to Sous Vide a Whole Chicken Safely
- Essential Equipment
- How to Sous Vide Whole Chicken Step-by-Step Instructions – Method #1 Molding
- Sous Vide Whole Chicken Step-by-Step Instructions – Method #2 Stuffing
- The Meat around the Leg Bones of My Cooked Chicken Is Still Pink-ish. Is It Safe to Eat?
- StreetSmart Sous Vide Tips
- What If I Don’t Have a Sous Vide?
- Round out Your Chicken Dinner
- Sous Vide Whole Chicken (Not Poached)
- About the Author
Why Sous Vide Whole Chicken?
The benefit of using a sous vide precision cooker (versus a grill or oven method) for making a whole chicken is that you can rest assured your chicken is always going to turn out tender, juicy, and cooked to perfection consistently, every time—never overcooked or dry. I’m sure you would agree, that less stress in the kitchen is always nice!
The even nicer part is that once your bird is in the sous vide bath, feel free to walk away from your kitchen. It’s going to take at least six hours (totally hands-free), and even if you leave the chicken in the bath longer, it’s still going to turn out great because sous vide makes it pretty much impossible to overcook it.
How to Sous Vide a Whole Chicken Safely
The main principle of sous vide cooking is to slow-cook food at a precise low temperature. A lot of the time, the cooking temperature is below 140°F (60°C). You might have heard of the “danger zone,” which refers to a temperature range between 40°F (4.44°C) and 140°F (60°C). When food sits in this range, potentially harmful bacteria, notably food pathogens, can thrive and make you sick.
One of the most problematic pathogens is Salmonella, and our beloved chicken has a lot of it. When the center of your chicken reaches 165°F (74°C), 100% of Salmonella is killed immediately. And that’s why the FDA recommends the minimum internal temperature for safely cooking chicken is 165°F (74°C).
When you cook chicken sous vide between 140°F (60°C) and 150°F (66°C), the internal temperature of the bird will never reach 165°F (74°C). How on earth is it safe to cook chicken this way? That’s a great question. Please read on.
Temperature and Time
You know that Salmonella in chicken dies instantly at 165°F (74°C). What you might not know is that at 160°F (71°C), it takes 14 seconds to kill Salmonella in chicken (5% fat). At 155°F (68°C), it takes 50 seconds. When the temperature is brought down to 150°F (66°C), the pathogen is killed in 3 minutes.
You see, to pasteurize chicken or any food, it isn’t just about the temperature. It’s about time as well. Technically, you can cook your chicken at an even lower temperature than 140°F for a longer time, and it will be safe to consume. But I don’t recommend it because the chicken will have a sashimi-like texture, which no one will find appealing.
The recommended sous vide whole chicken cooking time is 6 hours at 150°F (66°C). Not only is food safety ensured, but your bird will turn out mind-blowingly tender and juicy. Seriously, you are going to be stunned!
Can’t wait to roll up your sleeves and put a whole bird in a cooking bag? Hold on for a second. There’s one more thing you should know.
Fill up That Cavity
The tricky thing about cooking a whole bird sous vide is removing the air from the cavity. Because air doesn’t conduct heat well, it will prevent the inner part of the chicken from reaching its desired temperature.
Even if you use a vacuum sealer, there’s no way to suck the air out of the cavity unless you spatchcock your chicken. That’s why sous vide whole chicken is usually poached. Adding liquid into the cooking bag fills the chicken cavity, and the liquid can effectively transfer heat inside the chicken.
(Full disclosure: the first time I attempted to cook whole chicken sous vide, I did not add any liquid in the vacuum-sealed bag. The chicken made its own juice which filled up the cavity during the cooking process. After six hours, my bird was fully cooked and my family thoroughly enjoyed it. None of us got sick. However, it never hurts to take precautions regarding food safety.)
After reading the comments below and doing a few more experiments, I am happy to report that there are two non-poaching ways to effectively remove the air from a chicken cavity, and both methods worked extremely well.
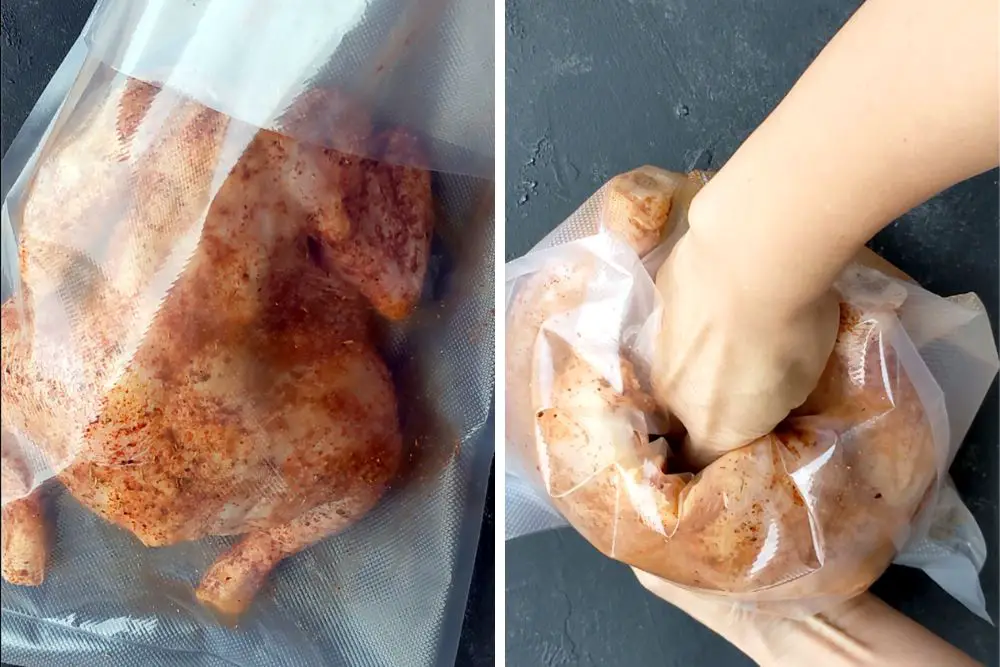
Method #1 Mold the sous vide bag into the chicken cavity.
This method was initially introduced to me by a reader, GS. See his comment below. Thank you, GS!
Put the chicken into a large sous vide bag, cavity side first. Then use your fist to push the bottom of the bag into the cavity. When you vacuum seal this way, the air gets sucked out of the cavity as well. The water in the sous vide bath can fill the cavity immediately when you drop the chicken into the bath. Now, the water can circulate your whole chicken, including the inside.
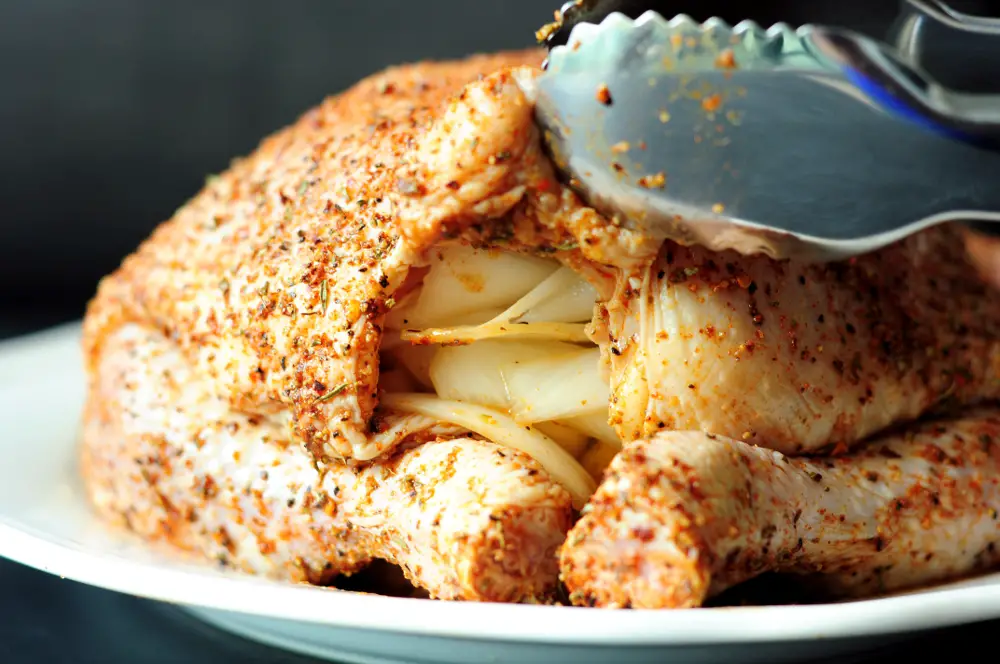
Method #2 Stuff the cavity of your chicken with onions and lemons!
The onions and lemons act as the heat transfer agent inside your chicken to ensure it reaches 150°F (66°C) inside out and holds at that temperature during the entire cooking time. They also add an unexpected layer of flavors to your chicken, in addition to the mouth-watering thyme, cayenne, garlic, and paprika dry rub.
Depending on the size of your chicken, you might need to use more or fewer onions and lemons. Make sure you stuff the cavity as much as possible so there’s little to no air left inside before you bag the chicken. I cut my onions and lemons into slices and stuffed the bird well.
Feel free to add a couple of sprigs of fresh rosemary or thyme or whatever your heart desires inside the chicken.
Essential Equipment
To sous vide a whole chicken successfully with either method, there are a few essential pieces of equipment you’ll need.
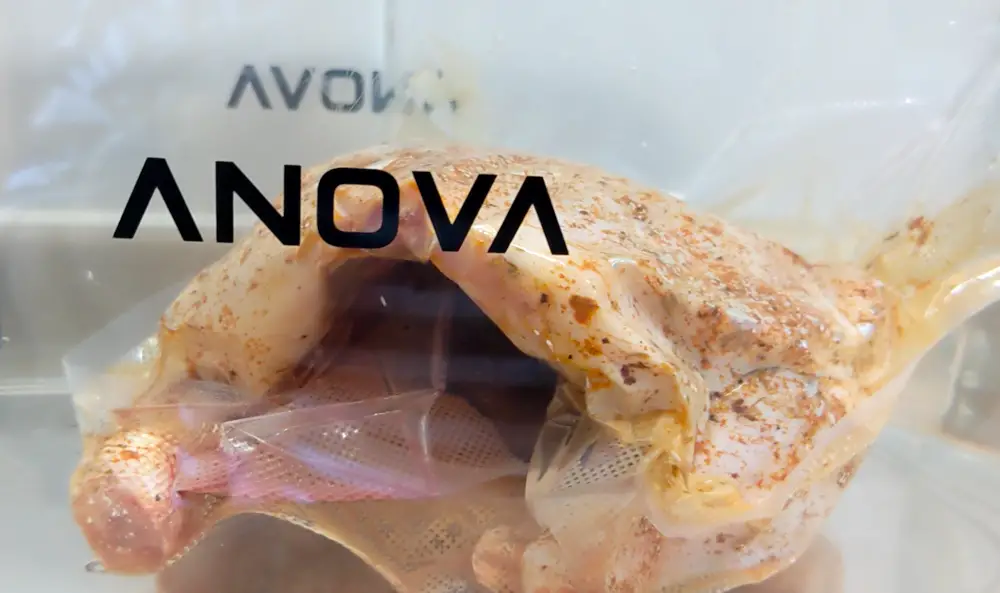
- A sous vide machine: I used Anova Culinary Sous Vide Precision Cooker 2.0 to sous vide my whole chicken.
- A sous vide container or a large pot: Depending on the size of your chicken, a decent-sized sous vide container will be ideal to hold the whole bird and still have room for the water to circulate. My go-to cooking vessel is this 16L sous vide container also by Anova.
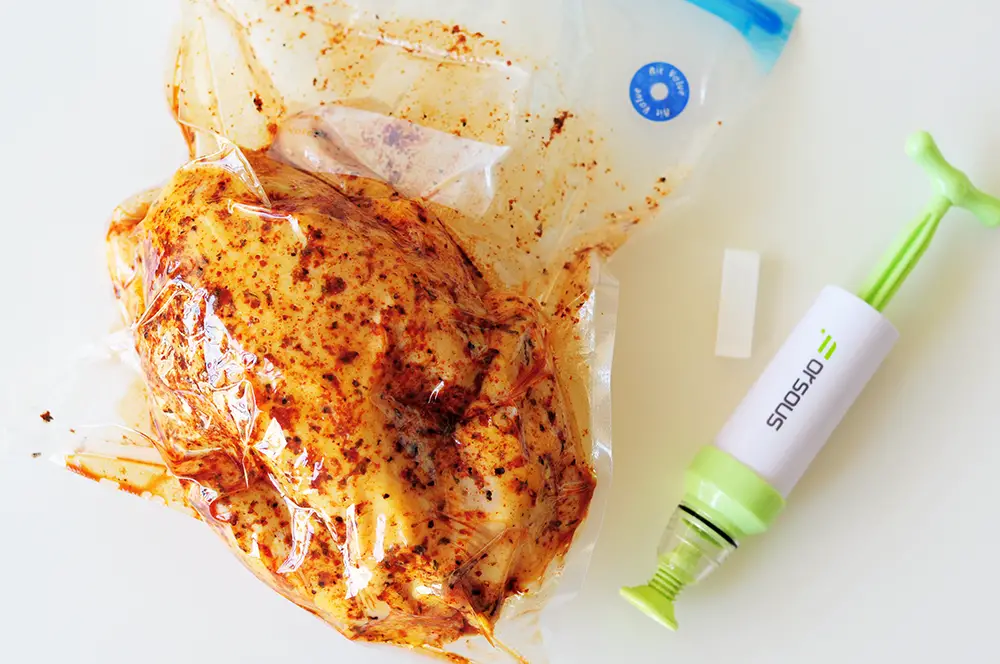
- Vacuum-sealer bags: As you can see, with method #1, I custom-cut a large sous vide bag to mold the bottom into the chicken cavity. Vacuum sealer rolls come in handy in cases like this. With method #2, I used a reusable sous vide bag with a hand pump to seal the bag. Wondering what type of bags you should use for sous vide? Read my in-depth Sous Vide Bags 101 here.
- A vacuum sealer: To use vacuum-sealer rolls, you’ll need a vacuum sealer.
How to Sous Vide Whole Chicken Step-by-Step Instructions – Method #1 Molding
Now, here comes the exciting part. Let’s do this!
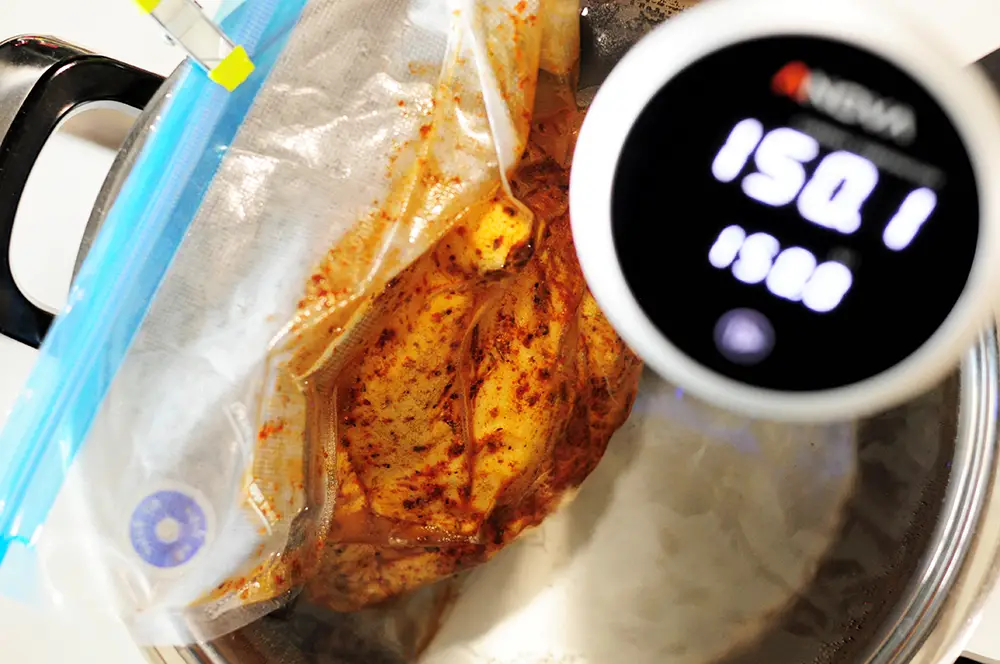
Step 1: Preheat water to 150°F (66°C) using an immersion circulator.
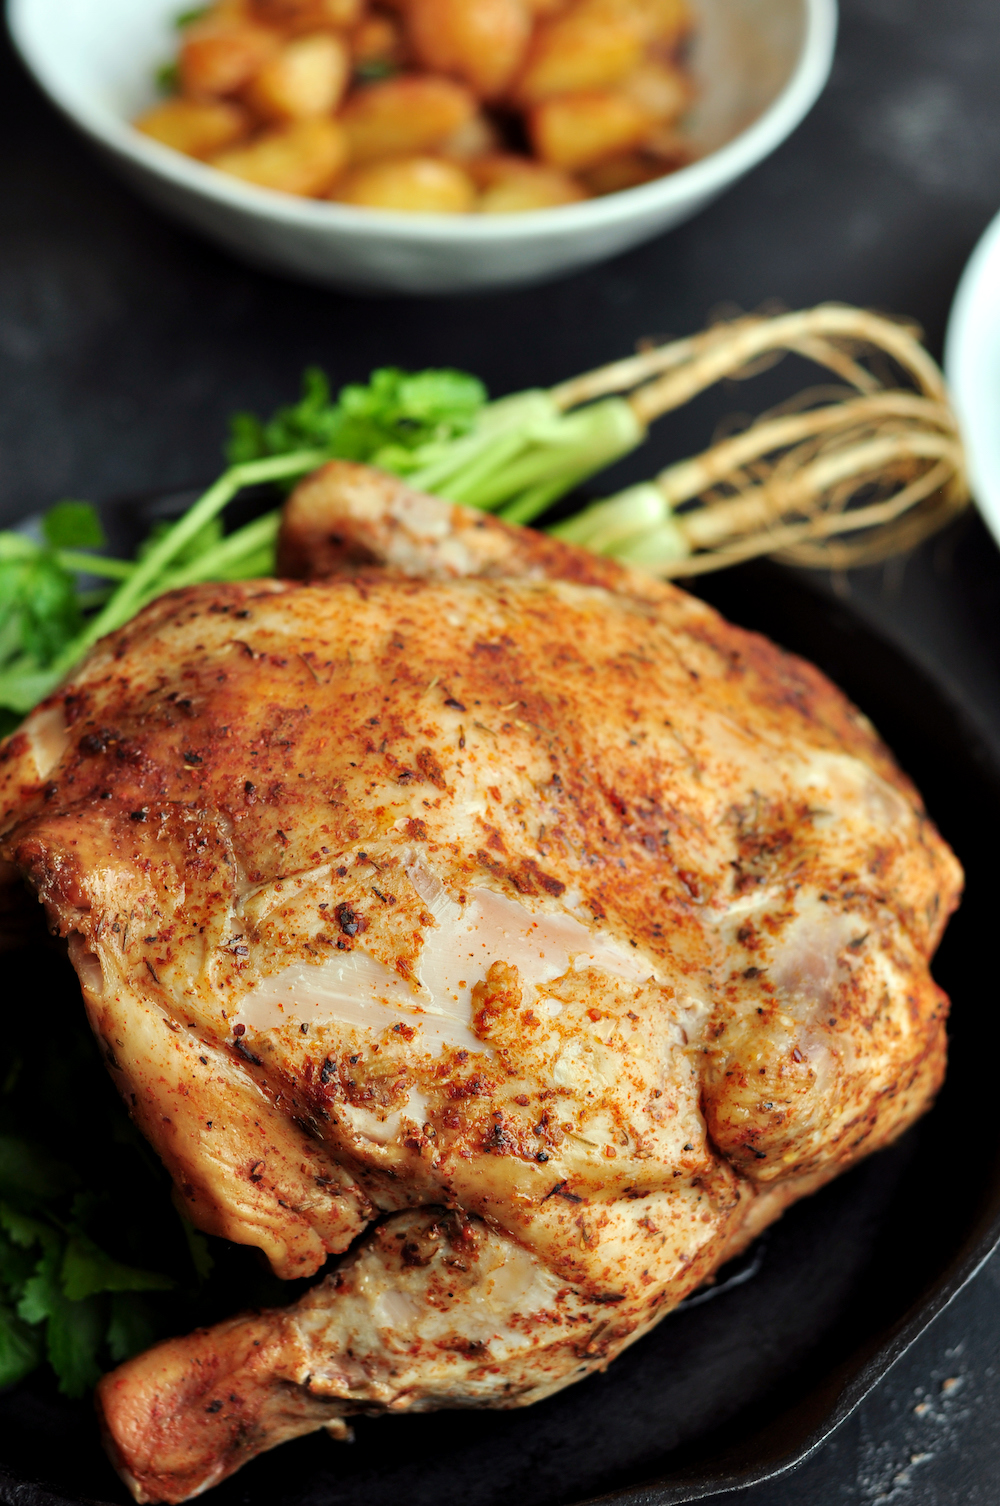
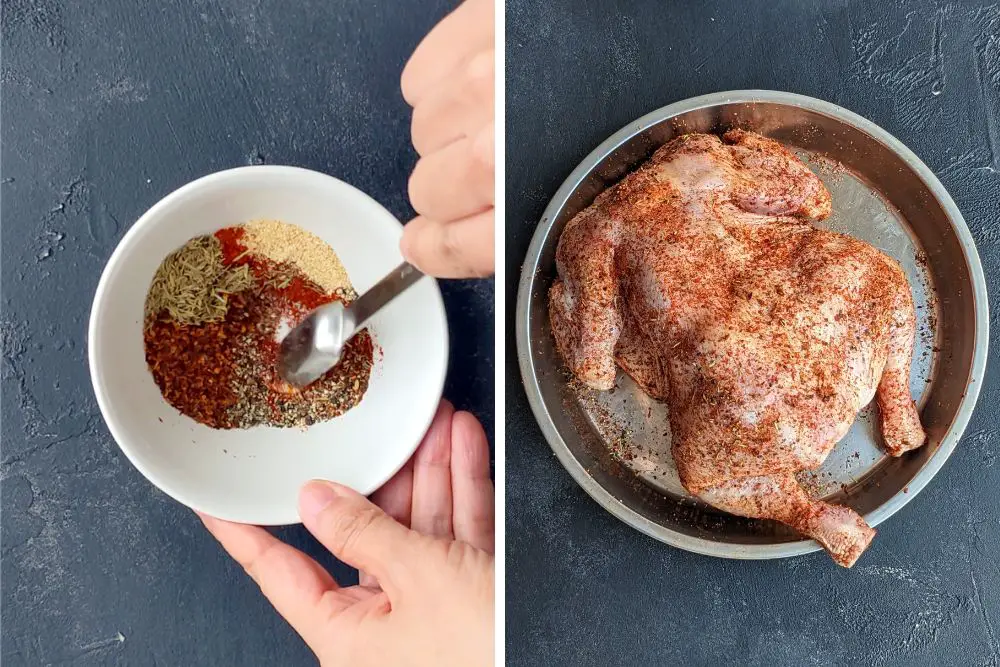
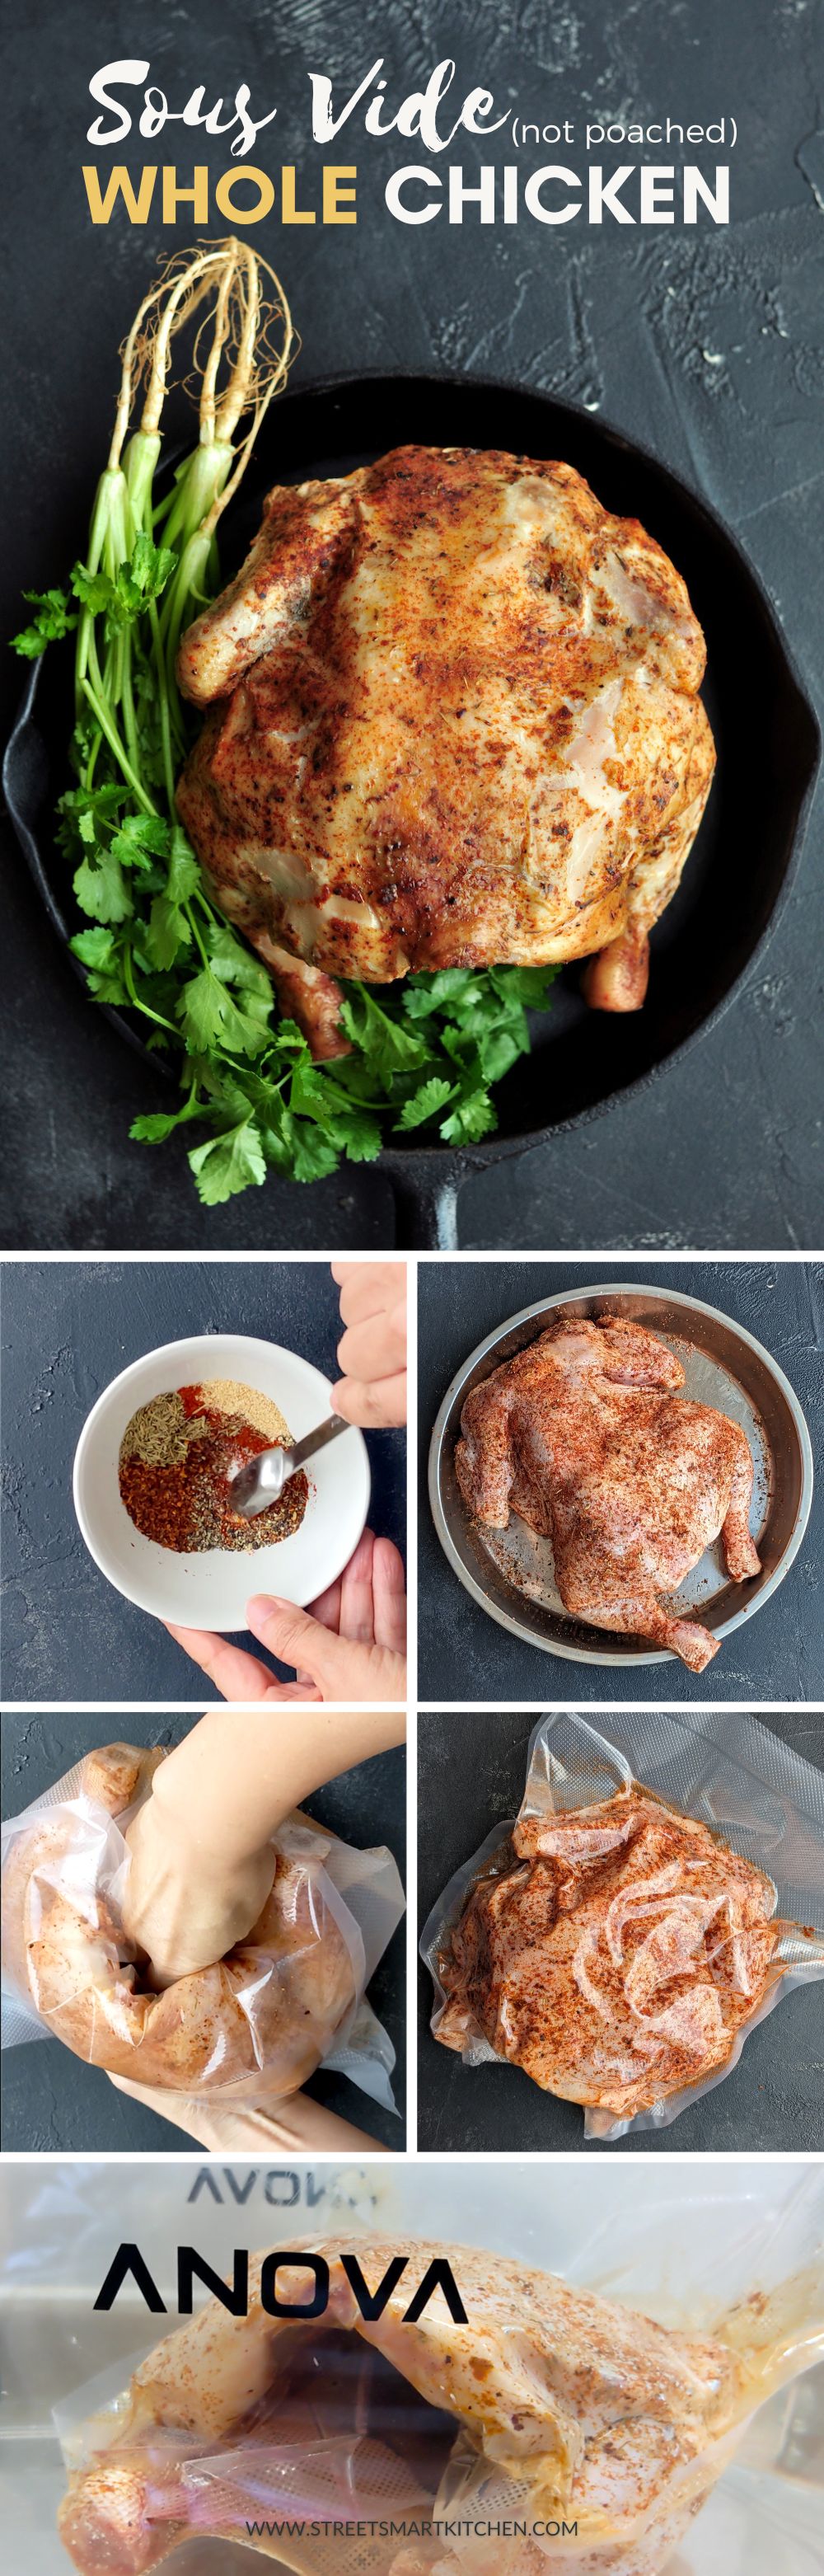
Step 2: Make the dry rub for your bird.
Step 3: Coat your chicken with the dry rub.
Step 4: Custom-cut a large sous vide bag from a vacuum-sealer roll. You’ll want the bag to be long enough as part of it will be molded into the cavity.
Step 5: Place the chicken, cavity side first, into the bag. Fold the top of the bag and hold it with one hand. Use the other hand (fist) to push the bottom of the bag into the chicken cavity. Release the top and vacuum seal the bag.
Step 6: Lower the bag into the prepared water bath. You should see bubbles popping out from the cavity right away as the chicken sinks to the bottom of the sous vide container. Set the timer for 6 hours.
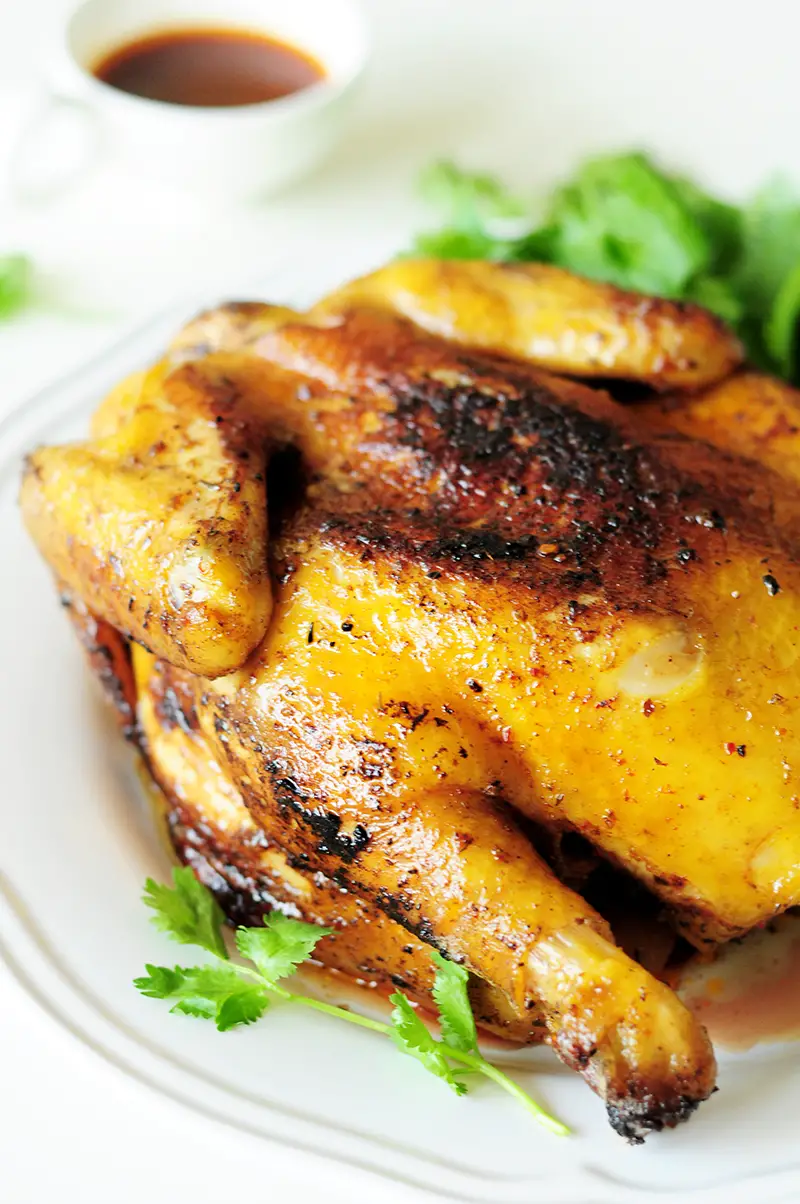
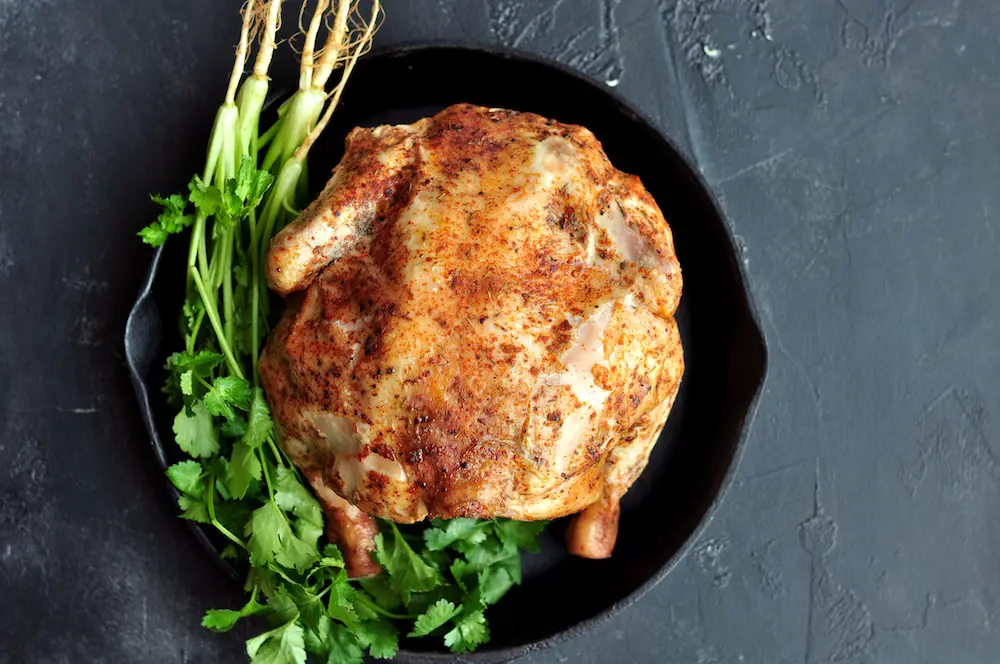
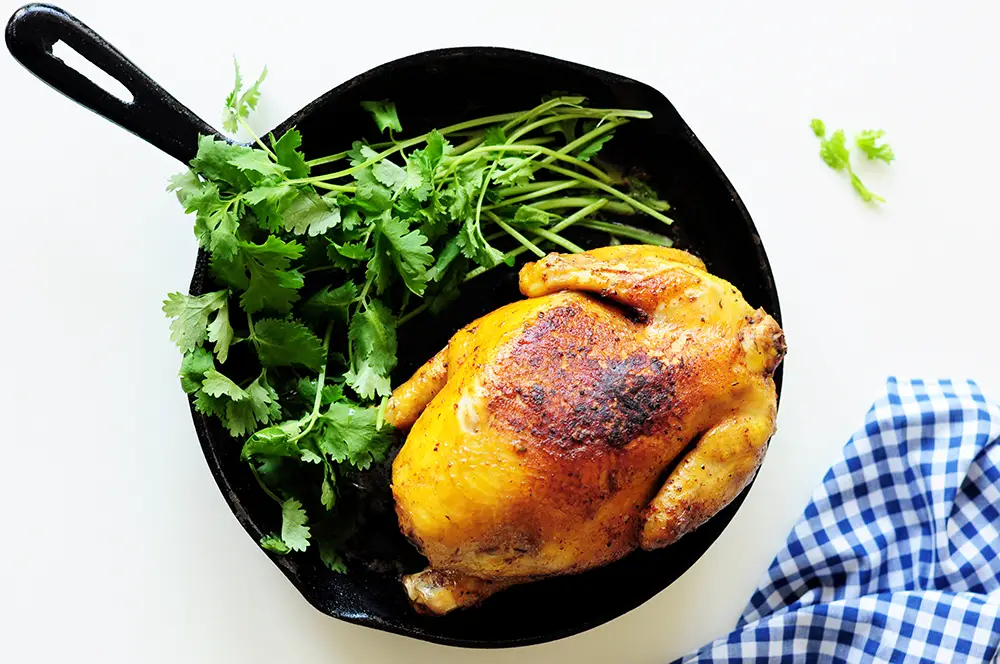
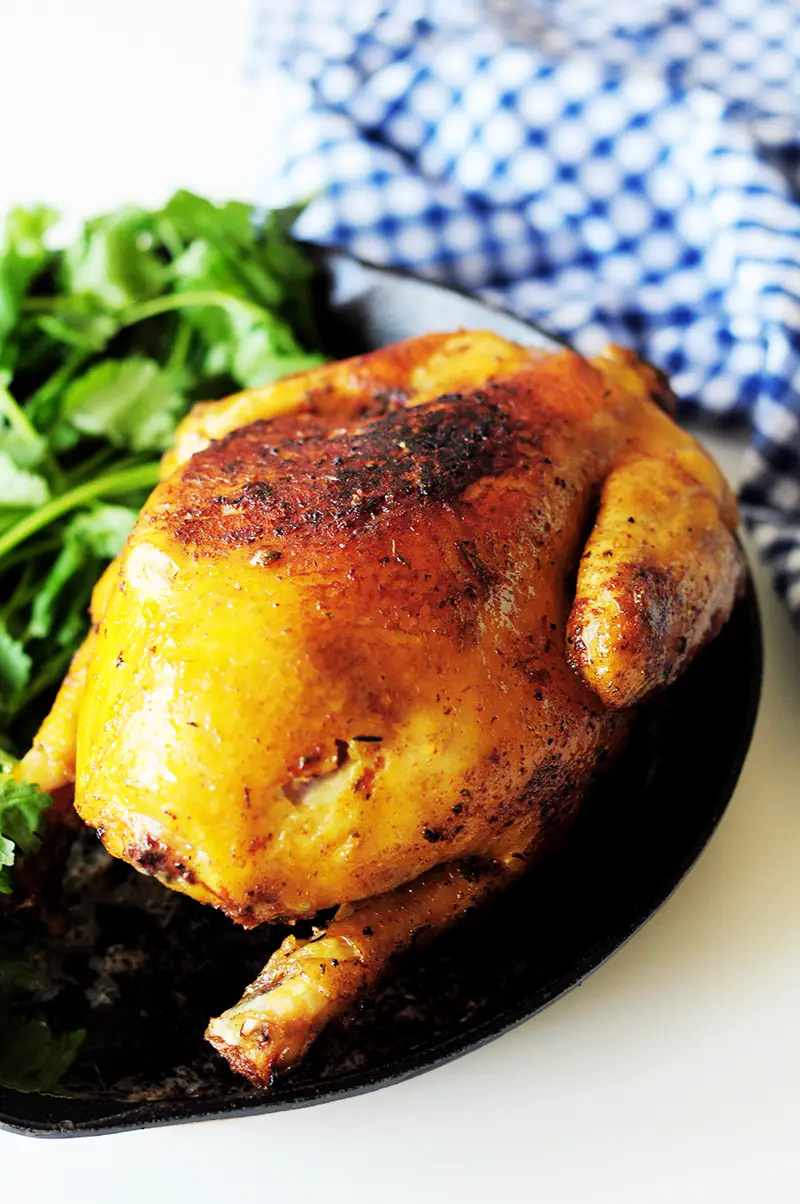
Step 7: Once the chicken is done, transfer it onto a plate and gently pat it dry with paper towels. Sear it on the stove, in the oven, or using a torch.
Sous Vide Whole Chicken Step-by-Step Instructions – Method #2 Stuffing
Follow step 1 to step 3 from method #1.
Step 4: Stuff the cavity with onions and lemons.
Step 5: Pop the chicken into a large sous vide bag and vacuum seal it.
Step 6: Lower the bag into the prepared water bath and set the timer for 6 hours.
Step 7: Once the chicken is done, transfer it onto a plate and pat dry gently. Sear it on the stove or using a torch.
Hooray! You did it!
The Meat around the Leg Bones of My Cooked Chicken Is Still Pink-ish. Is It Safe to Eat?
It’s understandable when we see cooked chicken meat that’s not white but pinkish, we automatically think it’s unsafe. It’s because we’ve spent most of our lives eating overcooked chicken, so when it’s cooked properly, it seems underdone.
If cooked chicken doesn’t have the appearance that we expect—all white inside and out—that doesn’t mean it’s unsafe to consume. Once again, provided it has been pasteurized fully, it is perfectly safe to eat.
StreetSmart Sous Vide Tips
- Cooking bags: For safety reasons mentioned in the article, Ziploc bags or silicone sous vide bags are not recommended for sous vide whole chicken. Also, your chicken most likely won’t fit in those bags. So, vacuum seal bags are the way to go. To learn more about how to choose the right bags for sous vide different foods, read Sous Vide Bags 101, where we dive deeply into the topic. You can also watch the video here.
- Brine the chicken: You can prepare the chicken with seasonings and/or stuffing if using, vacuum seal it, and leave it in the fridge overnight before cooking sous vide. This not only allows the chicken to marinate but also gives you more flexibility in your schedule.
- Make-ahead magic: You can also sous vide a whole chicken ahead of time. Post sous vide, make sure to place it in an ice-water bath to chill rapidly before refrigerating. A vacuum-sealed cooked whole chicken can be stored in the fridge for up to 7 days. Once you are ready, drop the chicken in a 131°F (55°C) water bath for 30 minutes or so to melt the gel from the cooking juice. It’s easier to pat the chicken dry for finishing this way. Then broil it to crisp up that skin.
- Preserve the cooking juice: A whole chicken makes a lot of juice after sous vide cooking. Don’t pour it down the drain. Instead, bring it to a boil and strain it. You’ll end up with super flavorful and nutrient-rich chicken broth to use in other recipes.
- Don’t throw away the bones: We really work that bird to the bones. Once you finish the best whole chicken you’ve ever had, make a flavorful chicken bone broth with the bones, onions, ginger, black peppercorns, and bay leaves.
What If I Don’t Have a Sous Vide?
Don’t have a sous vide machine or not ready to invest in one yet? Don’t worry. This dry rub I used for this sous vide whole chicken recipe is the same recipe as my Crockpot Whole Chicken. So you can follow step 1 to step 3 and use different cooking methods to cook the chicken.
- Slow cooker method: Cook the chicken on low for 6-8 hours. Feel free to add whatever vegetables into your slow cooker.
- Oven method: Roast the chicken at 350°F (177°C) for 1.5-2 hours or until the internal temperature reaches 165°F.
- Grill method: Grilled the chicken at 350°F-400°F (177°C – 204°C) for 80 minutes (rotate once halfway through) or until the internal temperature reaches 165°F.
Note: For the oven and grill method, you’ll want to melt some butter and brush all over the chicken before cooking. This step will result in golden brown and crispy skin.
Round out Your Chicken Dinner
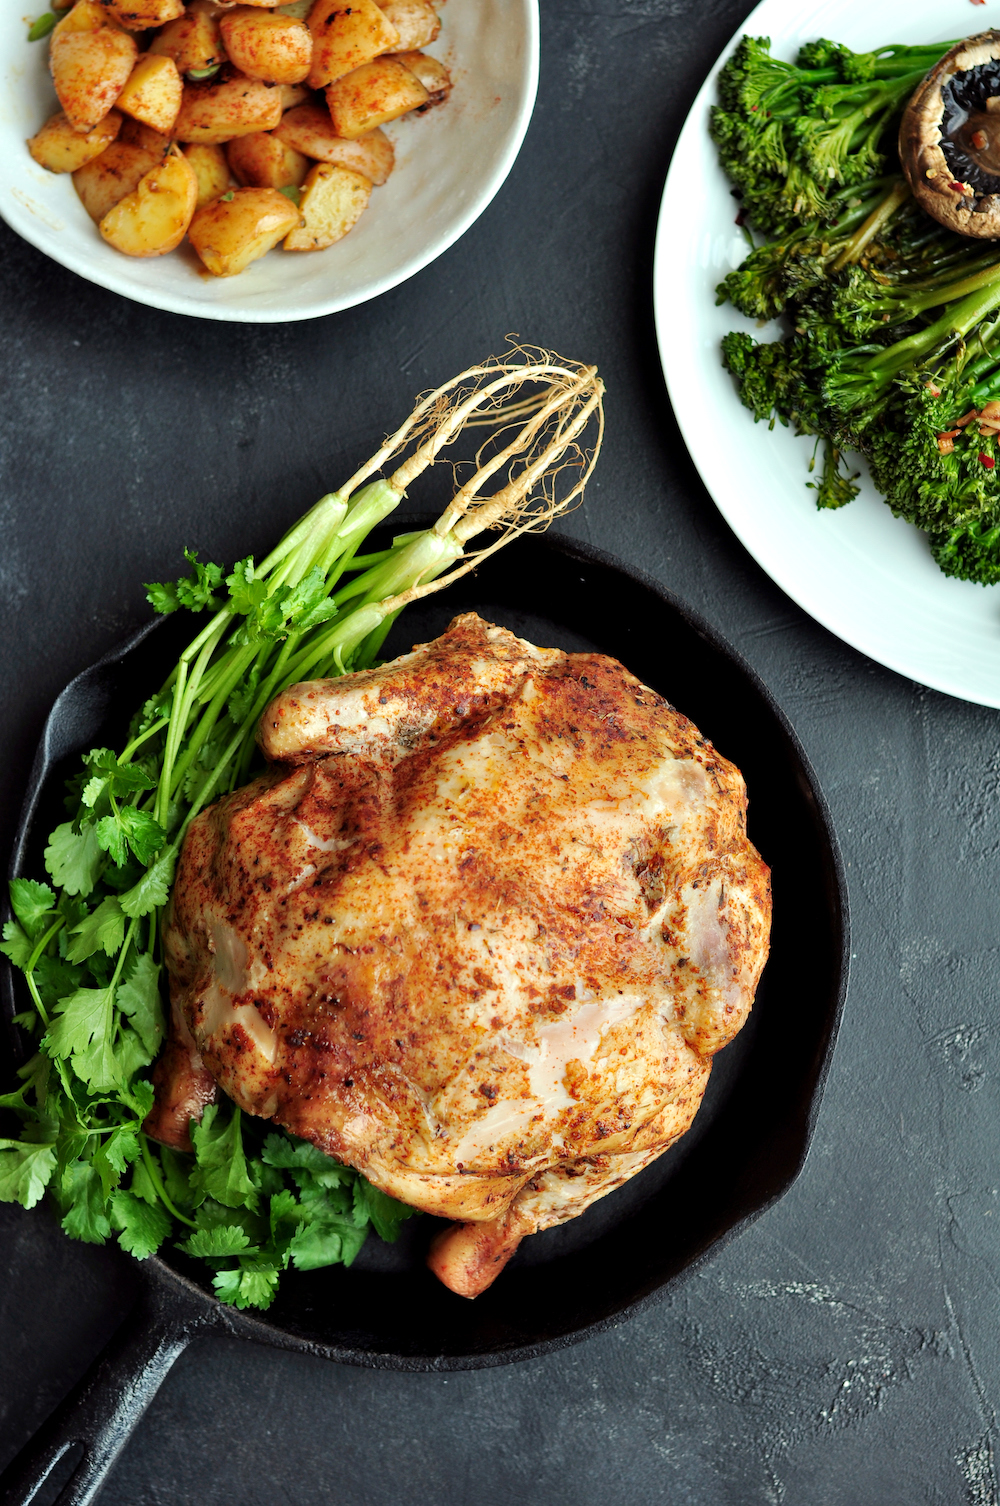
You can turn your chicken dinner into a feast by serving it with garlic paprika sous vide potatoes and pan-steamed broccolini with portobello mushrooms.
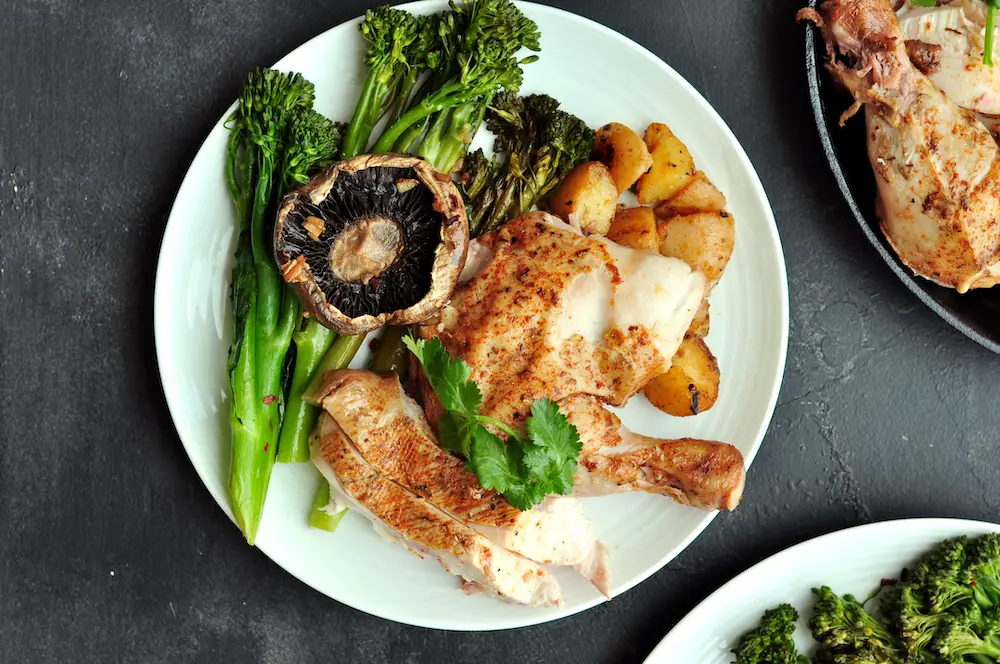
This recipe is perfect if you love serving up a hassle-free, wholesome dinner on the weekends. Plus, if you’re cooking for only two or three people, this whole chicken will yield enough leftovers to make a hearty chicken salad or a batch of chicken soup the next day.
Looking for more delicious sous vide chicken recipes? You might also like the following dishes.
- Sous Vide Chicken Breast and Asparagus
- Moroccan-Style Sous Vide Chicken Thighs (Chicken Tagine)
- Chinese Sticky and Cripsy Sous Vide Drumsticks
- Best Ever Sous Vide Chicken Wings
Sous Vide Whole Chicken (Not Poached)
- Prep Time: 10 minutes
- Cook Time: 6 hours 5 minutes
- Total Time: 6 hours 15 minutes
- Yield: 4–6 servings 1x
- Category: Poultry, Gluten Free
- Method: Sous Vide
- Cuisine: American
- Diet: Gluten Free
Description
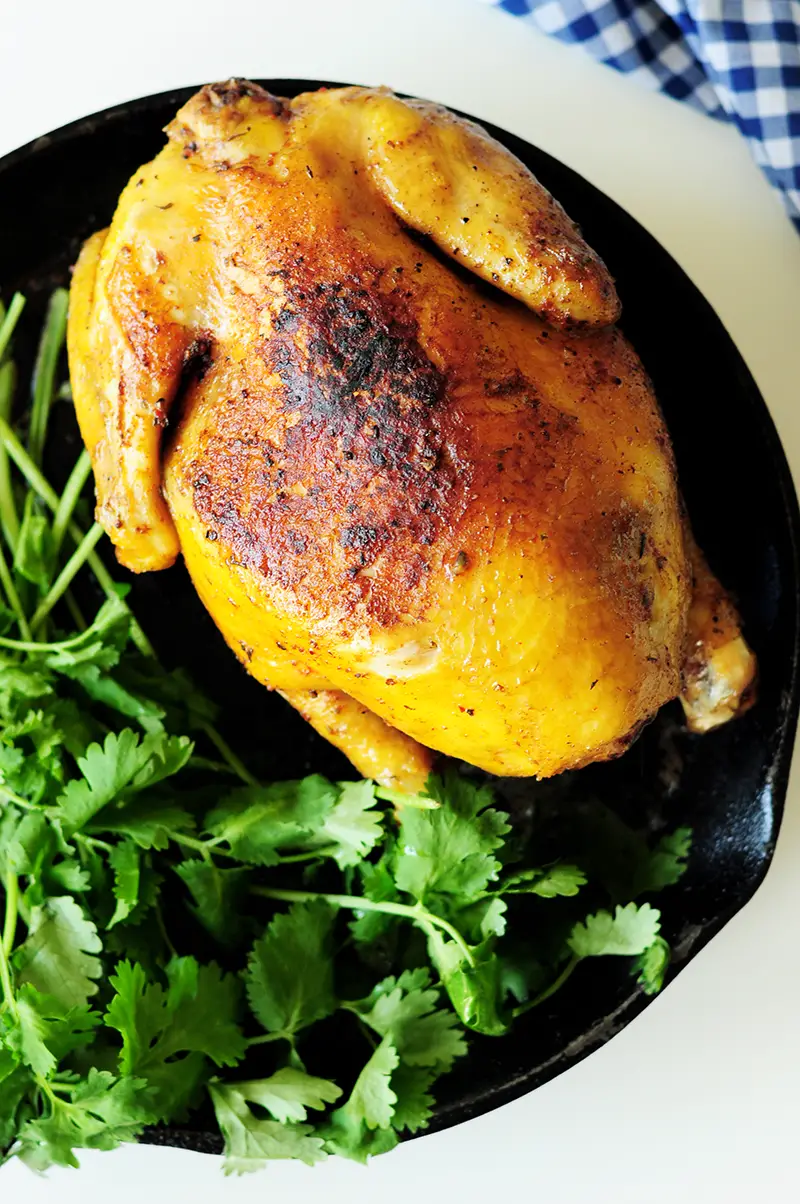
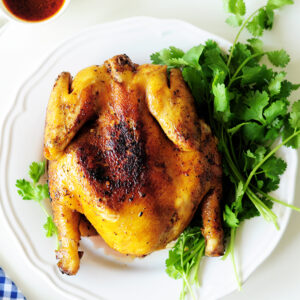
This sous vide whole chicken recipe will be the juiciest, tenderest, and most flavorful chicken you’ll ever make.
Ingredients
- 1 whole chicken (4-5 pounds)
- Fresh cilantro for serving (optional)
For the dry rub:
- 2 teaspoons Kosher salt
- 2 teaspoons paprika
- 1 teaspoon cayenne pepper
- 1 teaspoon dried thyme
- 2 teaspoons ground black pepper
- 1/2 teaspoon garlic powder
For applying method #2 – stuffing
- 1 large onion, roughly chopped
- a few lemons, cut into wedges
- Fresh thyme or rosemary (optional)
Instructions
- Set up the sous vide: Preheat water to 150°F (66°C) using a sous vide precision cooker (I use Anova sous vide).
- Prepare the chicken: Mix the dry rub ingredients. Rinse the chicken under cold water and pat it dry with paper towels. Rub the seasoning mix all over the chicken. Sprinkle the excess dry rub inside the chicken if there’s any left.
- Bag and vacuum seal the chicken using method #1 – mold the bag into the cavity: Custom-cut a large sous vide bag from a vacuum-sealer roll. You’ll want the bag to be long enough as part of it will be molded into the cavity. Seal one side and fold the top of the bag back over itself to form a hem. Place the chicken, cavity side first, into the bag. Fold the top of the bag and hold it with one hand. Use the other hand (fist) to push the bottom of the bag into the chicken cavity. Release the top and vacuum seal the bag.
- Bag and vacuum seal the chicken using method #2 – stuff the cavity: Prepare a large vacuum-seal bag or a reusable sous vide bag by folding the top of the bag back over itself to form a hem. Stuff the chicken cavity with onions, lemons, and your desired fresh herbs. Slide the chicken into the bag and vacuum seal it.
- Sous vide the whole chicken: Lower the bag into the prepared water bath, making sure the chicken is completely submerged under the water. If using method #1, you should see bubbles popping out from the cavity right away as the chicken sinks to the bottom of your cooking vessel. Set the timer for 6 hours.
- Finish the whole chicken: Once the chicken is done, immerse it in an ice-water bath for 5 minutes. Meanwhile, heat the broiler on high. Cut the bag open and transfer the chicken to a roasting pan. Gently pat with paper towels. Preserve the cooking liquid from the bag for gravy or flavorful chicken soup later. Brush some olive oil on the chicken skin and place under the broiler until the skin is crispy and golden brown, 5 to 7 minutes.
- Serve: Let the chicken rest for 10 minutes. When it’s cool enough to handle, discard the onions and lemons if you stuffed it, carve, and garnish with cilantro. Serve with vegetables and potatoes.
Nutrition
- Serving Size: 1
- Calories: 145
- Sugar: 0.5g
- Sodium: 232mg
- Fat: 11.6g
- Saturated Fat: 4.6g
- Carbohydrates: 1.6g
- Fiber: 0.6g
- Protein: 9g
- Cholesterol: 46mg
Note: This recipe post was originally published on October 20, 2018, and I have received many questions, comments, and criticisms regarding whether it’s safe to sous vide whole chicken without poaching it in the cooking bag. I feel it’s necessary to address these concerns regarding food safety. Therefore, I’ve updated this post with more information and different ways to safely sous vide a whole chicken.
About the Author

Sharon Chen is an Integrative Nutrition Health Coach and author of the Complete Sous Vide Cookbook. She believes food not only brings healing but also connection. As the creator of StreetSmart Kitchen, she aims to make meal prep easier than ever and help you find balance, ease, joy, and simplicity in the kitchen as you improve your well-being.
My chicken was not fully cooked. It was bloody and raw. Temp was 165 after 10 minute rest. We ate the breast which was very juicy and tender. I put the chicken in the roaster to finish cooking in the oven. It was a three pound chicken and I let it go past the six hours because I had something else in the oven.
Hi Amy, thank you for your comment. May I ask if your chicken was fully submerged under the water the entire time? I’ve made sous vide whole chicken countless times and it always comes out expected.
I made this whole chicken for dinner last night and it was fantastic! My new favorite way to make chicken!
It’s my favorite way to make chicken too! 🙂
Never thought to do a whole chicken in the sous vide. Turned out so great!
Awesome to hear. Thanks Shelby!
This made the juiciest and most flavorful chicken I’ve ever made! The chicken was perfectly cooked throughout, without any dryness. I will be making this again!
So great to hear. Thank you for making it, Vicky!
This looks amazing and such a treat! Thank you!
Thank you for stopping by.
This looks so good! I’m definitely a fan of crispy skin on juicy chicken!
Great. Thanks Casey!
Hi, will a regular traditional bread based stuffing work as a heat conductor for the cavity and will the stuffing turn out as well as it does when cooking a stuffed bird in the oven?
Also, just a thought. If you don’t want to stuff the cavity could you put a ziplocked bag of water into the cavity and just remove it at the end?
Hi Marco! Thanks for stopping by. I have seen folks use traditional stuffing for sous vide whole turkey, and it seems to work out for them. So I’d assume it will work for whole chicken as well.
Good question. If you don’t stuff the cavity, you can put the chicken, cavity first into a bag and then use your fist to push the bottom of the bag into the bird’s cavity so the water in the bath can circulate around inside of it. Be sure the water fills the cavity up when you place the chicken into your sous vide water bath. See the comment below from GS. 🙂
This was so good! My boys loved it and the flavor is perfect!
There’s a simpler way than stuffing the cavity.
When you vacuum seal the bag add 7 or 8 extra inches to bag. Use your fist to punch the sealed end of the bag into the cavity. keep your hand in there till it seals.
Then just make sure to put it in legs up so the cavity fills with water.
The bag stays sealed to the cavity and the temp of the water is the same as outside the chicken, I checked with an accurate thermometer. No need to stuff or spatchcock.
I’ve done it to 25lb turkeys without spatchcocking. (Had to make a custom bag tho).
This is one of the most genius ideas that I have ever heard. Thank you so much for sharing! I am going to try this and let you know how it goes! Thanks again!
We used potato chunks & onions instead of lemon. Afterwards we used an immersion blender to “blend” the potato down to make a gravy with the juices. The potato works as a thickener to keep it gluten free.
Hi Alison, that’s a brilliant idea you got there using potatoes as stuffing, then blending it down. Were the potatoes tender enough? I have never tried to sous vide potatoes at such a low temperature but it sounds like I need to give it a try. Thanks so much for sharing your experiences!
This turned out perfectly, and the stuffing with onions and lemons, which I often do, had an interesting twist that I wanted to share. I coarsely chopped the onions, and was able to separate them from the lemons after. They were still crunchy – so I strained them from the juice, leaving them coated with a bit of the fats, sauteed them, and then added the juices. When reduced, it was a perfect topping!
Thanks!
Awesome! Thanks for sharing your twist on the stuffing, Geoffrey. It’s lovely! So happy to hear that you enjoyed this recipe. Cheers!
Pingback: 30+ Easy Sunday Dinner Ideas For Reunion 2022
I followed the sous vide recipe regarding onion and lemon wedges in the cavity, varied the herbs a little. It was superb, possibly the best chicken we have had. The breast was a touch less tender than the drumsticks – maybe need a slightly lower temperature for longer? Othwerwise just brilliant.
Hey Paul, thanks for the feedback. Very happy to hear that it turned out well for you. While sous vide whole chicken is fabulous, the minor downside of it is that you won’t get the PERFECT texture for each parts because chicken has red meat and white meat. If you were to cook the parts separately, the legs require a high temperature than the breasts. I usually cook my chicken breast at 140F for two hours. But I wouldn’t drop the temp to 140F for a whole chicken. Hope that helps.
Pretty interesting chicken recipe hehe!
I haven’t eaten the results yet as it’s on the counter doing it’s thing in my Anova. I have the set from Costco that has the huge tub with it. We have a large family, so 2 chickens is a must. I saw the comment about doing a whole turkey, so figured I could try 2 chickens as long as they fit. These are chickens that we grew right here on our homestead. they are about 5 lbs each. I had to cut the wings off so they would fit in the largest Food Sealer vacuum bag, but the did fit in the bucket. I vacuum sealed them both individually with lemon and onion in the cavity. I preheated to 150 degrees while I prepped the chickens. My water wasn’t to a full 150, and of course dropped some when I put the cold chickens in. So my question is should I increase the time some to account for not being at the full temp for the full 6 hours? I’m excited to see what the results are. I plan to use a torch for the searing with some garlic butter and rosemary.
Hi Debbie, thanks for your comment. You could consider raising the temp a little bit so you have some wiggle room and of course, cooking the chickens for longer than 6 hours won’t hurt. You also want to make sure that there’s still enough room left in your container to let the water circulate after fitting two chickens in. That will help with reaching the set temp. Hope that helps and please let me know how your chickens turn out. Excited for you too!
Little did I know we can make sous vide for a big chicken! Imagine we make it with a Turkey, possible? Anyway, this recipe looks so dope! Highly appreciate!
Yes, whole turkey is totally possible too as long as you have a big enough tank to hold the turkey.
Thanks for stopping by, Nancy!
I recommend spatchcocking the turkey to get a more even thickness.
Pingback: Easy and Elegant Recipes to Make Incredible Meals
Is it possible to stuff the “thorax” with onions and cut up potatoes?
thanks,
Yes, absolutely.
Great explanation of the sous vide method. Just one little quibble: Do you actually know what a „thorax“ is? Just asking, because you use the term incorrectly so many times.
Or is it just a euphemism to avoid thinking about the fact that you are stuffing onions up a chicken‘s a..?
First try today. Too rainy to grill, so tried this. Chicken was a bit tough in spots and the skin was rubbery despite extra time under the broiler. Not sure if that is normal. Tasted very good though. Juiciest breast pieces ever, but probably won’t be my go to method.
I love trying new things in my sous vide, so we gave this a try. I found I didn’t care for this way to cook the chicken. The long sous vide makes the lemons and onions quite potent and the chicken had a pretty strong flavor of lemon peel. While I got some nice color on the skin with broiling at the end, most of the skin was kind of soft and squishy. Meat was tender, but not a lot of the seasoning and salt seemed to get into the meat. Overall, I would say that brining and either roasting or smoking a chicken would be my preferred cooking method. Brining gets much more flavor into the meat and retains a lot of juices (I was surprised this didn’t happen with the sous vide), and roasting gets a better crispier skin. We actually had to salt the meat after cooking. Worth a try, but we probably won’t cook chicken this way again.
Overrated. If you are skilled at roasting a chicken conventionally, there’s nothing to be gained by this time-consuming method, and several difficulties to overcome. Per definition, the chicken will come out of the sous-vide step waterlogged. It is not a trivial thing to get the bird from there to crispy skin without altering the internal temp. I used a 500-deg oven for 5 min followed by blowtorch. Still couldn’t get the skin crispy, but the residual rub burned. The fat under the skin also doesn’t render completely during the sous vide phase, so you’re left with a rubbery layer under the skin, unless you either blowtorch longer (burning the outer layer of skin,) or leave in a scorching oven longer, thereby drying out the breasts, which is what you were trying to avoid in the first place. Finally this temp/time doesn’t get the dark meat cooked enough to melt all the connective tissue, so you get rubbery dark meat, even though it’s moist.
Why wouldn’t you just refrigerate your chicken before putting it in your oven. The fridge will not only dry the skin out slightly but you will lower the exterior/interior temp enough to get a good crispy skin without overcooking or drying out.
My whole family really loved it! Such a huge hit!
Yay! I am so happy to hear that. Thanks for trying out the recipe. 🙂
I can’t believe how easy this is! I always think of sous vide cooking as fancy and complicated…not with this recipe. Thanks for sharing!
AMAZING! We just tried this recipe and it is so incredibly juicy, tender and flavorful! Love using our sous vide!! Thank you!
This sounds like a really succulent way to cook chicken, with very little effort. Perfect for entertaining.
what an amazing informative post! I never knew you could sous vide a whole chicken. I cannot wait to try this amazing recipe!
I tried this and my chicken was not thoroughly cooked. Juices were running dark pink, and legs were firmly attached. We cut into it and it did not look safe. At that point, dinner was ruined, I did not know how to finish cooking the chicken without it drying out. Took another hour in 375 oven to reach 165.
Thank you for trying this recipe. I am sorry to hear that it didn’t work out for you. I have since updated this recipe article with my personal experiences along with a lot more info regarding sous vide chicken safety. I hope you find it helpful.
Ah! I found the manual suction devices and valved bags – lots of different ones on Amazon. But such mixed reviews. What has your experience been?
Hey John! Good to hear that you found it. This is the type that I use. https://amzn.to/2CTqijr
I love those because they are easy and convenient. Also, the manual pump takes up no space at all. The set is great for cooking 2-4 servings at a time. But if you want to do a large batch of cooking, manually pumping out the air from each bag could be a little tedious and tiring. That’s the only disadvantage I have experienced. Hope that’s helpful. Cheers!
Where did you acquire that clever Dr Sous manual suction device and bags? My web searches turn up nothing like that.
I have a 2.85 lb de-boned chicken stuffed with shrimp dressing. Would the same times/temp apply for the other boneless preparatrions?
Hello Om, since your chicken is deboned, you might not need 6 hours of cooking time. The temperature (149F or 150F) can be the same for cooking light meat and dark meat of a chicken. I’d shoot for 4-5 hours and check doneness. If you haven’t yet, make sure you download my sous vide time and temp cooking guide for more information. Cheers!
Would these times still work for a 5lb whole chicken? Thanks!
It should work for a 5lb whole chicken, but I would recommend you check at 6 hours and add more time if needed.
Hi Sharon!
If I use a larger chicken (+3.5kg) which I generally buy from a local farm, how much does this affect the cooking time using sous vide?
I’m looking to cook for all the family and especially when having guests, I really don’t want it undercooked.
Really looking forward to trying your recipe, it looks amazing!
Hey Evdokios! Thanks for reaching out. For larger chicken, I would highly recommend that you butterfly it first, meaning cut it in half in the middle and use two bags to cook the halves. The temp and the cooking time will still be the same. But if you want to cook it as a whole, go for at least 8 hours or even longer. Check and if it’s still not done, add more cooking time. Remember that you can’t really overcook food using sous vide, so might as well cook for longer especially it’s chicken.
Another option is to sous vide first and finish it off in the oven or grill. That should work too! Hope that’s helpful.
What if I take a whole chicken and cut it into its pieces then Sous Vide, how does that change the cooking time and or temperature and why? I love to understand the science behind the answer.
Hey Dave, if you cut chicken into pieces and sous vide, you don’t need 6 hours of cooking time. Generally, the larger the meat (especially with bones), the longer cooking time you need. For white meat like chicken breasts, 140F for 1.5-2 hours should be enough. For dark meat like thighs and other parts of the chicken with bones, 149F for 2 hours is what I would do. Hope that’s helpful.
Dave: there is another key reason why cutting up a chicken will cook much faster than a whole one when using sous vide. It has to do with the cavity: the chicken pieces are contacting the warm water on both side of the piece (through the bag, of course). But the meat of a whole bird is only touching warm water on one of it’s sides. While the air in the cavity does reach the cooking temperature (say, 150℉), it doesn’t carry as much heat as the water, and thus cooking the meat is slower.
(Yes, there is a difference between “temperature” and “heat”…. ask someone who’s familiar withthermodynamics.)
Hi there! How will the cooking time change for a 2.5 lb whole chicken?
Hi there! No, the cooking time is the same. 🙂
I deboned a chicken and added a harissa paste to the inside and outside and rolled it up like a ballotine. Then baked the deboned rolled chicken on/in a grill pan for 1 hour and 10 minutes at 400 degrees to get the meat up to temp. I am thinking of trying this method. Of course I want the crispy skin on the outside. Do you think the same technique and cooking times you used would work on a chicken ballotine?
Hi Michael, the sous vide temp and cooking time used in this recipe is for whole chicken with bones and everything. With deboned chicken, generally, the sous vide temp is between 146F to 149F and the cooking time is 2 hours. You may adjust the temperature and cooking time to change the texture of chicken though. Hope that helps.
Pingback: 18 Sous Vide Chicken Breast Recipes | My Daily Beauty Tips
Pingback: 24 Incredible Sous Vide Recipes for Five-Star Meals
Can I put the dry rub on the night before and cook it the next day?
Absolutely. Marinating the chicken overnight will make it taste even better!
Hi! Can I stixk it into a high temp oven after instead of searing it on a heavy pan? Thanks!
Oh absolutely. Use the broiler in your oven to get a crispy skin.
Hey , I am doing whole chicken sous vide for the first time now (in Japan). However rather than dry rub I added a bit of butter and olive oil. Will see how it turns out in another 5 hours.
Thanks
Duncan
Hey Duncan! How did the sous vide whole chicken turn out for you?
Isn’t their a problem with the meat near the cavity not fully cooking since there is no heat transfer since it’s full of air? Would stuffing it with onions and garlic better cook it?
Hi Ivan, I’ve cooked sous vide whole chicken multiple times and it’s fully cooked each time. If you are concerned about it, you can always use an instant-read thermometer. If it reads 165F, it means that the chicken is done. Also, if you vacuum seal the chicken well, there shouldn’t be any air inside the bag. You may cook the chicken for more than 6 hours. Leaving the meat in the water bath for up to 2 hours shouldn’t affect the texture too much. Hope that’s helpful.
Your instruction was to set the water temperature to 150 deg. How can the chicken reach 165 deg?
That’s for the oven method. As for sous vide, the chicken is well-pasteurized cooking at 150F for six hours. For more sous vide chicken and food safety information, please check out this guide on Serious Eats: https://www.seriouseats.com/2015/07/the-food-lab-complete-guide-to-sous-vide-chicken-breast.html#safe
Cheers!
This is wrong. As others have pointed out, the air in the cavity prevents the water temperature from reaching the inner meat. Air is not a good conductor of heat. That’s the whole principle of sous vide, which literally means, “under vacuum.” The reason you need to remove air from the bags is so that the meat is as near the water as possible for heat transference (flotation is less important reason since it could be prevented with clips and a rack). With so much air in the cavity, there is no effective conduction of heat. In other words, the inner meat is not cooking sous vide (under vacuum). Indeed, when I measured my chicken, the inner cavity only registered around 130F. That’s not hot enough to produce steam, which can carry heat through air.
Very dangerous. It’s precisely why the other sous vide recipes use broth to poach — liquids are a good conductor of heat.
The page you referenced refers to direct exposure to heat. In other words, the pathogen must be exposed to the temperatures and times on the axes. In this case, the inner meat never reaches safe temperatures so the graph is inapplicable.
In conclusion, this method is unsafe. I say this as someone with a physics and medical background whose current research is in Infectious Diseases. In other words, I deal daily with pathogens and affiliation p is part of my job.
If you really want to sous vide a whole chicken, butterfly it first. Then splay it flat before sealing it a bag. Or split the chicken lengthwise and use two separate bags. That way, there is no large air pocket to prevent heat conduction from water to meat.
I am guessing you have never done this. Chickens today are full of water and while I added no water/broth to mine, when it was done the bag was full of chicken broth so the cavity gets plenty of broth and plenty of heat transfer. I did cook mine longer and at 155.
“the inner cavity only registered around 130F” did you measure the air or by penetrating the meat?
Fascinating way to make a popular dish. I was going to ask how you browned it but, I read that at the end of your post. 🙂
Thanks, Elizabeth! The easiest way to brown it is probably by using a torch. But I did it in a cast iron skillet. 🙂
Your chicken recipe is making me super hungry while typing this comment, and that golden skin makes me want to dip it to lots of gravy and enjoy it. Ohh this is delicious!
Lol. Thank you, Blair! That’s good to hear. haha…
That chicken looks so juicy! I also am impressed with the low sodium content. I watch my salt intake so this is a perfect recipe.
There is nothing like a perfectly roasted chicken. Will have to try your method looks really good
Thank you, Candy! I hope you enjoy it. 🙂
I have yet to cook an entire chicken, but this looks like it is worth a try. It’s definitely a skill that I would love to learn and this looks so good!
I remember the first time I cooked a whole chicken. I used a slow cooker. It was scary, but after I did it, it’s honestly not that hard. You just have to try it. 🙂
My husband is the chef and so wants to get a Sous Vide; he watches too many cooking shows. But from your post it sure seems worth it
It’s worth every penny! I’m sure you will benefit the most from getting a sous vide for your husband. 😛
I’ve heard that using a sous vide makes food more succulent, but I haven’t tried it myself yet.
The dry rub ingredients sound delicious. This looks like a great family dinner. I look foward to giving it a go.
I LOVE Chicken and this dish looks amazing. Can’t wait to prepare it. Mouth-watering!
Fab recipe! And I appreciate you sharing the different cooking methods. I haven’t invested in a sous vide just yet but will be testing this recipe in my slow cooker in the meantime.
I never knew you could make a whole chicken with sous vide, this looks so moist and delicious!
I didn’t know either. Now I did it, there’s no going back. lol
Oh wow! I didn’t know you can sous vide a whole chicken! We’ve only been using it on chicken thighs. I imagine a sous vide chicken would be even better than a rotisserie chicken 🙂
The texture of the chicken is so much better than a rotisserie chicken. You’ll have to try it yourself. It’s game changing! 🙂