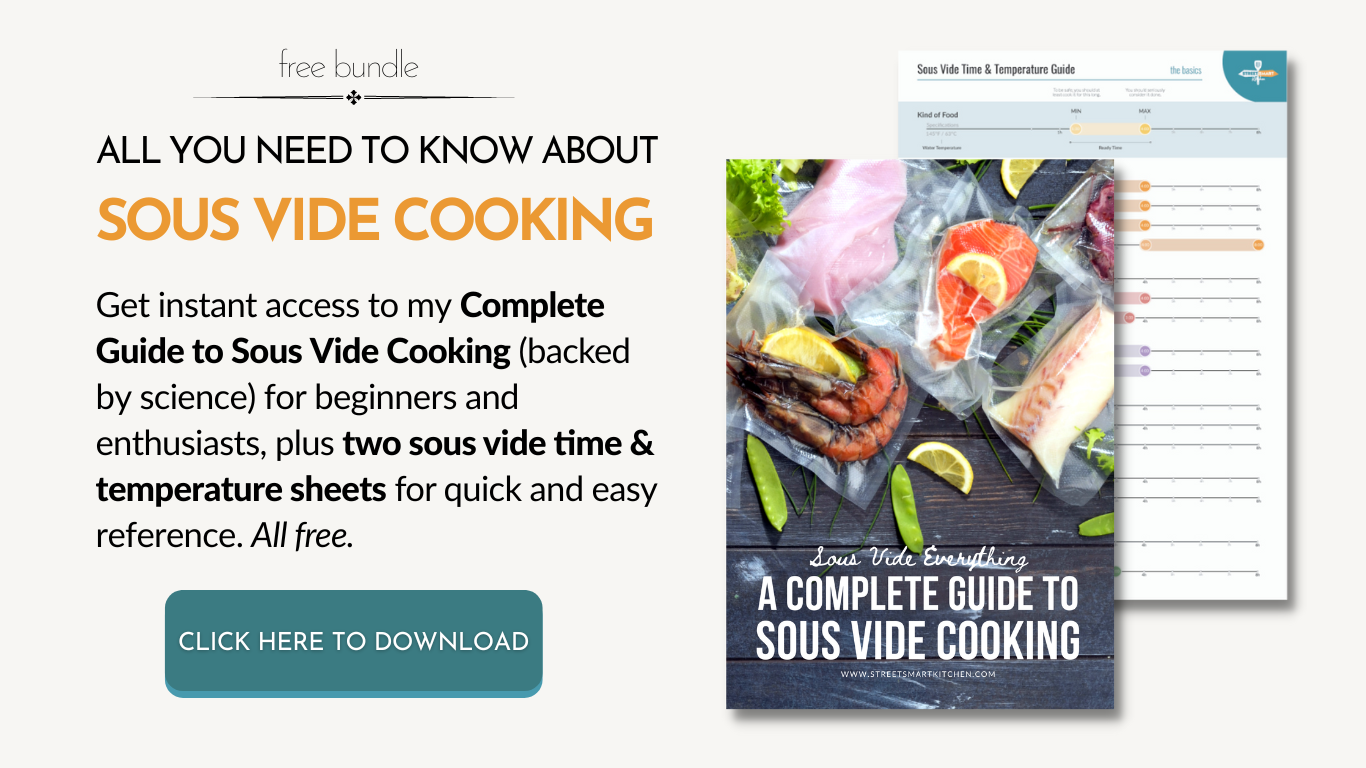
Sous vide everything with this complete guide to sous vide cooking (backed by science) for beginners and enthusiasts.
Disclaimer: Some of the links in this article are affiliate links, which means if you decide to purchase any recommended products through those links, I will receive a small commission at no extra cost to you. Thank you for your support in advance!
Introduction
Sous vide cooking has been getting a lot of press over the past couple of years. I don’t embrace every hot culinary trend that comes along, but I decided to investigate this one early on, less out of curiosity and more out of necessity. Maybe even a bit of desperation. In 2018, life took me from Austin, Texas to Hong Kong, where our one-bedroom apartment was less than 400 square feet with a minuscule open kitchen, no oven, and nominal counter space.
As I was contemplating our imminent starvation, I discovered sous vide cooking. All I needed was a big pot (which I already had) and a place to rest it. And so I started, and my passion blossomed as I have been placing whole chicken, steak, bacon, ribs, huge roasts, all sorts of vegetables, potatoes, eggs, cheesecake, and you-name-it into a water bath to cook. I have spent the past few years experimenting, sharing my growing knowledge, writing about my victories (and a few stumbles along the way), and most importantly, sustaining my family with sous vide.
You may be asking yourself, with all the cooking methods we already have, do we really need another? My answer is an enthusiastic yes! Sous vide is a marvel of consistency, bringing out the best texture, flavor, and nutrition your food has to offer, time after time. If you’re brand new to sous vide, we’ll cover the basics here, and if you’re already a hard-core fan, let’s expand your repertoire.
What Is Sous Vide?
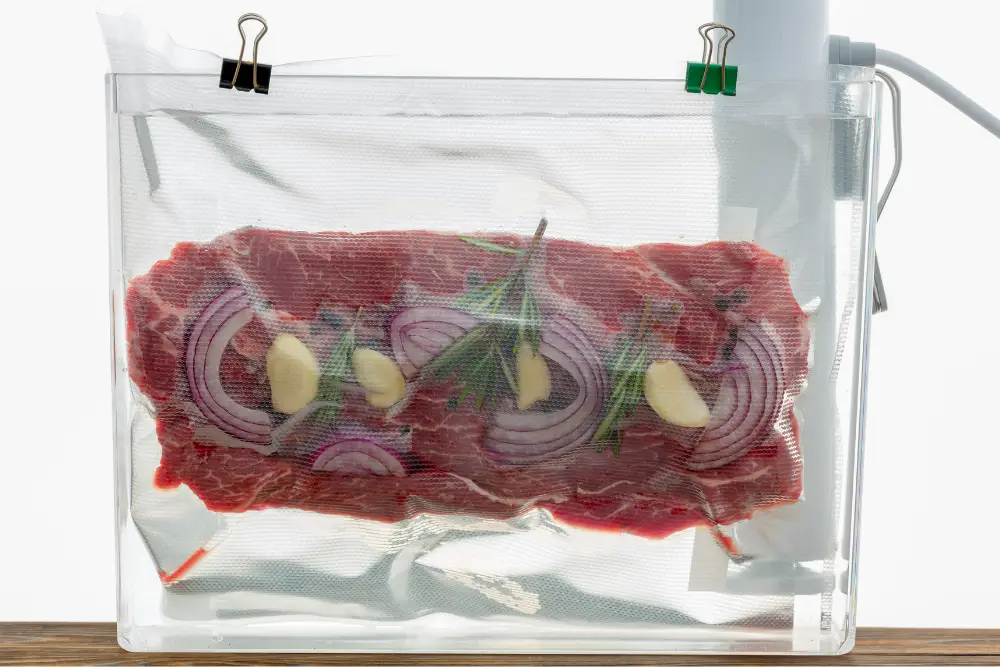
Let’s start with the name, which is pronounced: “sue veed.” It’s French, meaning “under vacuum.” With this method, you put your foods and seasonings into containers, typically plastic bags that are airtight—or as close to it as possible—or jars.
The sealed food pouch then goes into a water bath that stays at a precise and constant temperature thanks to a gadget called an immersion circulator. The cooking process is gradual and controlled, with the water circulating around the bag and heating the food evenly.
For you, there’s less hands-on time investment and no guesswork—you won’t be contemplating a steak that’s nicely seared on the outside and praying it’s not raw in the middle. Basically, allowing your food to bask in its own little countertop jacuzzi produces predictable and pretty darned blissful results.
Why Sous Vide Food Is Extraordinary
With sous vide, the food cooks slowly and evenly, inside and out, in its own juice. The moisture and nutrients aren’t lost in the cooking vessel as they are with traditional cooking methods. Better still, your foods will have the ideal consistency—juicy and tender meat, crisp vegetables, and seafood with sublime texture.
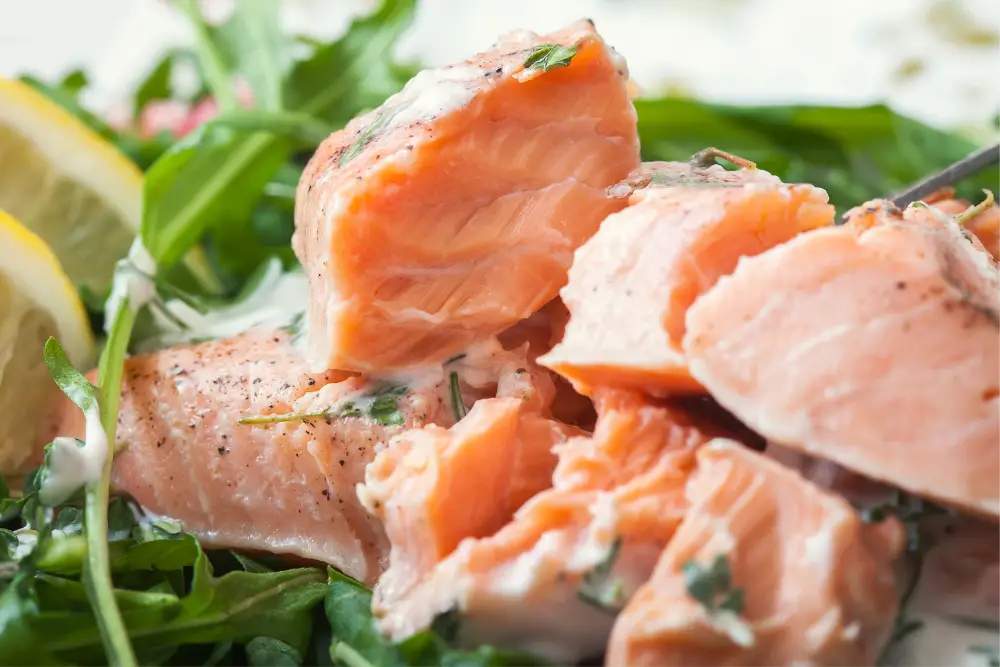
Let’s take fish, for example. When cooking seafood with traditional methods, the window of proper doneness is usually very small. When you pan-fry a fish fillet, the cooking temperature of the pan will be at least 390°F (199°C), much higher than the ideal temperature for fish (in the 120°F to 125°F range). The edges of pan-fried fish will inevitably be more cooked than the center.
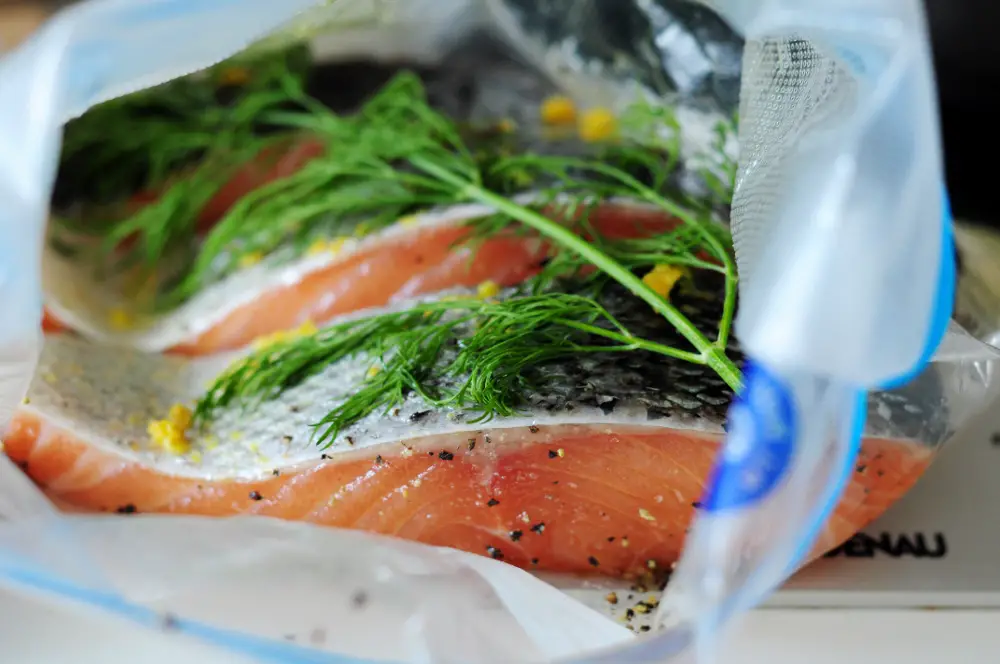
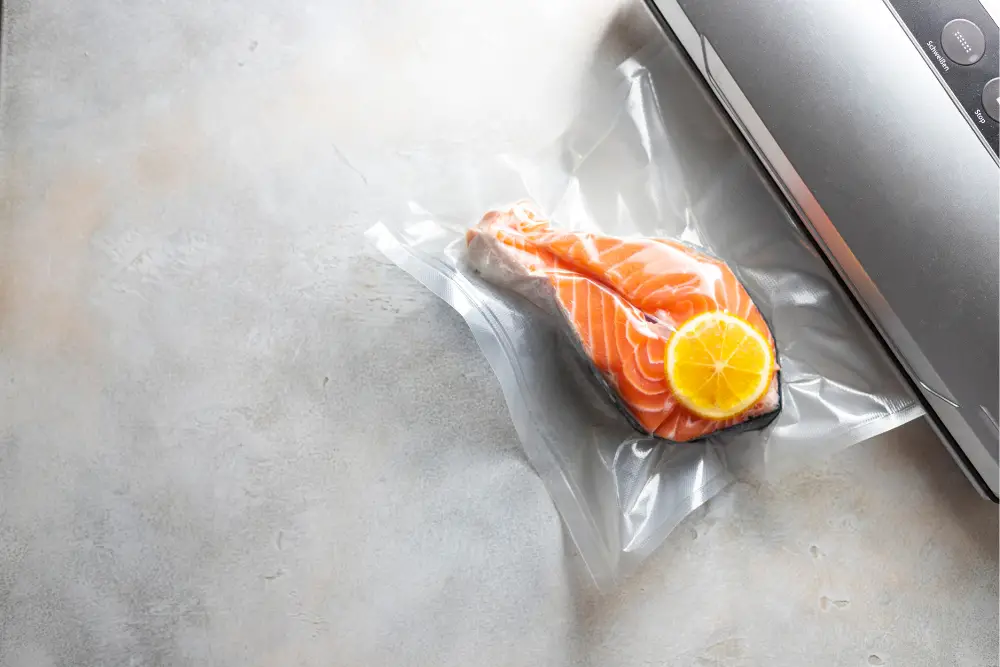
A piece of salmon cooked sous vide at 122°F (50°C), however, remains a translucent pink with a delicate, flaky texture from one side to the other.
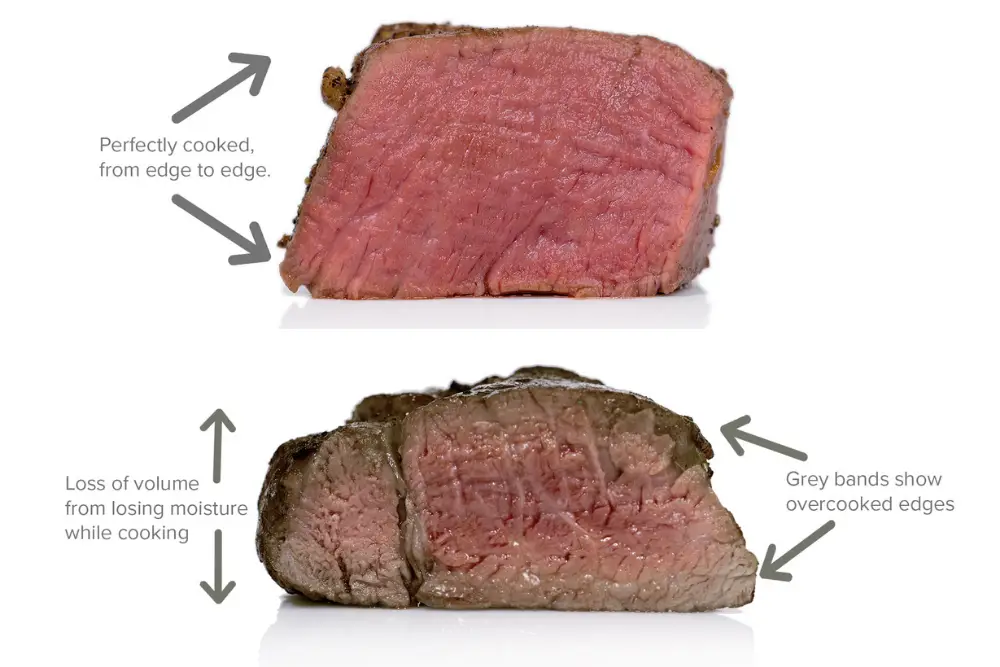
Sous vide shines brightest of all, perhaps, with meats. Immersing a gorgeous steak in a water bath may not seem intuitive, but here’s why it’s ideal: The suggested temperature for a medium-rare steak is between 129°F (54°C) and 140°F (60°C).
When you cook it in a skillet or on a grill, the outer surface cooks first. By the time the center reaches the right temperature, the edges are already overdone.
Your steak will also lose a fair bit of moisture while cooking in any traditional way. Contrast that with a steak cooked using the sous vide method at 129°F (54°C) for an extended period (the cooking time depends on the cut’s thickness), which will be perfectly cooked from one edge to the other due to the constant temperature control. The meat is in a vacuum bag during cooking, sealed up with all its moisture and juices. (Au jus, anyone?) Nothing is lost during the process.
So How Does This Work?
My first reactions to sous vide reviews were skeptical. They touted the ease and consistency with which even inexperienced home cooks could produce restaurant-quality food. The same phrases cropped up again and again: Set it and forget it. Foolproof. When I started nerding out on the details, though, I came to appreciate how this gadget functions and what it can accomplish—and the myriad ways I could use it. So let’s start with some nuts and bolts and see why the rave reviews are not just a lot of hype.
The essential piece of equipment is called an immersion circulator, AKA the sous vide machine. Immersion circulators could be found in laboratories in the late 1800s when scientists needed to keep water baths at specific, consistent temperatures to incubate samples. In the mid-20th century, the device had worked its way into some food prep applications, and it came onto the market for home kitchen use in the mid-2000s.
The immersion circulator you buy today heats the water bath and keeps it at a precise temperature for the time you set it. This specificity gives you much greater control than other cooking methods.
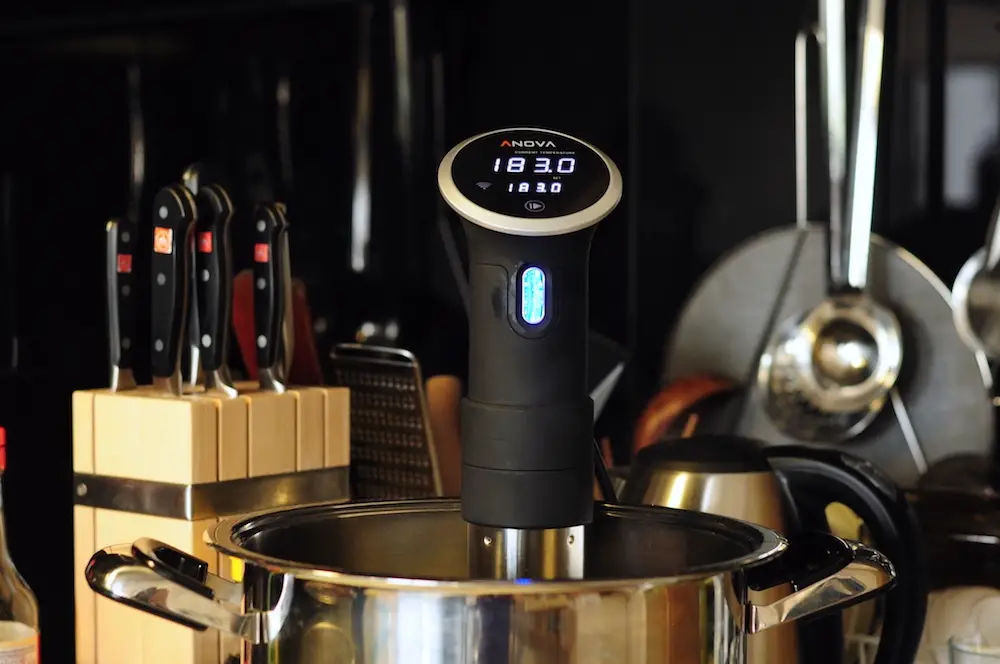
The immersion circulator typically consists of a pump, heating element, tube, thermometer, set of control circuits, and interface. It works like this:
- On the interface, you set the desired temperature for the hot-water bath, and the control circuitry fires up the heating element.
- The pump draws water into the mouth of the tube at the base of the circulator. The water emerges from the top of the tube (which needn’t be submerged).
- The thermometer monitors the water temperature and sends information to the control circuit, which switches the heating element on and off as needed to maintain the temperature. The water flows continuously through the tube, remaining at a precise temperature throughout the container for the duration of the cooking time.
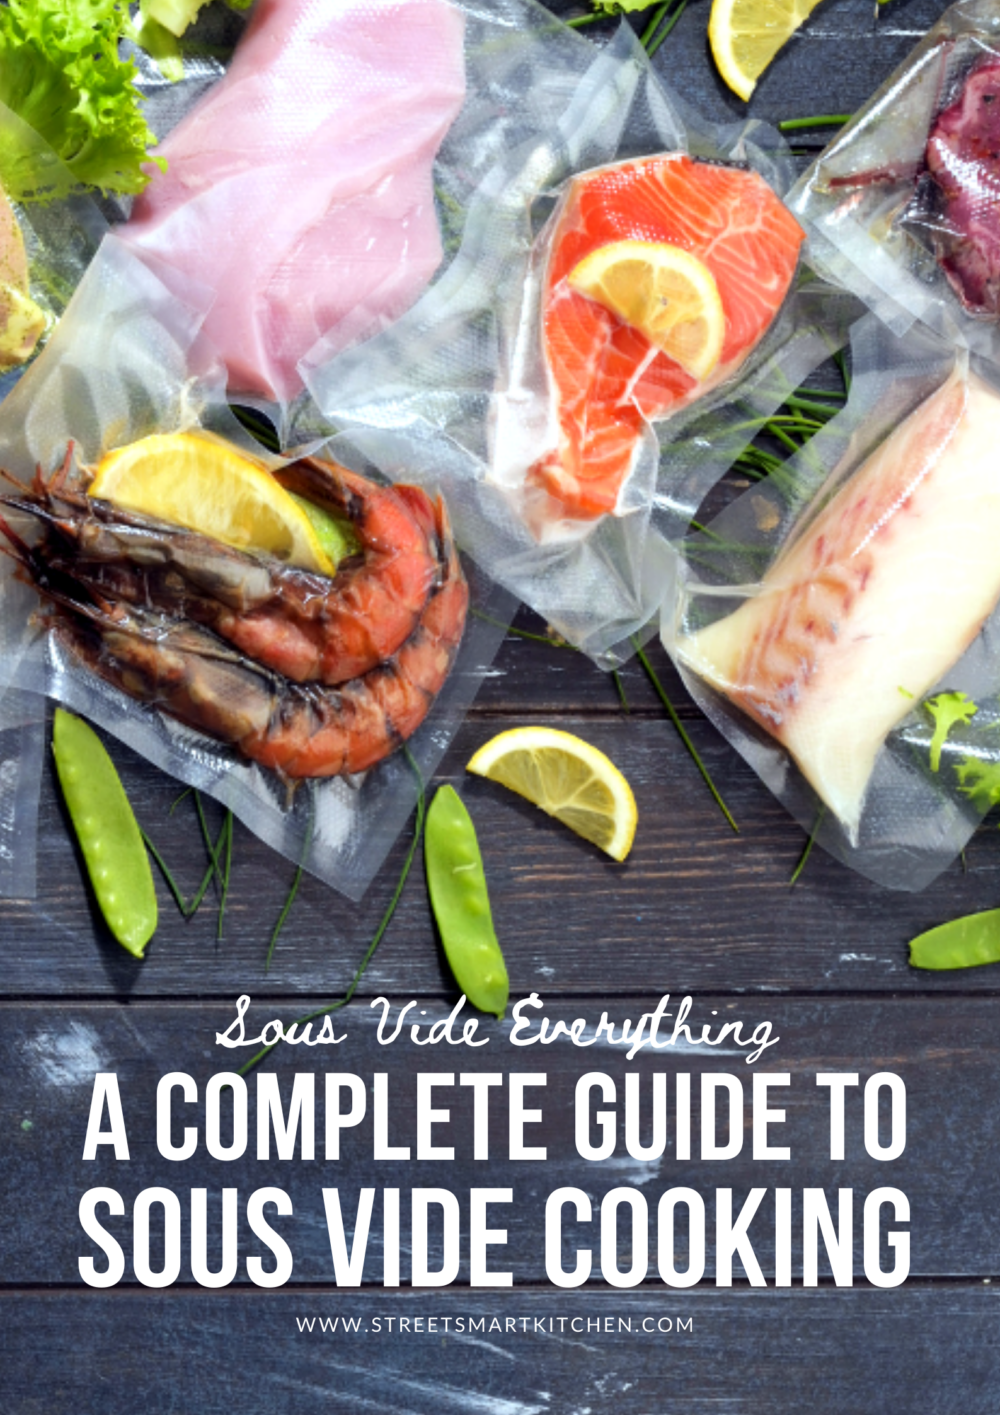
This guide is also available in PDF version. Tell me where to send it by clicking the button below.
Sous Vide Food Safety
Whenever we look at new cooking methods, we naturally wonder about any inherent risks. Is sous vide safe?
Yes, it is, but please keep a few best practices in mind. Here are a couple of things to know before you start cooking sous vide.
Steering Clear of the Temperature Danger Zone
Food scientists refer to the “danger zone” as a temperature range between 40°F (4.4°C) and 140°F (60°C). The longer your food sits in this range, the greater the potential for harmful bacteria to thrive. To stay safe, the lowest recommended temperature for cooking sous vide is 130°F (54.4°C). But wait—isn’t 130°F (54.4°C) still within the danger zone? That brings us to the other variable in the food safety equation: time.
The Importance of Time
With sous vide, we compensate for the lower temperature by increasing the cooking time. Clostridium perfringens, the most common food pathogen, do not multiply above 126°F (52.2°C). The most worrisome pathogens, however—Salmonella species, Listeria monocytogenes, and the pathogenic strains of Escherichia coli—take hours to kill at 126°F (52.2°C). Sous vide takes the all-important combination of time and temperature into account.
For example, the FDA recommends 165°F (74°C) as the minimum internal cooking temp for chicken. When you cook chicken sous vide between 140° (60°C) and 150°F (65.6°C), the internal temperature of the bird will never reach 165°F. How can that be safe? you might well ask. The answer is time.
As soon as the center of a chicken reaches 165°F (74°C), 100% of Salmonella is killed immediately. At 160°F (71°C), it takes 14 seconds to kill the bacteria. At 155°F (68°C), it takes 50 seconds. Drop the temperature to 150°F (65.6°C), and the pathogen dies off in three minutes. So by adding time, the lower temperatures still take out the bad guys, and the result is mind-blowingly moist and tender chicken.
Best Practices for Sous Vide Cooking
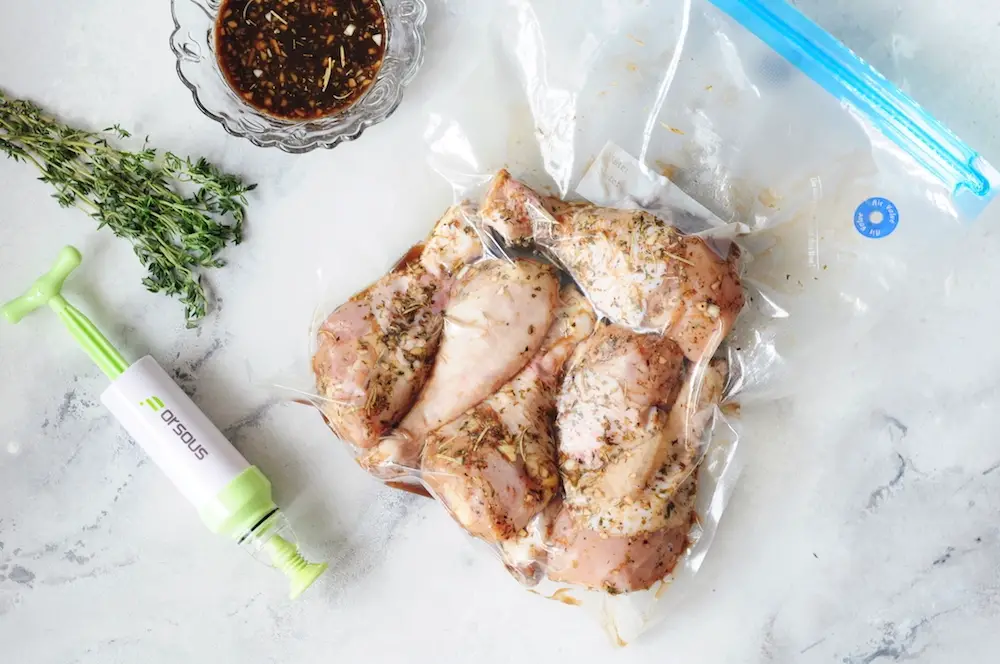
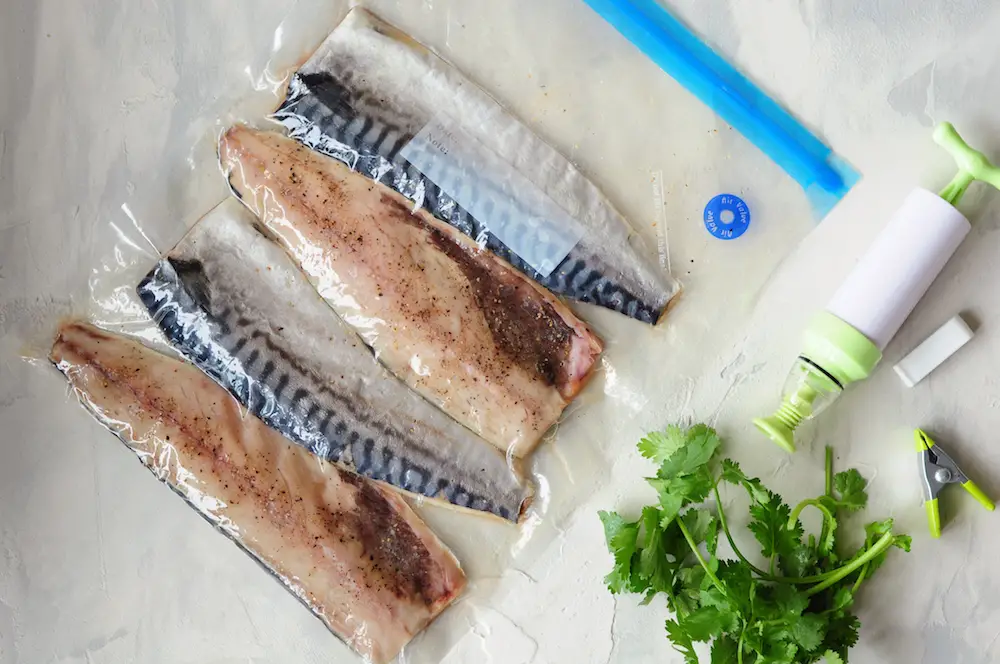
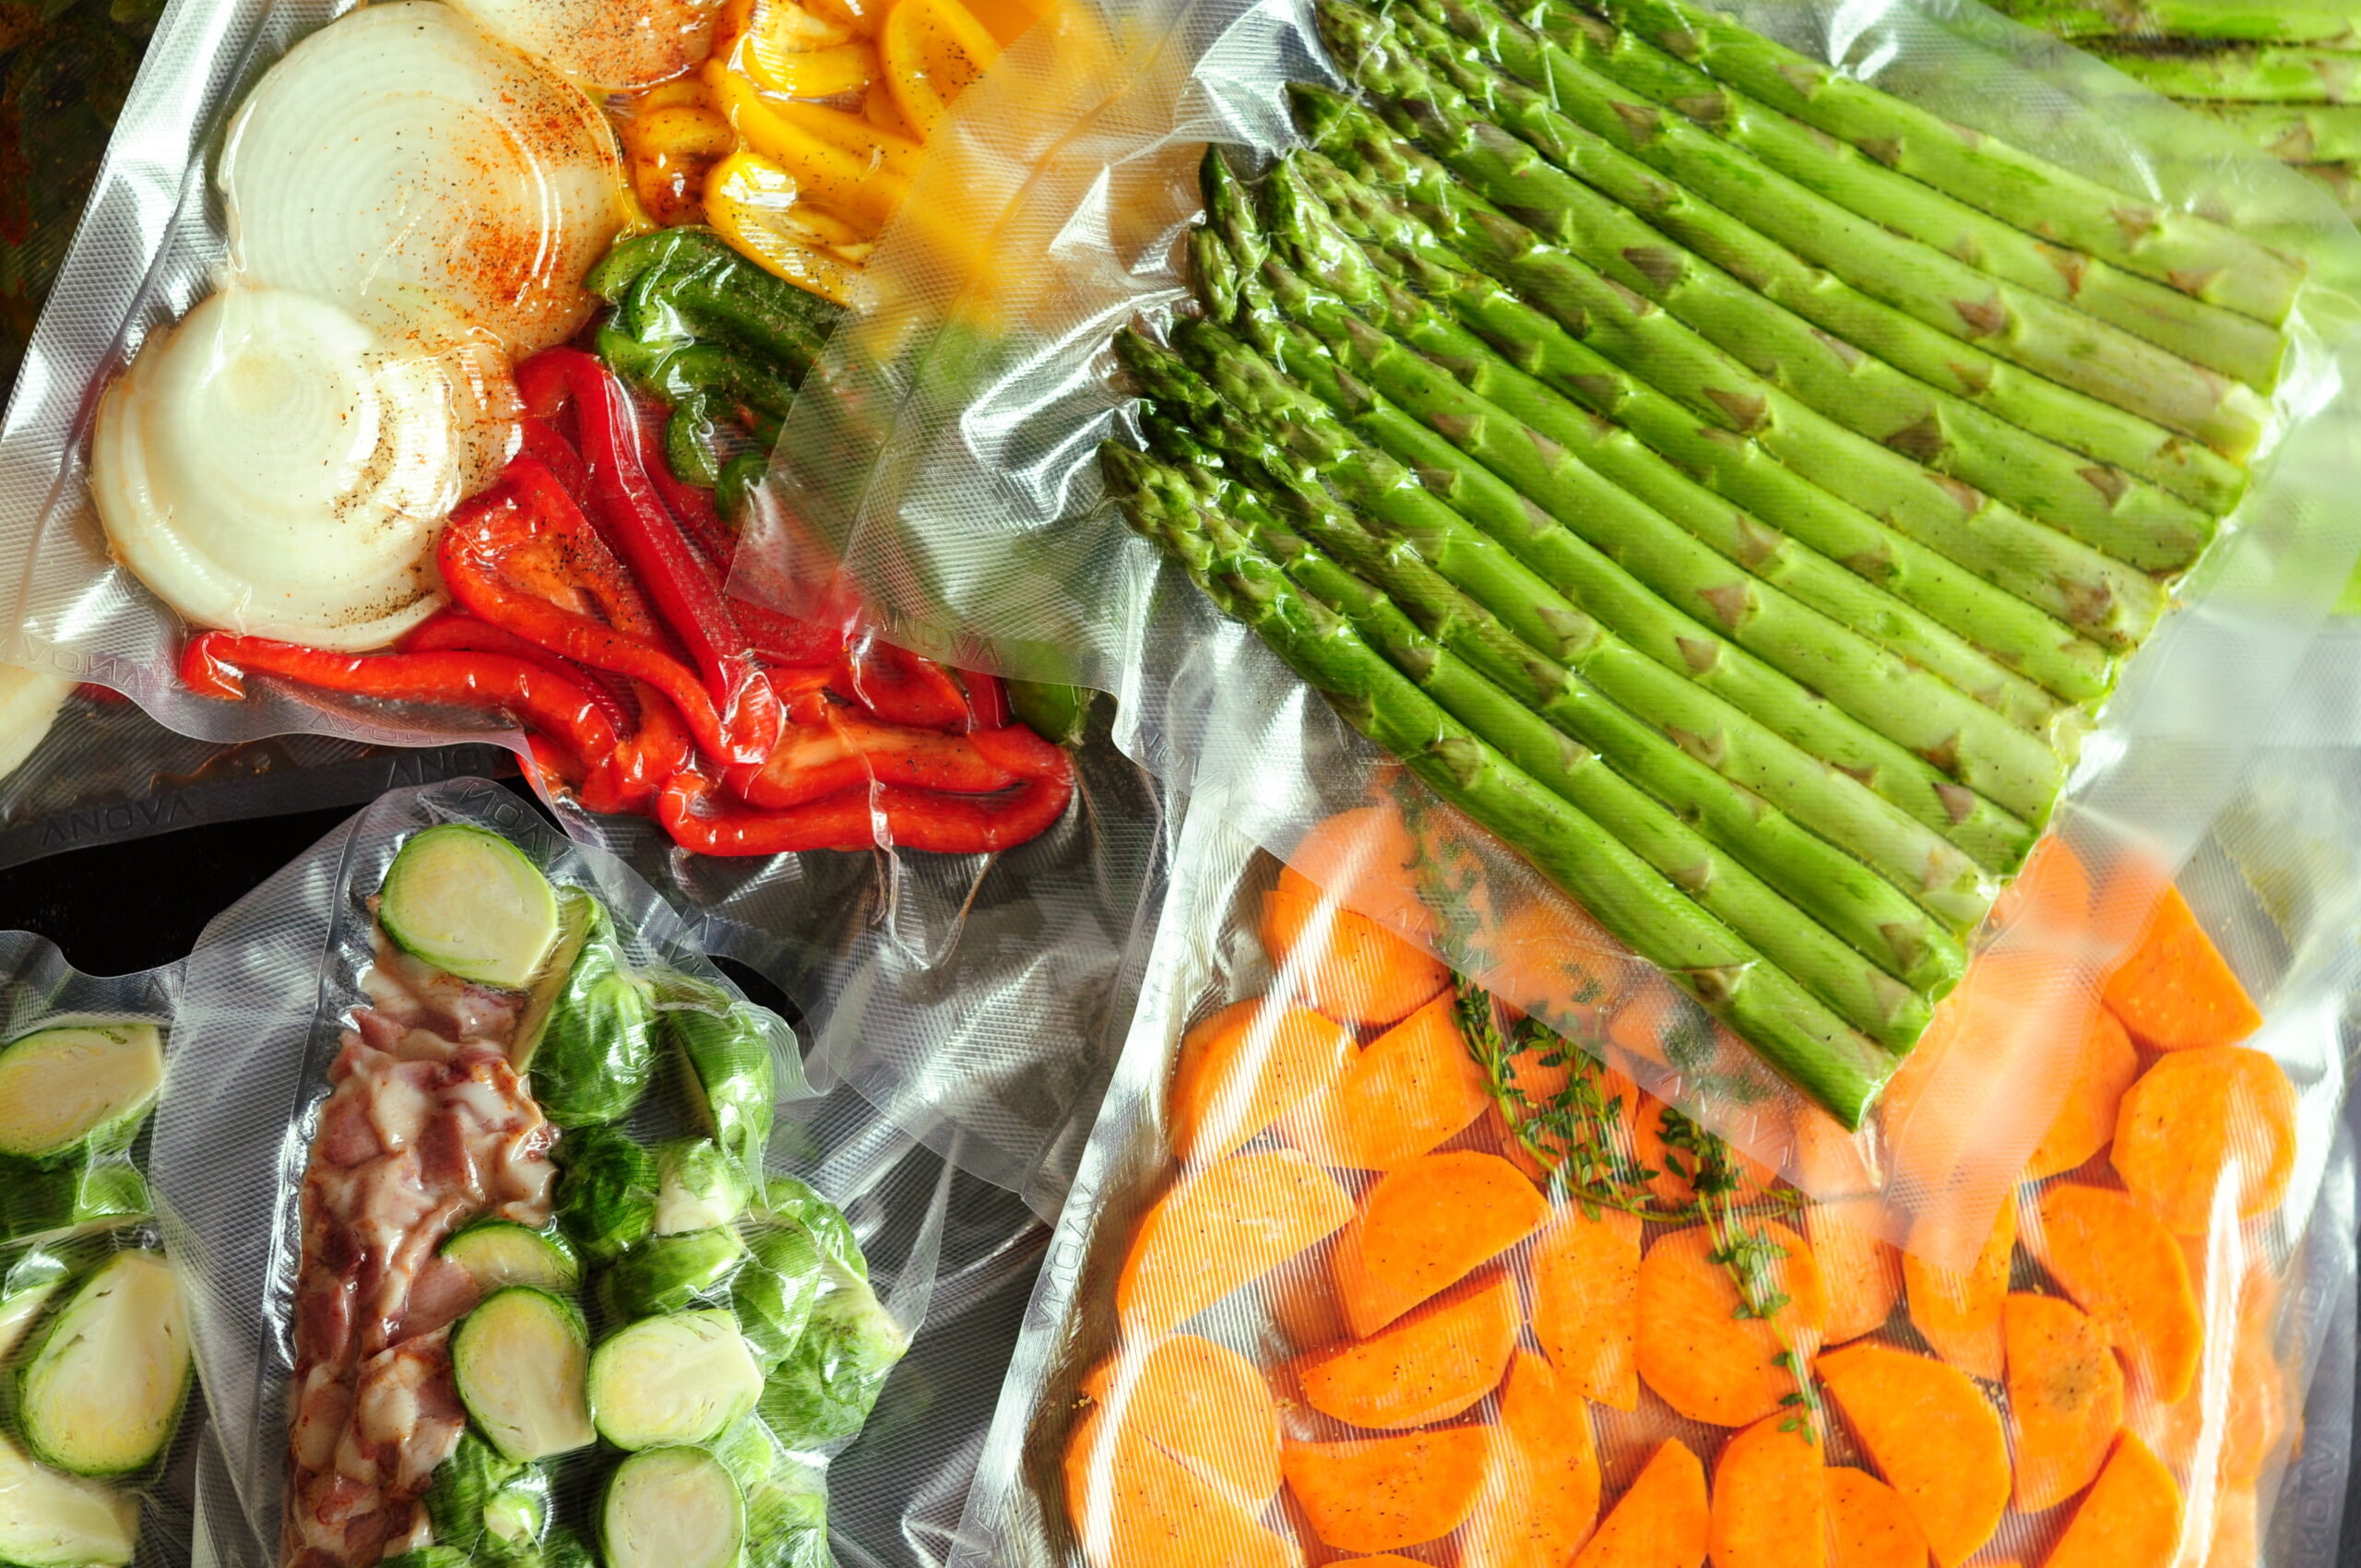
First and foremost, the most important step in sous vide cooking is choosing the right cooking bags. For the sake of both safety and quality, you don’t want to use just any random plastic bag in your sous vide. Let’s spend a few minutes looking at the types of cooking bags, how to fill them, and how to seal them along with a few other best practices to ensure that you cook sous vide safely.
Choosing the Right Cooking Bag for the Job
It’s essential to sous vide with durable plastic bags that are BPA-free. Using Ziploc or other reputable name brands will keep your food free of BPA, phthalates, and other undesirable chemicals that can leach into your food at high temperatures. Food grade, microwave-safe, or freezer-safe are the keywords to look for.
Most recipes work perfectly well with either Ziptop-style or vacuum sealer bags. Some sous vide recipes, however, require one type or the other, so let’s take a look at some of the differences.
There are three main types of bags that can be used for sous vide cooking.
#1 Ziptop-style Bags:
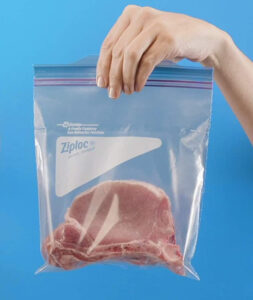
You likely already have these in your kitchen, which is a plus, and they come in a wide range of sizes. The walls of the freezer bags are just a bit thicker and more durable. These are single-use bags. Again, make sure to use food-grade plastic bags from reputable name brands that are free of BPA and other harmful chemicals.
#2 Reusable sous vide bags:
- Plastic bags with air valve (the kit comes with a hand pump, so no vacuum-sealing machine needed)
- Silicone storage bags
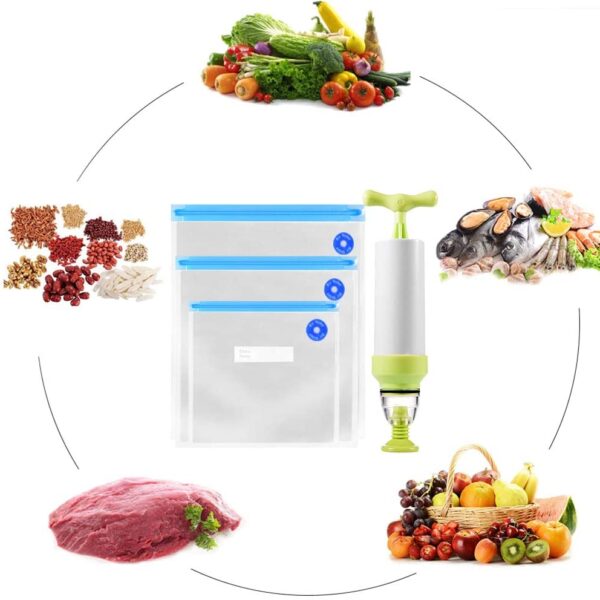
If you are using your sous vide regularly, reusable bags are kinder to both your wallet and the environment. Silicone bags are more expensive, but they can be used thousands of times, and they avoid the health and safety concerns of plastic. On the other hand, it’s easier to remove the air from reusable plastic bags using a hand pump.
#3 Sous vide vacuum sealer bags
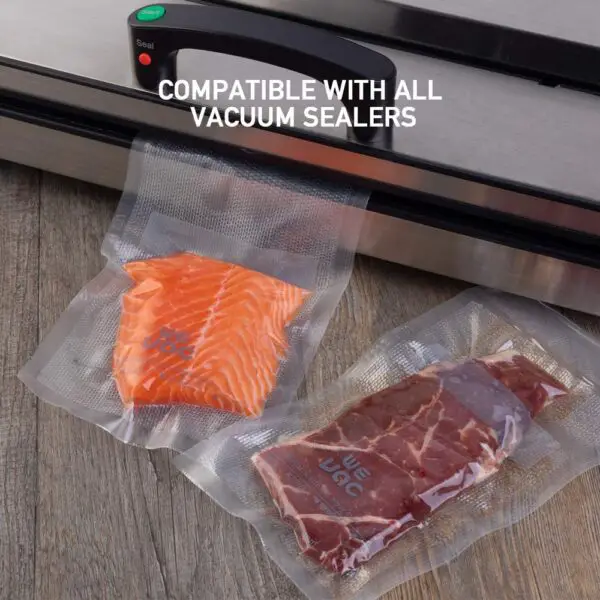
These will give you an airtight seal, and you use only the amount of bag material you need to enclose your food. Tip: Use bag material that is compatible with your vacuum sealer.
Cooking Bag Choice Q&A
There are certain conditions that warrant using a particular type of bag, so let’s take a look at those. Answering a few questions will help you make the right choice.
Will you be cooking at temps over 150°F (65.5°C)?
If yes, use either reusable sous vide or a vacuum sealer bag, as the Ziptop-style bags are not ideal for higher-temperature cooking, and a ruptured bag means a ruined meal.
Will you be cooking for six hours or longer?
If so, again, go with the vacuum sealer bags or reusable sous vide bags as the Ziptop-style bags can weaken over longer time periods.
Does your food have a lot of liquid (marinade, sauce, etc.)?
For most commonly used vacuum sealers, sealing a bag with a lot of moisture in it is difficult. Grains like rice or millet, which require a lot of cooking liquid inside the bag are also candidates for Ziptop-style or reusable bags. On that note, though, a vertical vacuum sealer does magic on sealing bags of food with liquids.
Are you cooking vegetables?
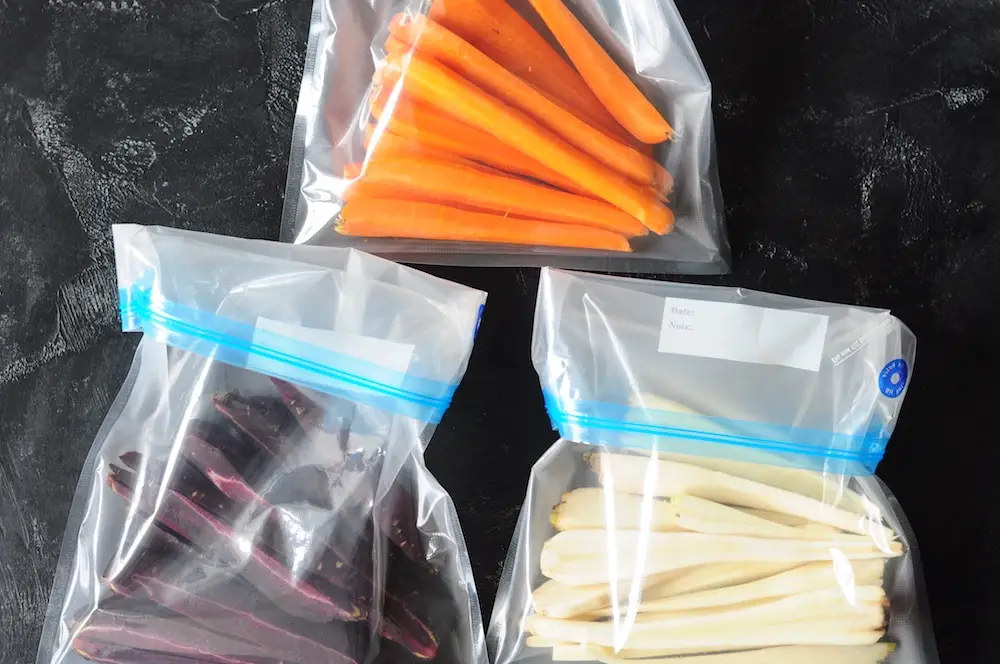
Vacuum-sealing vegetables is the only way to guarantee the best results. At the high temps that are required for most vegetables, the air in a Ziptop-style or silicone bag can expand and steam out, affecting the overall cook. Vacuum sealing removes the air, prevents the bag from floating or overheating, and results in the best vegetables you’ll ever eat.
Are you cooking smaller, denser pieces of food…?
Things like cuts of steak, chicken breasts, fish, chops, tenderloins, and burgers can do perfectly well in Ziploc-style or reusable bags, as cooking them won’t exceed either the time or temperature limits I mentioned above (150°F and six hours). If you have a vacuum sealer, that’s just fine for these things too.
...Or, on the contrary, are you cooking something huge?
Armed with a hand-held vacuum sealer, an oversized bag, and a large container, you can cook brisket, whole turkeys, and other centerpiece dishes that will never fit into a Ziploc-style or reusable bag. No oven is required!
Are you prepping food in advance?
In a vacuum-sealed bag, sous vide cooking pasteurizes vegetables and meat, so you can store them in the fridge for a week or freeze them for months at a time without freezer burn.
The bottom line for newbies: If you’re just starting out, and you’re reluctant to invest in reusable bags or a vacuum sealer, that’s fine! You don’t need to. Start by cooking with the Ziptop-style bags that you probably have in your kitchen already. If you’re cooking at temps over 150°F or for longer than six hours, double-bag your food. If and when the time is right, you can explore the reusable and vacuum-sealing choices.
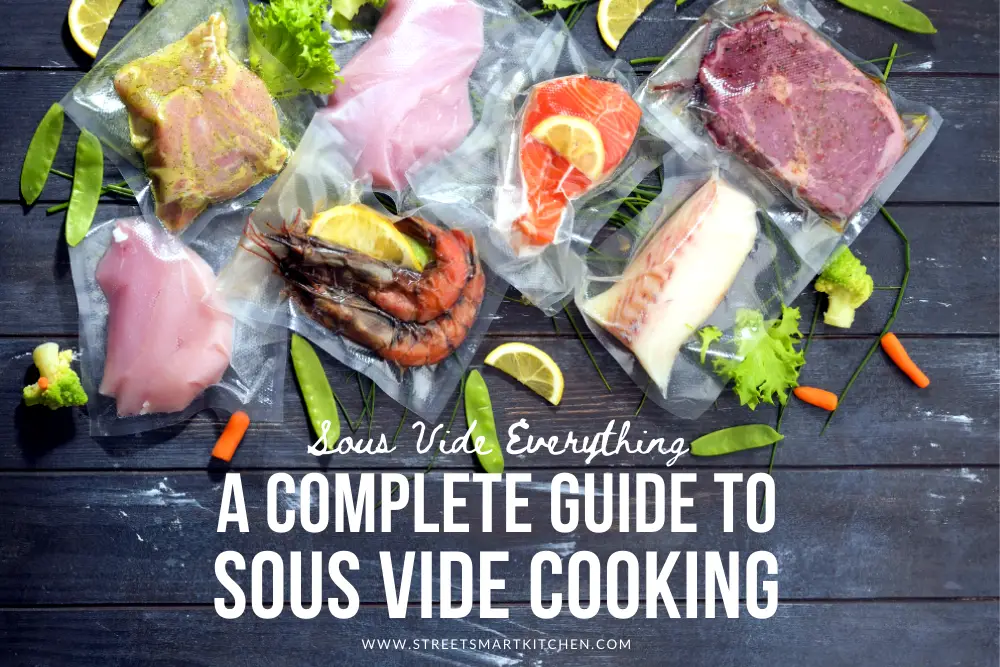
This guide is also available in PDF version. Tell me where to send it by clicking the button below.
Getting the Food into the Bag
This isn’t rocket science, but a few tips to make the process easier, cleaner, and safer won’t go astray here.
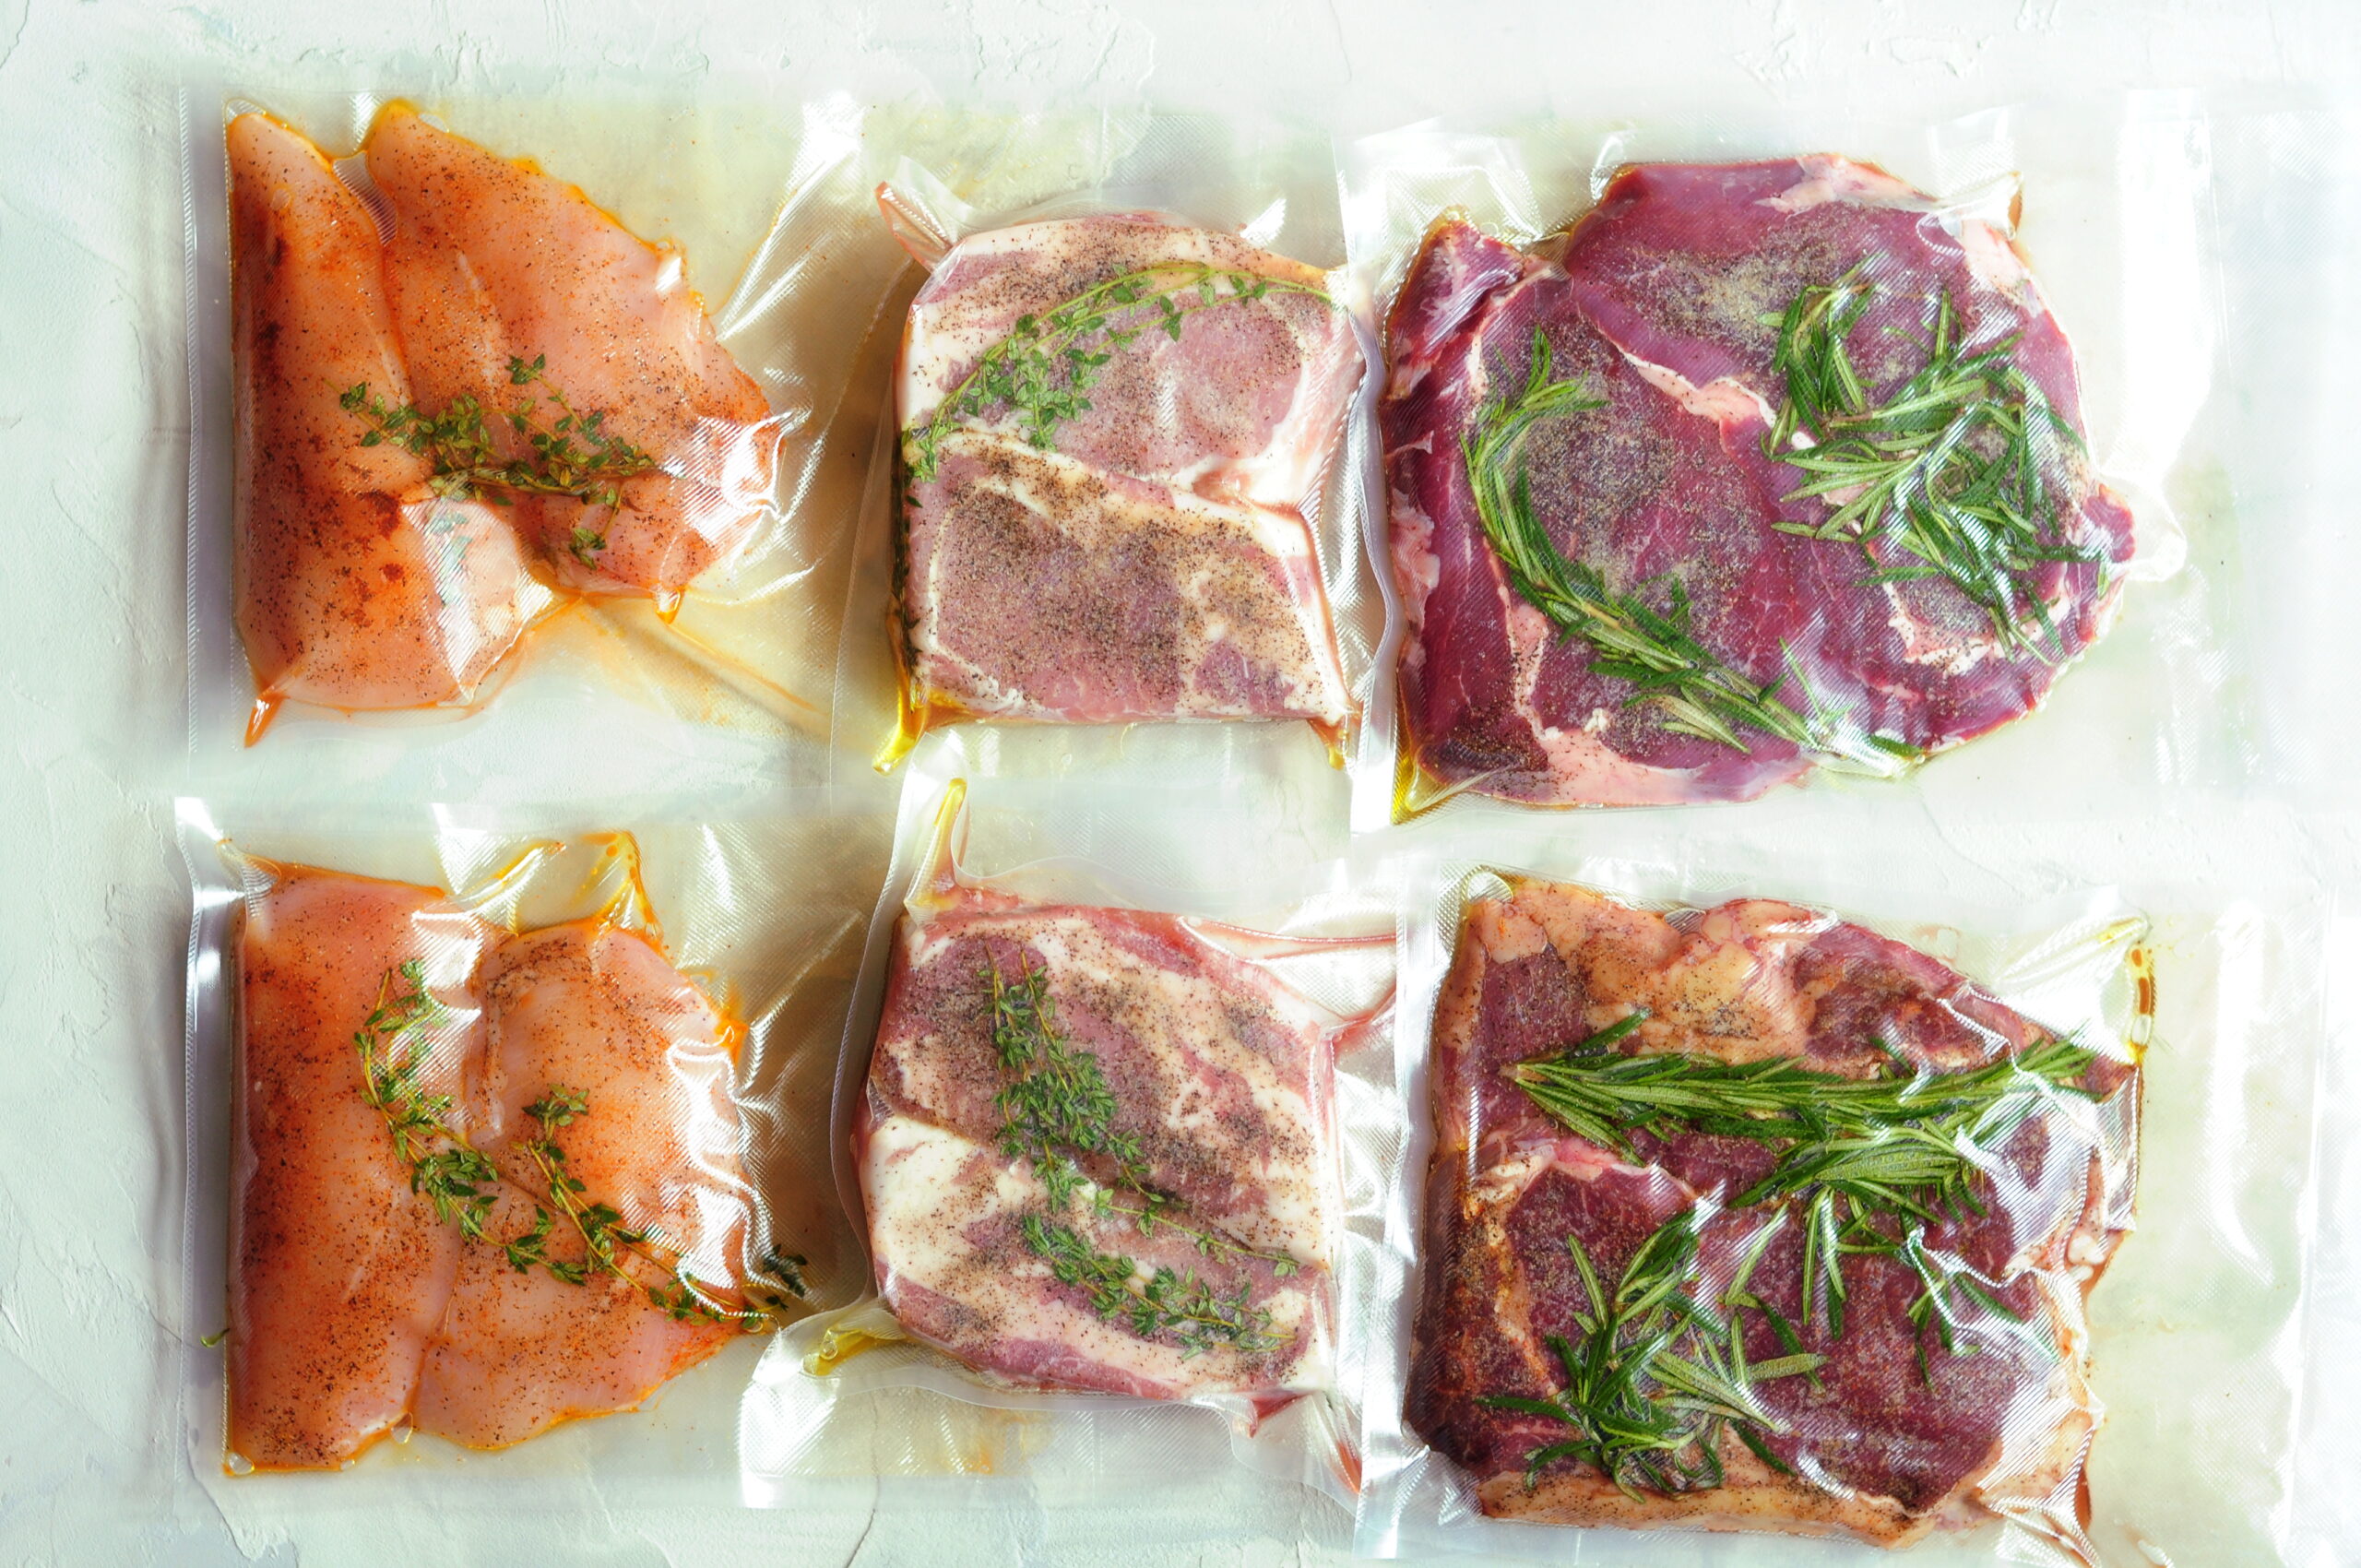
Step #1: Start by folding the top of your bag—fold at least the top 1/3 of the bag outward over itself to form a hem. This will keep any seasonings or marinade from interfering with the seal, which could allow contamination.
Step #2: Don’t overstuff the bag. Keep food in a single layer where possible. When cooking delicate proteins, leave space between pieces; you don’t want them sticking to each other. Use multiple bags when you need to.
Step #3: Add oil when you’re cooking protein or small pieces of food to prevent the food from getting stuck in the bag’s seams.
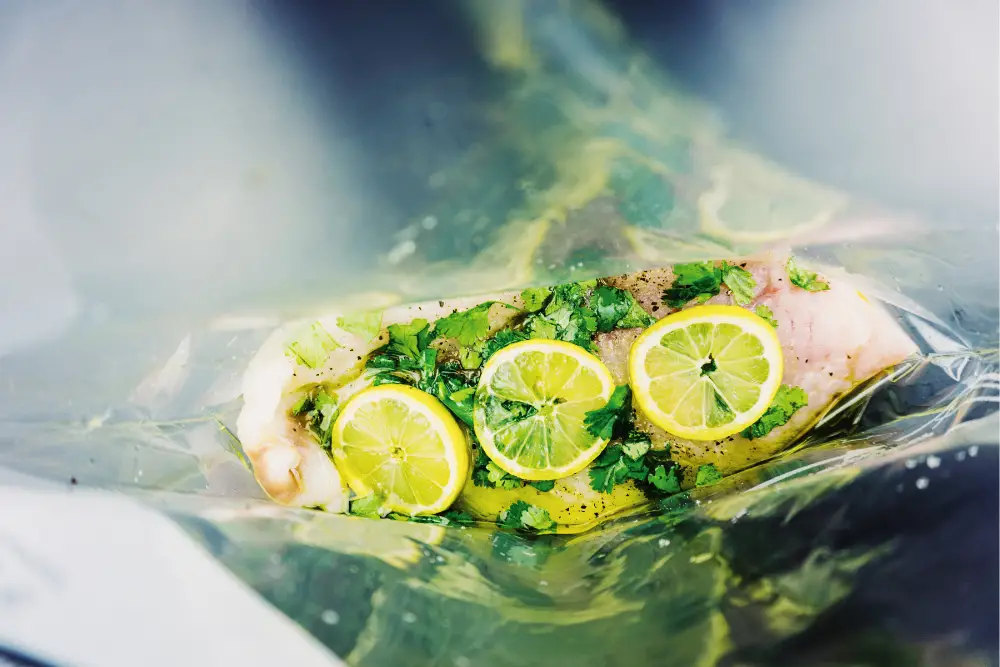
Step #4: Add your aromatics and herbs. For delicate protein, especially fish, place the herbs and aromatics on the skin side so they don’t leave a visible “stamp” on your food after cooking.
Step #5: Finally, seal the bag. Unfold the edge. If using a sous vide bag, seal it with either a vacuum sealer or a hand pump. If a Ziptop-style bag, use the water displacement method to close it. Speaking of which, let’s take a closer look at your sealing options.
Sealing the Bag
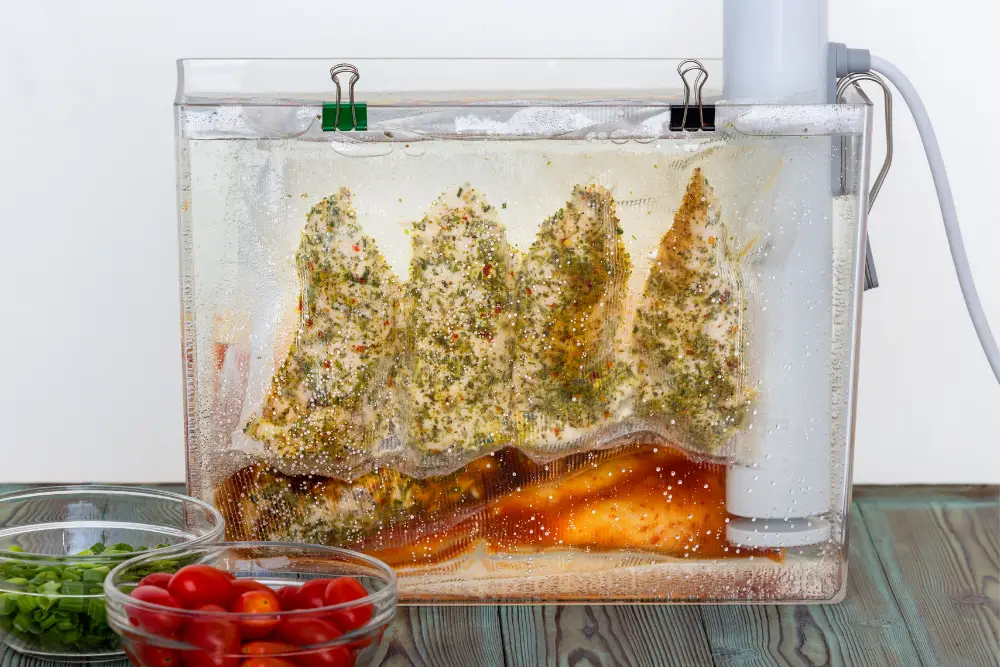
Removing all the air (or as much as possible) from a cooking bag before dropping it into the water bath keeps the bag from floating. Food is not completely submerged and does not cook evenly when the bag is not immersed. There are a few ways to remove the air and seal the bag before you cook.
Use the water displacement method: If you don’t have a vacuum sealer or hand pump, and you’re using a Ziptop-style bag, this will do the trick. Place your seasoned food in the bag and zip it to 80%, leaving the corner unzipped. Fill a container with enough water to fully submerge the bag of food. (You might use the cooking water before you heat it.) Slowly press the bag down into the water, gently squeezing out the air around the food, going after any pesky air bubbles. The pressure of the water will help remove the air from the bag as you go. When the water level is just below the zip-line, seal the bag the rest of the way.
Use a hand pump: When you use a hand pump to vacuum-seal your reusable cooking bags, avoid getting anything on the air valve as you put the food into the bag. The best way to do this is folding the top of the bag down below the air valve before you put the food into it. Then unfold the bag and zip it up with a clipping seal. Attach the pump to the valve and go to town until the air is gone.
Use a vacuum sealer: A vacuum sealer makes it super easy to batch cook, and it gets high marks for safety and sanitation. I recommend it for long and higher-temperature cooking sessions, and it does produce the best vegetables. Check the manual that came with your vacuum sealer, but typically, you’ll place the open edge of your food-filled bag into the machine, close and lock the lid, and then press the “vacuum” button. The process also heat-seals the edge of the bag.
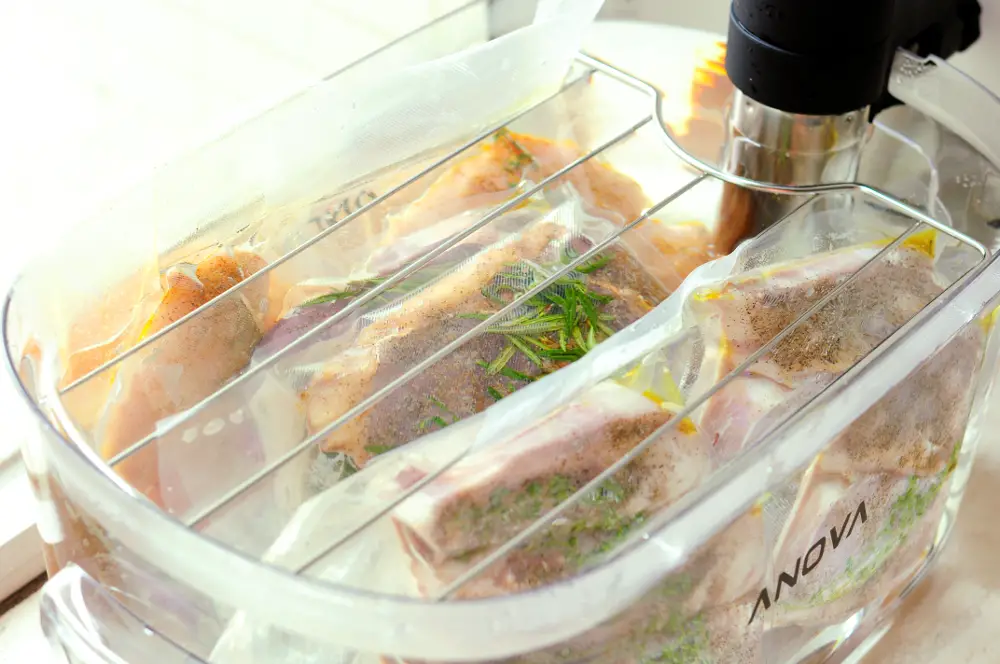
One way or another, when your cooking bag is tidily filled, excess air removed and the edge sealed, it’s time to go for a swim.
Cooking and Searing
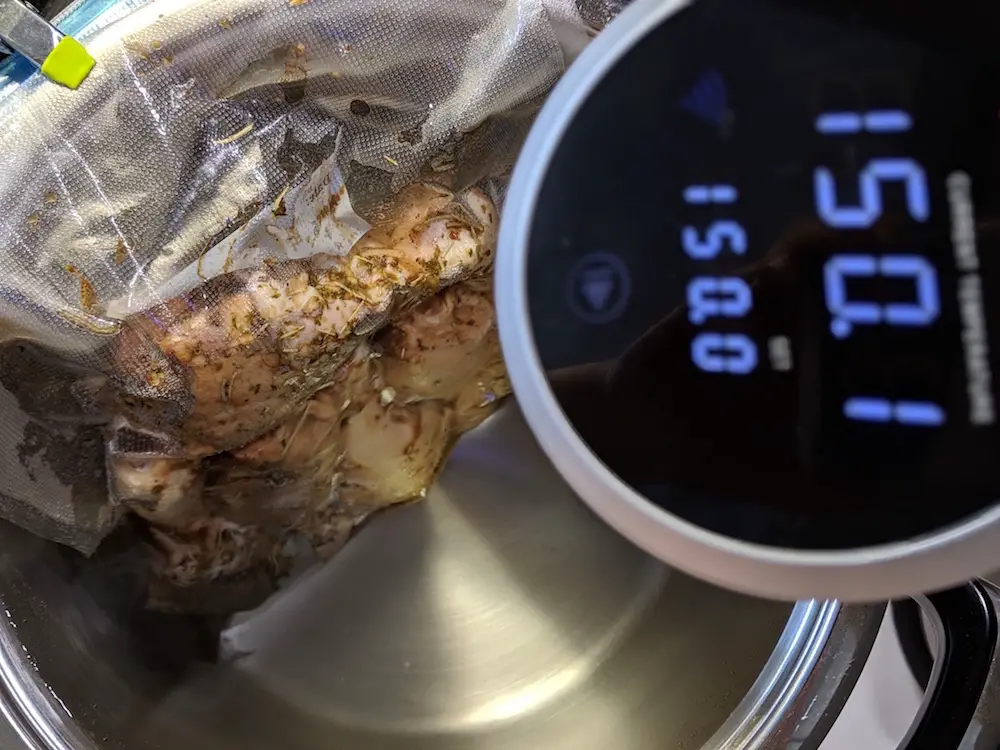
So now we get down to the real business of cooking in a sous vide. Here’s the process: Immerse the sealed bag containing your food in the heated water bath, set the timer, and walk away. No, I’m not kidding.
Here are a few tips to bear in mind to be sure the sous vide can do the fabulous job it’s designed for.
- Allow the water to reach the desired temperature before you put your bags of food into it.
- Clip your bag to the side of the sous vide container to hold it in place. Keep the bag submerged with a sous vide rack if you have one; otherwise, a water glass, mug, or ceramic bowl or plate will do the trick. Just fill them with water so they’ll sink.
- If you’re going to be cooking for twelve hours or more, cover the vessel to reduce evaporation. If your sous vide vessel came with a lid, you’re in business. If not, plastic wrap or silicone sous vide lid work well. Another very neat trick is topping your water bath with ping pong balls, which trap both heat and moisture inside the cooking vessel.
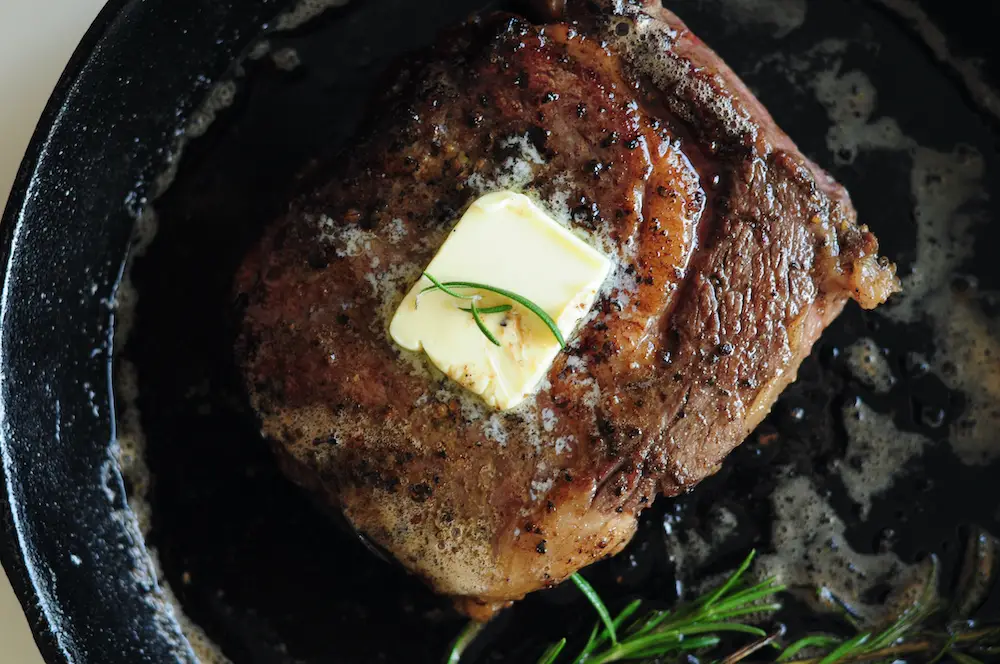
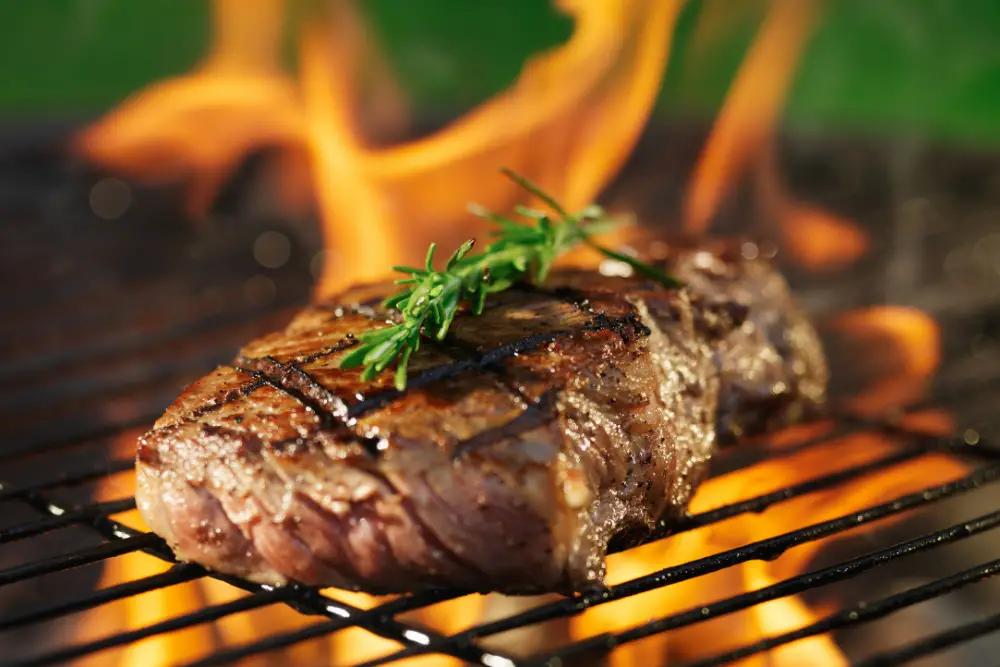
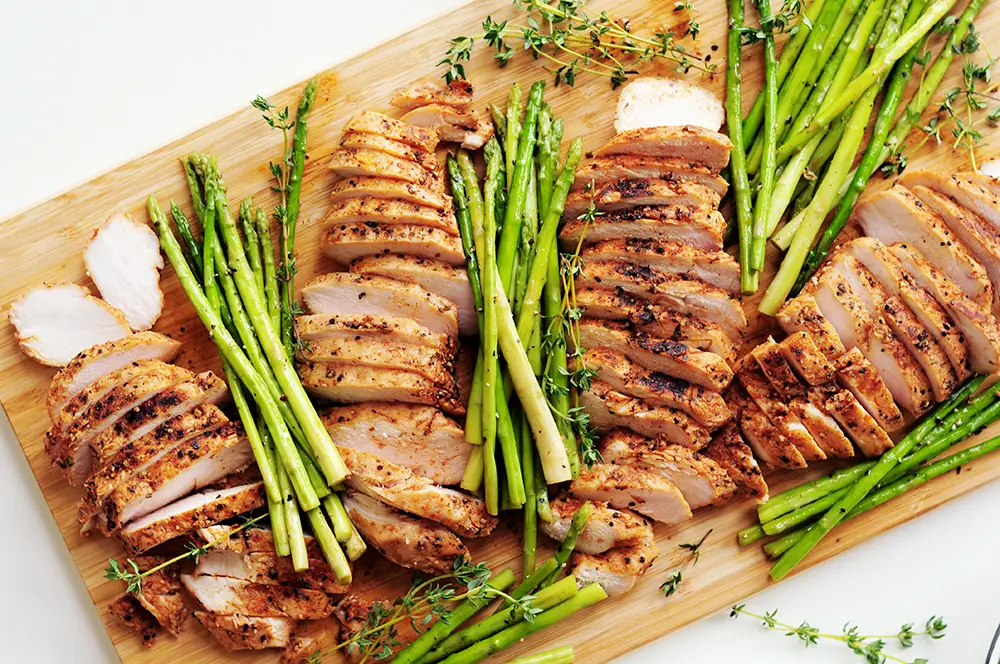
Especially for seafood and meat, the final step before you plate the food is typically searing it. This is known as a reverse sear, coming at the end of the cooking process to create an irresistible crust. A cast-iron skillet on the stovetop is possibly the easiest way to sear, but your broiler or a grill can also produce superb results. If you happen to have a hand torch, that’s better still.
I’ll go over the general rules for pan-searing here, but they apply to the other searing methods as well:
- When you remove your food from the cooking bag, grab some paper towels and pat it dry as best you can. The surface of your meat or fish must exceed a blazing 300ºF (149°C) to achieve that perfectly crispy, browned crust. Water steams at 212°F (100°C), though, so if there is moisture hanging around, it will heat first and steam your food instead of searing it. Horrors!
- Get your pan extremely hot. How hot? Flick a bit of water into the dry pan. If it sizzles, hops about, and then vanishes, the pan is ready.
- Add the oil. You don’t need much! Choose an oil with a high smoke point for searing—avocado oil or vegetable oil is great, but olive oil will work well enough if that’s what you have on hand.
- Sear your meat or fish on both sides. If your pan is adequately hot, 45-90 seconds on each side will give you the best results.
- Don’t overload the pan. Searing releases more juices, and you’ll want to allow time between batches for that liquid to evaporate. Again, we’re all about searing here, not steaming.
If you decide to sear your meat under the broiler, place the oven rack four to six inches below the heating element, set it to the highest heat, and preheat it for several minutes. Keep a watchful eye on your food when it’s under the broiler because it can cook fast. We’re looking for a nice sear, not incineration. Grilling the meat for a minute or two on each side is also a good alternative.
If the hand torch is your searing tool of choice, take care to use a deep blue flame. A yellow flame bears incompletely combusted hydrocarbons from the fuel—and that’s neither an odor nor a flavor you want in your food.
Now that you know how sous vide cooking works and you’ve learned some best practices, you might be asking, “Okay, but how often will I use it? Will it be another gadget that I dust off twice a year when I want to make pulled pork?” Trust me, your immersion circulator will not be gathering dust. It may become the hardest-working tool in your kitchen.
This guide is also available in PDF version. Tell me where to send it by clicking the button below.
What Kinds of Food Can You Sous Vide?
Sous vide is simply unparalleled when it comes to cooking meats and seafood of all kinds, but its exceptional abilities don’t stop there. I’ve been blown away by the range of foods that come out of the water bath with optimal texture, intense flavor, and nutrients right where you want them, every single time.
Meats and Poultry
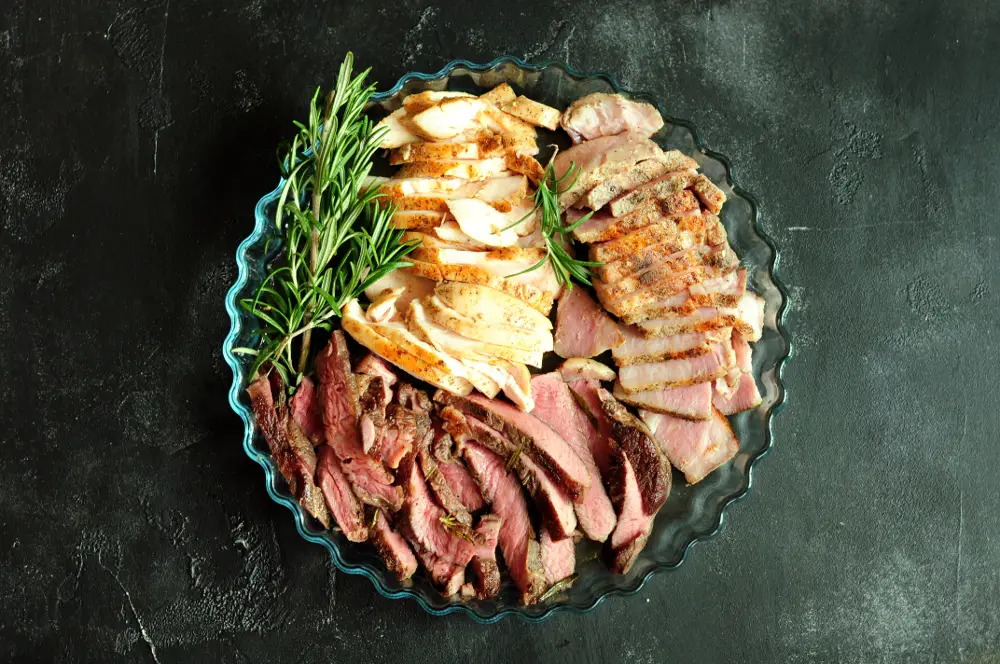
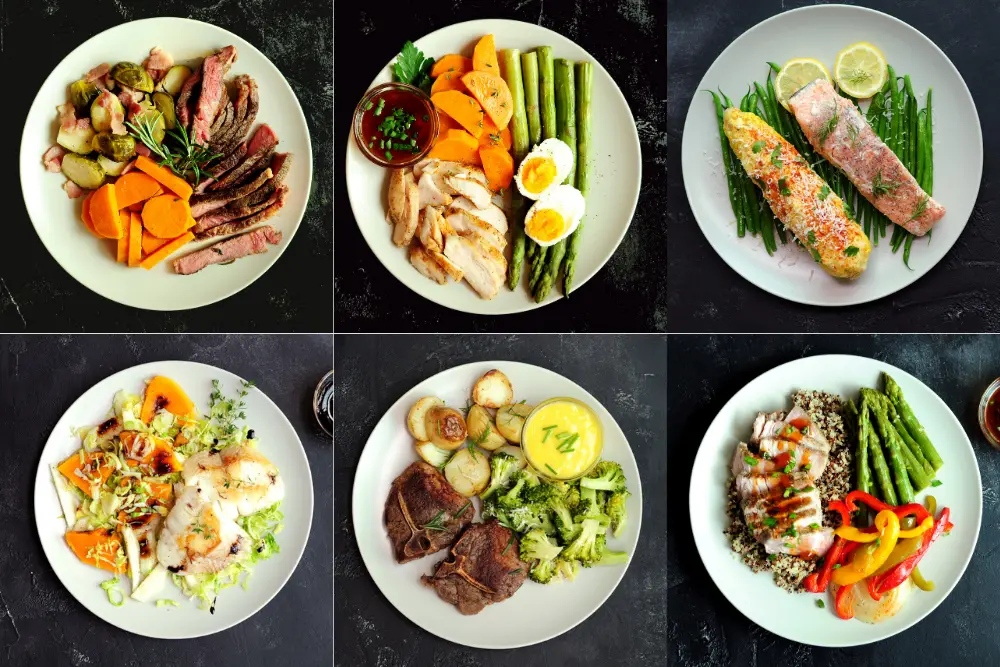
The sous vide has become my top choice for cooking meat. What kind of meat, you ask? You name it—from classic sous vide steak, bbq brisket, chicken breasts, duck breasts, pork chops, lamb chops, to a whole Thanksgiving turkey, from inexpensive stew meat to top-of-the-line wagyu beef, beef tenderloin, racks of ribs, pork belly (porchetta, anyone?), pork shoulder, pulled pork, meatballs, and even (surprisingly) burgers. I can’t overstate the value of cooking meat evenly from one side to the other. It’s simply outstanding.
Seafood
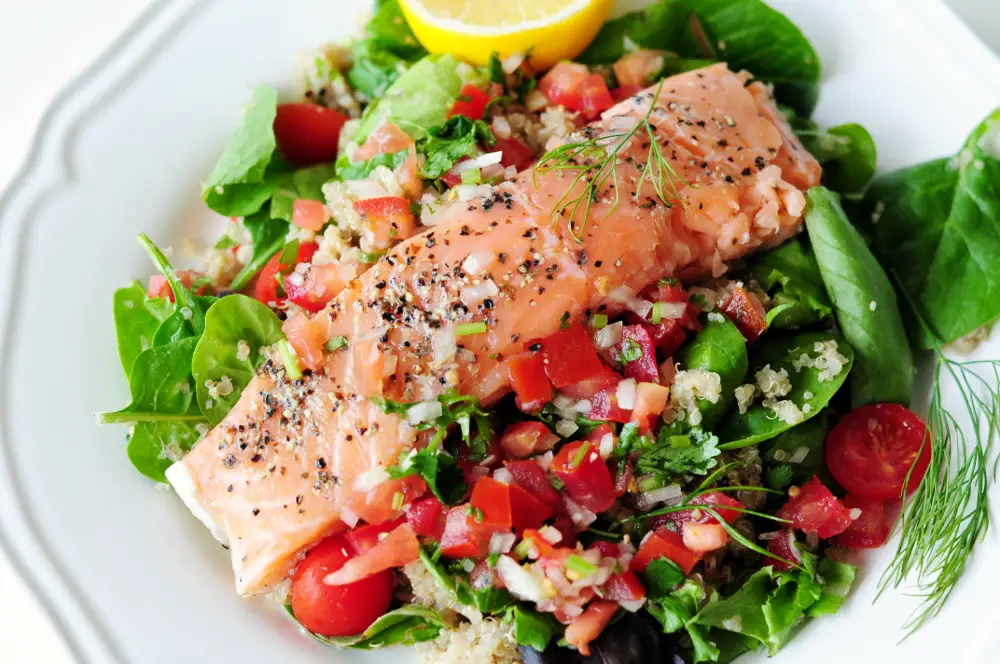
Here, too, the sous vide is unbeatable. Classic salmon, scallops, lobster tails, tuna steaks, a whole snapper, or mackerel emerge from the water bath precisely done, with impeccable flavor and texture. Just a quick sear on the skin side before serving, and you’ve produced a culinary masterpiece. You’ll never get a piece of squid or octopus with car-tire texture from your sous vide, nor a dry and chalky shrimp. Once again, you need only set the appropriate temp, immerse the bag, set the timer, and come back when it’s finished. No watching, no flipping, no fretting.
Eggs
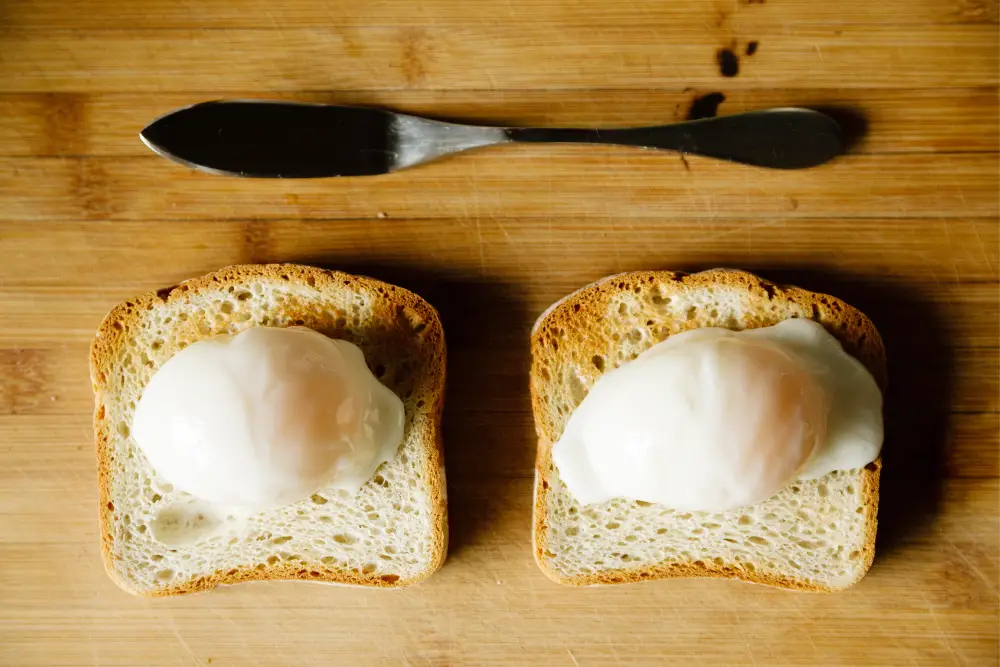
You can hard- or soft-boil eggs in their shells in the sous vide. Why would you do this? Because the result is a glorious, uniform texture (not rubbery!) and no hint of discoloration. Eggs benedict, poached eggs, egg salads, and egg bites are fabulous. I’ve also used my sous vide to simply pasteurize eggs without cooking them, which allows me to make edible raw cookie dough, amongst other things.
Vegetables

There’s so much emphasis on cooking proteins in the sous vide that it’s tempting to overlook its merits in the veggie department. Cooking your vegetables in a 180° (82°C)-190°F (88°C) water bath weakens the plants’ cell walls, giving you toothsomely crisp vegetables (rather than rupturing the cell walls, which gives you mush). In their vacuum-sealed bag, the vegetables retain more of their natural flavor and color than with any other cooking method. Fennel with parmesan, spicy honey-butter carrots, asparagus mimosa, butternut squash, and crispy smashed potatoes are just a few of my favorites.
Grains
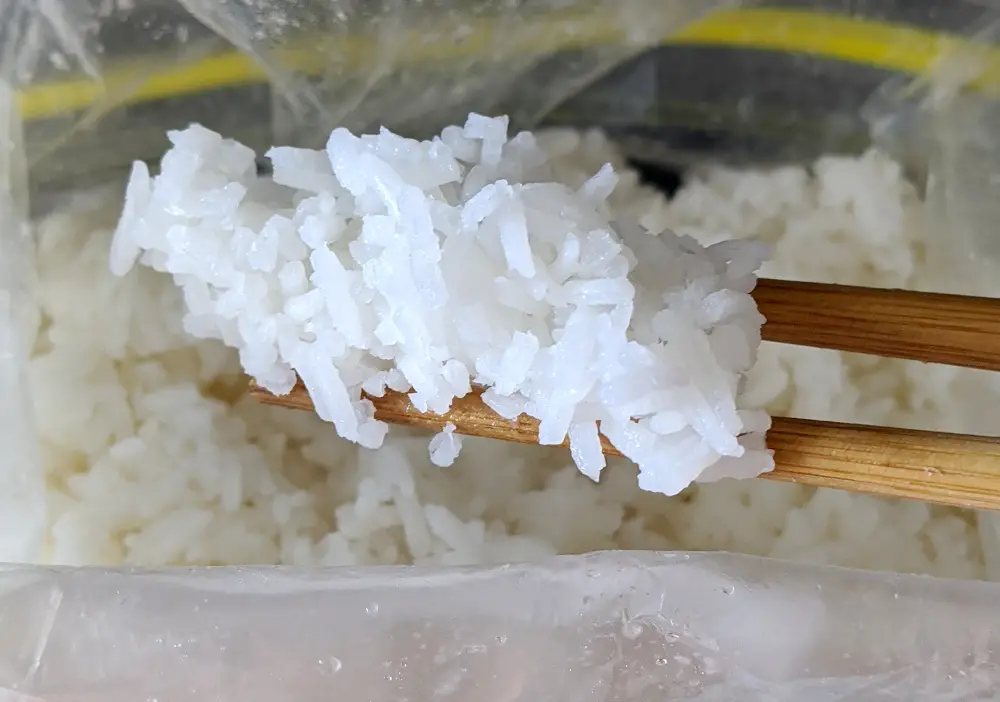
The sous vide is also a goof-proof, hands-off way to cook rice, millet, lentils, couscous, and other grains and pulses. Can you believe it?
Sauces
There’s no more standing at the stovetop, whisking furiously to combat lumpy or separated sauces when you have a sous vide. Hollandaise and béchamel, aioli, gravies, syrups, and purées are just a few of the ways you can effortlessly achieve that five-star finish for your meals.
Soups and Stews

Sous vide also amplifies the flavors in all sorts of soups and chowders, giving you a hearty winter meal in a bag. I’d also choose sous vide over stovetop every time for meat and vegetable stews and curries.
Desserts
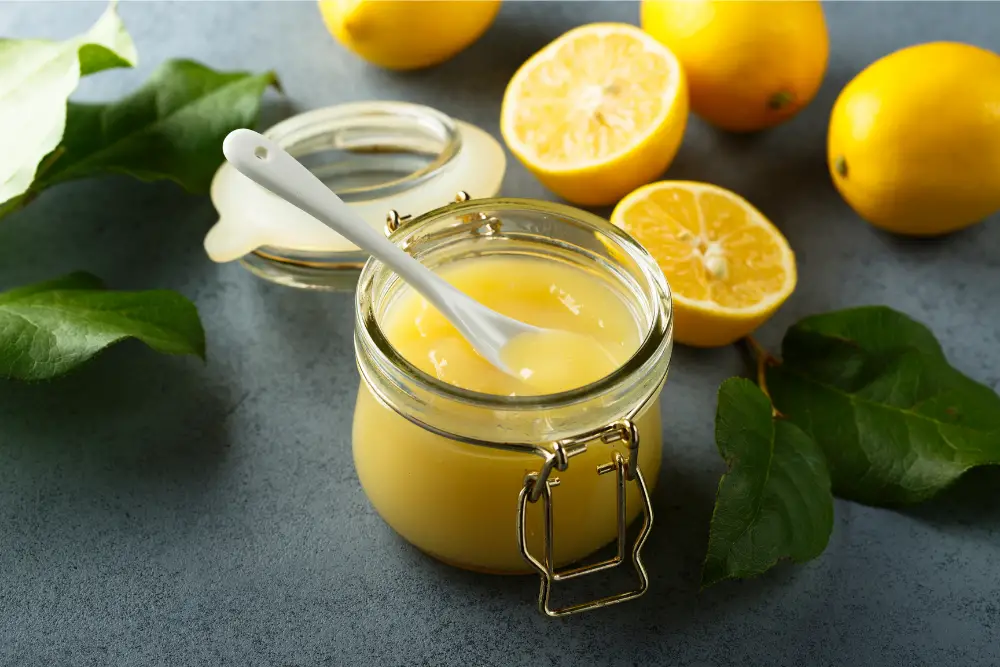
Have you ever had rich, satiny pudding made from scratch? Make some in your sous vide and you’ll be sneering at that instant stuff in the supermarket. How about some poached pears in red wine? Crème brûlée and lemon curd are easy-peasy, and the sous vide is a terrific way to make the base for ice creams. Oh, and don’t forget single-serving Mason jars of cheesecake!
Drinks
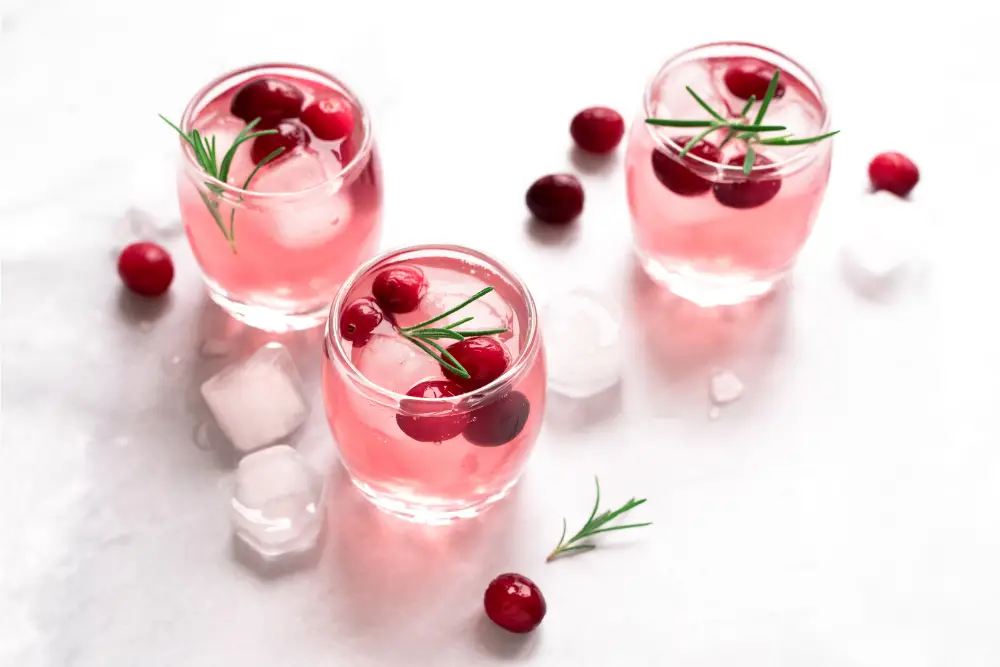
Vodka infused with lemon and rosemary, cucumber-infused gin, cranberry-pear champagne cocktails, and spice-laden hot toddies is just a few of my sous vide hits. Mulled cider and wine belong on the list too.
Feeling intrigued? I tried all the foods mentioned above over the years and hand-picked my best recipes to share with you in my Complete Sous Vide Cookbook, which was published in December 2020. The reviews have been overwhelmingly glowing. Check it out.
This guide is also available in PDF version. Tell me where to send it by clicking the button below.
Meal Prep with Sous Vide
I could (and do!) go on for hours about the spectacular results of cooking sous vide. It’s tempting to overlook one of the other benefits, which is the flexibility it gives your cooking schedule. You can use it to cook when it’s convenient for you, which needn’t be right before you sit down to eat.
Gourmet dinner on a hectic weeknight is entirely manageable if you do some of the prep work on the weekend. Heck, you can even cook the food on Sunday afternoon and just reheat it on Tuesday night (and with no loss of quality). Finally, I’ll give you some ideas for meal planning to make the best use of your sous vide—and, of course, your time.
Prep in Advance
With sous vide, the prep time is the bulk of the hands-on effort—it’s the peeling, slicing, dicing, and measuring that happens before the ingredients go into the bag. Once the bags are ready, however, you don’t necessarily have to cook right away. When those bags are tightly sealed, the food will keep perfectly well in your fridge for up to 24 hours. Plan B: Pop the bags into the freezer until it’s time to cook.
For example, you can prepare a Dijon-herb prime rib the night before, measuring the mustard and seasonings and giving the rib roast a good rubdown with the mixture. Put it all into a cooking bag, seal it up, and stow it in the fridge. Drop the bag directly into the preheated water bath the next morning and set the timer for eight hours. It will be ready by the time you come back home from work. Just give the meat a quick sear under the broiler to give it a golden-brown crust before you bring it to the table.
This seems like a good time to mention that even if you hit a traffic jam on your way home from work, you needn’t fuss about your food cooking to smithereens. If it stays in the bath longer than the prescribed amount of time, sometimes even by a matter of hours, your food will not reach greater levels of doneness. Your steak will not be shoe-leather; your broccoli will not be mush.
You might want to season a bunch of chicken breasts in different ways—Cajun, herb, lemon, salt, and pepper, etc.—put them into the cooking bags, seal them, and freeze them. When it’s time to cook them, either defrost them in the fridge or drop the frozen bag directly into the preheated sous vide. (Just add an extra half hour to the cooking time if you do that.)
A couple of notes: Especially if you’re preparing meat ahead of time, use less salt than you might otherwise. Too much salt will effectively cure your meat, drawing moisture out of it. (If it’s curing you’re aiming for, of course, then go for it.)
Although adding lemon or lime slices to your sous vide bag is a terrific idea when you’re cooking immediately, give it a miss if you’re prepping ahead of time. The acid from the citrus will effectively jump-start the cooking process for your meat or fish while it’s in the fridge.
Cook in Advance
You needn’t stop at prepping the cooking bags ahead of time—you can also sous vide the food, refrigerate or freeze it, and then reheat it when the time comes.
You’ll just need to rapidly chill the bags in ice water when they come out of the cooking bath. This will dodge the 40° to 140°F range at which food pathogens flourish, and then you can put the fully cooked foods right into your freezer or fridge. The chilled food, still in the sealed cooking bag, can last up to two days in your refrigerator. (If your food is vacuum-sealed, it can last for up to five days.) If your serving time is more than 48 hours away, just freeze it instead.
When it’s time to reheat, check out this in-depth guide on reheating pretty much anything using your sous vide machine by the amazing folks at ChefSteps.
As you’ve probably noticed, I sing the praises of cooking just about anything in the sous vide, but you’ll quickly observe that various dishes call for different cooking temperatures and times. Here are a few tips for maximizing your sous vide machine.
Cook in Batches
Meat and vegetables have different temperature requirements, so I recommend cooking the veggies at a high temperature first, then dropping the temp for your meat. You can quickly reduce the temperature by scooping a few cups of hot water out and adding cups of ice to the water bath. The cooked vegetables can remain in the water to stay warm (and remember, they won’t continue cooking and grow mushy) until it’s time to serve the meal.
Cook A Meal at the Same Temp When You Can
This might sound unachievable if you are thinking of a meal as separate servings of protein, starches, and fiber. Consider, though, that you can cook both eggs and hollandaise sauce in your sous vide, at the same temperature for roughly the same amount of time. That puts you well on your way to a glorious Sunday brunch for a crowd. You’re probably already a fan of one-pot meals. Now you can become even more enthusiastic about one-bag meals. The recipes are out there (and several are in my book)!
Plan Your Meals Ahead and Cook Like Foods Together
Heat your water bath to 183° and prepare different vegetables to eat over the coming days. When you’ve got them all seasoned and bagged, you can sous vide them together for 45-60 minutes.
Pork and the white meat of chicken and turkey can cook together for two to three hours at a temperature between 140°F (60°C) and 146°F (63°C). Likewise, red meat—beef and lamb, duck, and the dark meat of chicken and turkey—also share similar sous vide requirements. Just put the meats into separate bags. Put the finished foods into the fridge or freezer, then mix and match the vegetables and meats at mealtime over the next several days.
Here are a few meat and vegetable combinations that I adore:
- Perfect Steak with Brussels Sprouts and Sweet Potatoes
- Chicken Breast with Asparagus, Sweet Potatoes, Sous Vide Eggs along with Spicy Peach Sauce
- Salmon with Green Beans and Caribbean-Style Corn on the Cob
- Halibut with Butternut Squash Pear Salad and Balsamic Dressing
- Lamb Chops with Broccoli, Potatoes, and Aioli
- Pork Chops with Red Bell Peppers and Onions along with Sous Vide Eggs
At this point, you have a good grasp on how sous vide works and what sorts of magic you can make with it. Let’s take a look at what you’ll need to make that magic happen.
If you’d like to know exactly how to make those meals ahead of time and have them ready in just 15 minutes, check out my Sous Vide Once, Savor All Week meal prep program where all the meals are planned and instructions are clearly laid out step by step.
The Basic Gear
Getting started with sous vide does not mean a monumental investment in expensive and space-consuming new stuff. It goes without saying, though, that an immersion circulator is the first thing you’ll need to make restaurant-quality sous vide dishes at home, so let’s start with that and then move on to a few other essentials you should have as you’re getting started.
A sous vide machine: There are a few immersion circulators aimed at the home kitchen market, with prices between $100 and $400. They typically include an app that allows you to control the device from your smartphone. (Don’t you just love technology?)
The Anova Precision Cookers, Joule Sous Vide, and KitchenBoss Sous Vide Cooker are all popular and well-reviewed.
I have a 2014 Anova device, which I still use and love. The newer version is even smaller, sleeker, and more powerful. I also acquired a KitchenBoss G320 Sous Vide Cooker and had much to say about this device. You can find my in-depth review here.
Plastic bags: As mentioned previously in Choosing the Right Cooking Bag for the Job section, you need to cook your foods in rugged, top-quality bags that can handle sub-boiling temperatures for long time periods without releasing harmful chemicals or rupturing. To start off, try with high-quality food-grade Ziptop-style bags or freezer bags. Once you are comfortable with sous vide cooking, you can invest in reusable sous vide bags or vacuum sealer bags.
A Dutch oven or large pot: You quite likely already have the cooking vessel you need. As long as your pot holds enough water to reach or exceed the minimal water line on your immersion circulator, and you can completely immerse your food in the water bath, you’re good to go.
Bag clips: These are handy, first, to keep your cooking bags (especially bags that aren’t vacuum-sealed) from floating. Second, they make sure the seal of the Ziptop-style bag stays above the water line, and finally, they hold the bags securely so they don’t move around in the pot, potentially blocking the immersion circulator’s input ports. You don’t need anything special—large binder clips from the office supply store will do nicely.
A heatproof mat, trivet, or potholder: No matter what type of vessel you use for the water bath, it tends to get very hot during cooking, so protect your countertop with one of these under the pot.
Skillet: Searing your food—especially meat and fish—when it comes out of the sous vide makes it a treat for both the eyes and the palate, giving it that gorgeous and delicious crust. A quick sear on the stovetop in a flat-bottomed pan (a cast-iron skillet is ideal) is the easiest way to do it.
The Nice-to-Have Gear
Okay, these things aren’t technically required, but they’ll make your sous vide adventure easier and more pleasant. (Although it’s already pretty darned easy!)
Sous vide container: This is simply a rectangular, transparent polycarbonate bin that’s heat-resistant and food-safe. Cambro is one of the most popular brands, and their containers are perfect for sous vide cooking. They come in different sizes. If you’re cooking a whole turkey or a full rack of ribs, your largest traditional cooking pot won’t do the job; you’ll need something bigger and wider.
Some immersion circulator manufacturers such as Anova also sell sous vide containers specifically designed to work with their sous vide machine. Many include a lid and can accommodate optional racks that fit inside them, which are handy when you want to cook multiple bags of food at the same time. They keep the bags from floating, holding them in place and allowing the water to circulate evenly around them.
Sous vide silicone lid: A lid over your sous vide vessel prevents the water from evaporating, which is especially helpful with long cooking times. If you’re using one of your traditional pots for sous vide, you can’t use its own cover because the immersion circulator is in the way. You could use plastic wrap, but a sous vide silicone lid is specifically designed for the task and does a better job.
Reusable sous vide bags: These will be either plastic or silicone. I personally use sous vide bags kit, which comes with reusable sous vide bags (with air valve) in different sizes, a hand pump, and a few sealing clips. It’s practical, affordable, and provides better results.
Vacuum sealer and vacuum sealer bags: You can manage just fine without these for most foods, but a sous vide bag with all the air removed allows the contents to cook most efficiently and evenly. You’ll need vacuum sealer bags for the job.
Small jars: Sous vide is a brilliant way to make crème brûlée, yogurt, soufflés, or those egg bites you’ve become addicted to, thanks to Starbucks. Small Mason-style canning jars are perfect single-serving containers for these delights, and they’re readily available on Amazon.
Before placing glass jars in your sous vide water bath, twist the lids until they are “fingertip tight”—closed just tightly enough that you can still open them with your fingertips. How do you accomplish this? Put the lid on the jar, then twist to tighten it using just your fingertips. When you first feel resistance, give the lid a single twist in the opposite direction, then one more in the original direction to tighten it.
Hand torch: I listed a skillet as a must-have for searing; you can also sear meat in the oven or on the grill. A hand torch, though, provides higher heat, so you can sear the surface of your dishes even more quickly with no worries about overcooking the inside.
Useful Resources
Want more sous vide-related resources? Here are a few that I found useful.
- A Practical Guide to Sous Vide Cooking by Douglas Baldwin
- ChefSteps
- Sous Vide Everything (YouTube)
- Anova Culinary Recipes
- Amazing Food Made Easy
That’s a wrap! I wish you all the best as you embark (or continue) on your sous vide adventure! If you have any questions, feel free to leave a comment below.