How to Make Potstickers
Potstickers are one of the classics in Chinese cuisine. They also make a wonderful, healthy freezer meal for the whole family. Here’s a step-by-step guide to homemade potstickers.
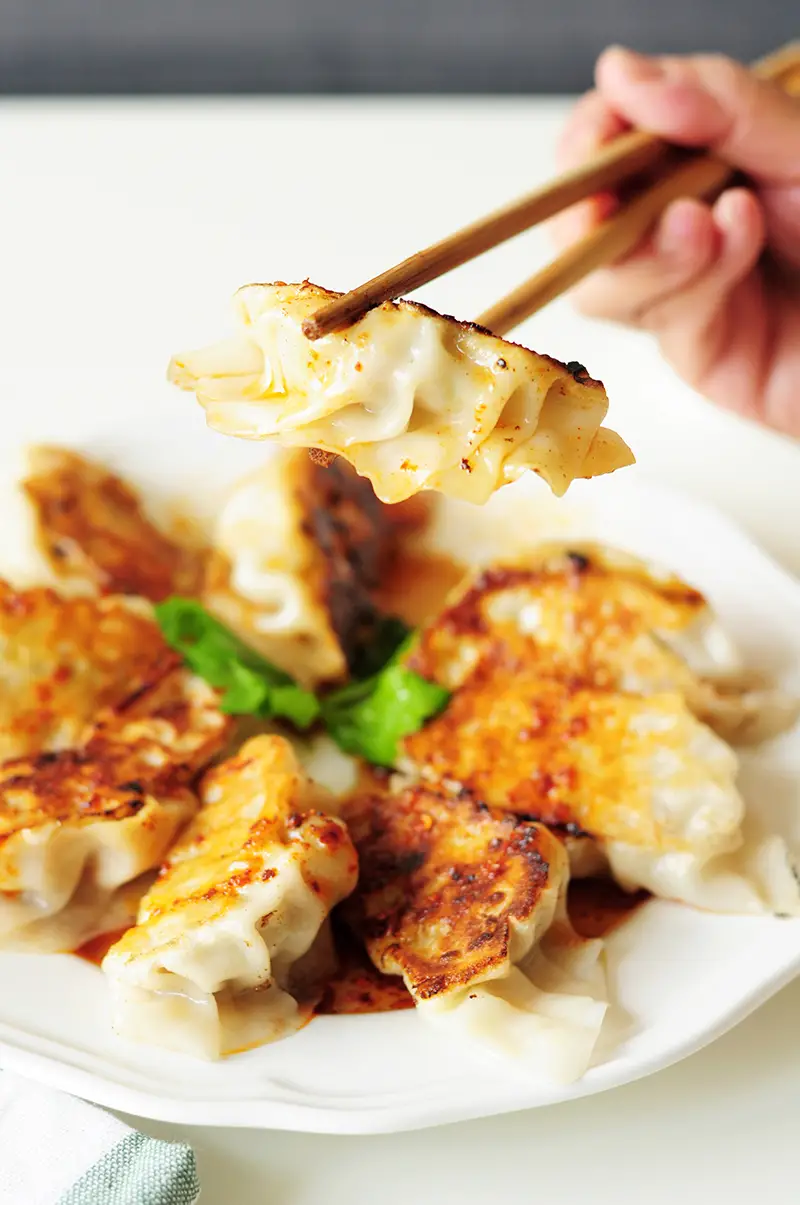
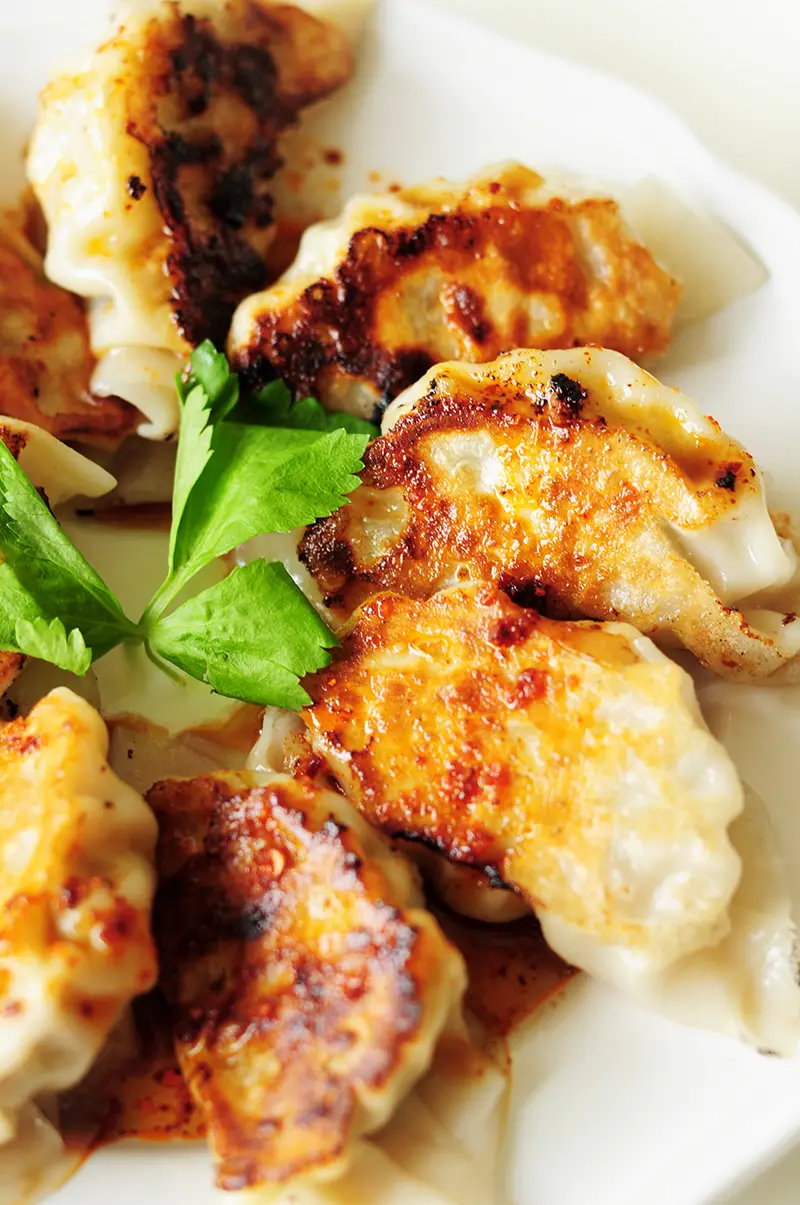
You can’t disregard potstickers when you consider the classics of Chinese food. Take the juicy and flavorful fillings, the soft skin on the top, and the crispy skin at the bottom… Add an authentic Chinese dipping sauce, and they just shoot up to the top of the list. Don’t you agree?
Yes?! Good. Because I am going to show you exactly how to make potstickers in your kitchen. Don’t be intimidated. We are going to take it one baby step at a time. Follow along and you will be surprised by how skillful you are at Chinese cooking!
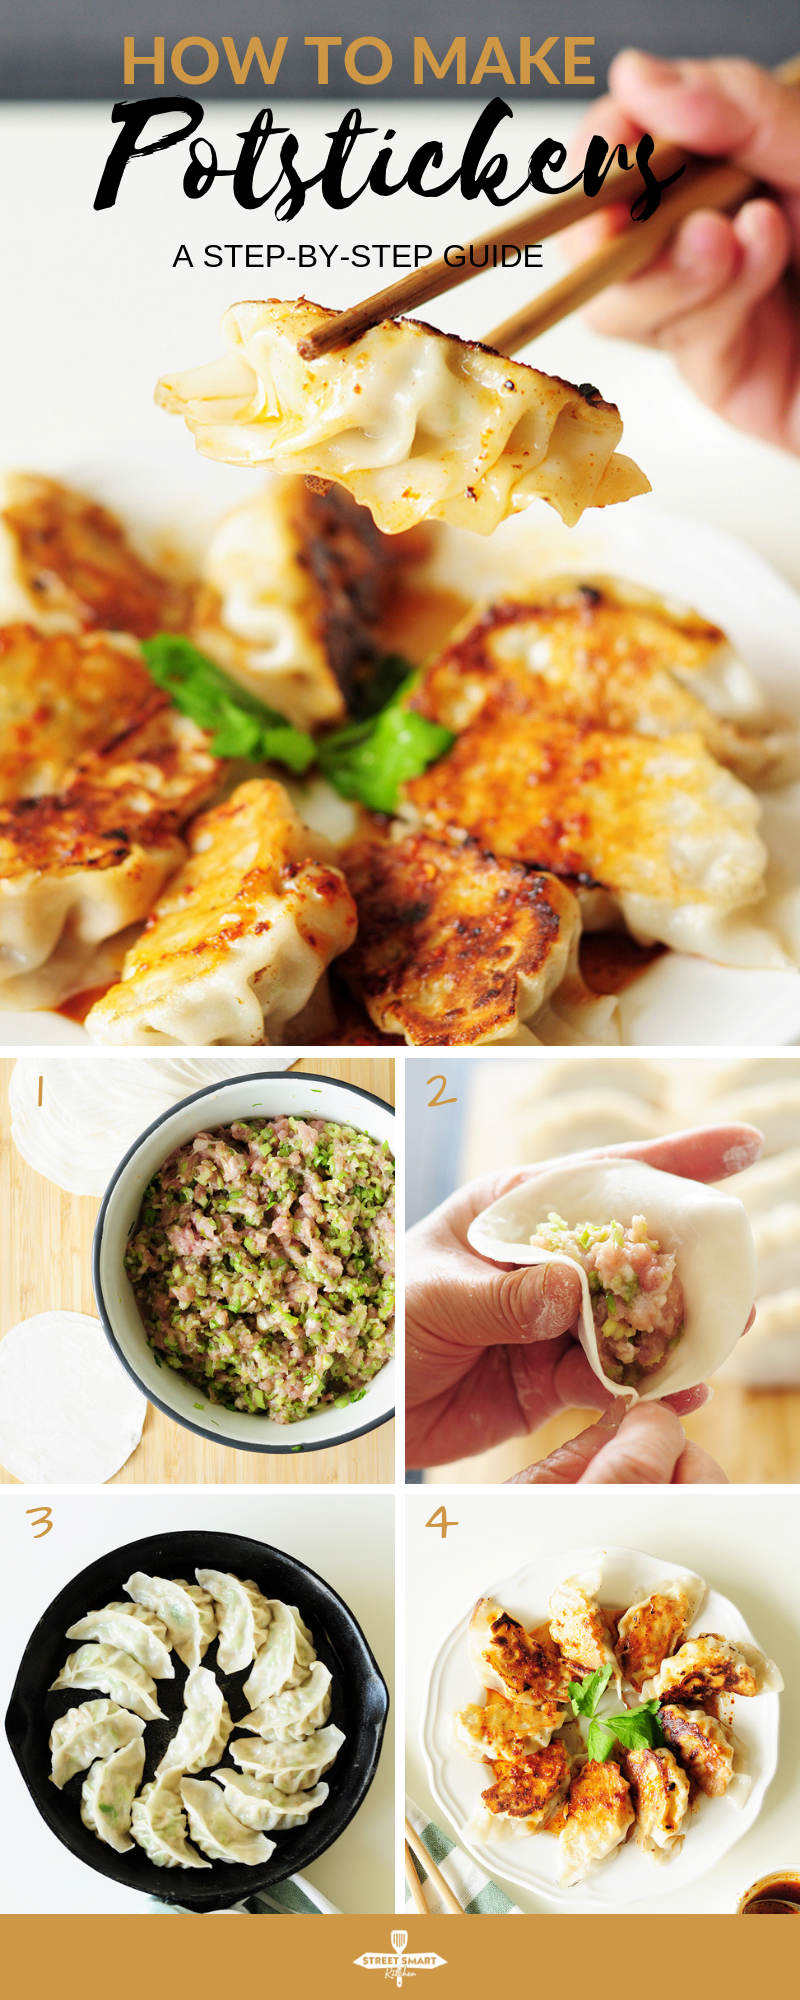
How to Make Potstickers at Home
Step 1: Prepare the Filling: The Key to Making the Perfect Potsticker Filling
Similar to wonton fillings, there are numerous combinations of potsticker fillings that you can come up with. Depending on your preference, you can do all-meat fillings (such as ground pork, ground chicken, or ground beef), all-vegetable fillings, or a mix of meat and vegetables, which is my favorite.
Whatever you desire, remember this—the key to the perfect potsticker filling is to keep it wet and sticky but not watery.
The consistency you are looking for in your potsticker fillings is like a paste—firm enough to wrap but not dripping wet, which will destroy the potsticker wrappers when folding.
Usually the added condiments in the potsticker fillings—like light soy sauce, Chinese cooking wine, and good-quality oil—do a fantastic job keeping all the ingredients together. But if you choose to use vegetables in your filling, and if the vegetables have high water content, such as celery and bell peppers, they might generate additional liquid, which will make your filling too wet to wrap.
That doesn’t mean you can’t use these vegetables with higher water content for potsticker fillings. You just have to draw out the water from them with a bit of salt before mixing them into your filling.
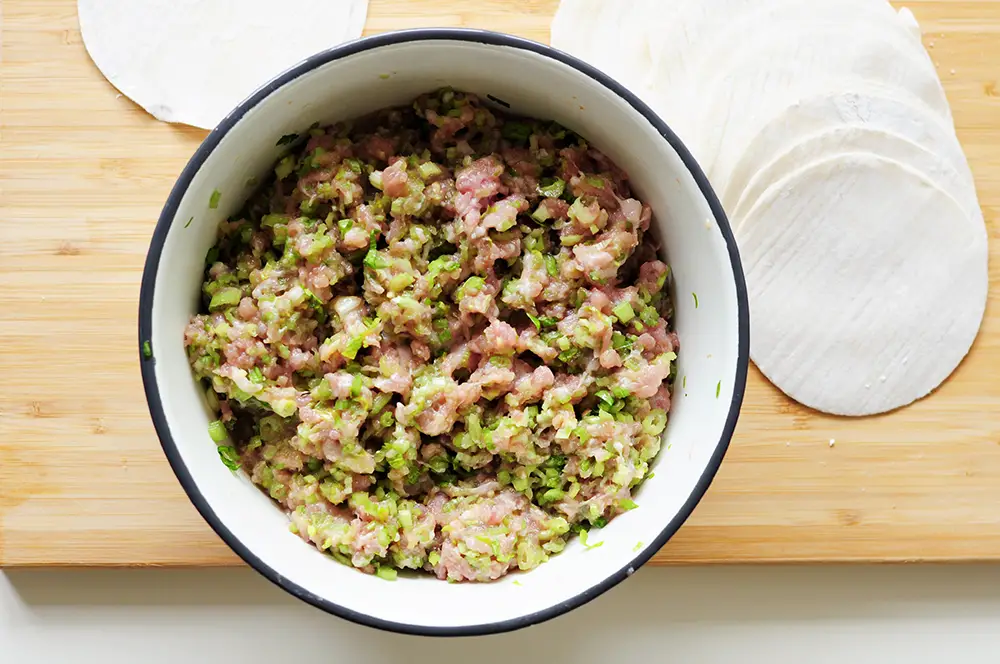
In this post, I am going to show you how to draw out the water from certain vegetables so you can put whatever you want into your fillings. The filling recipe that we are going to make contains 80% lean ground pork, celery, and fresh ginger, along with salt, soy sauce, Shaoxing wine, olive oil, corn starch, and a tiny bit of brown sugar.
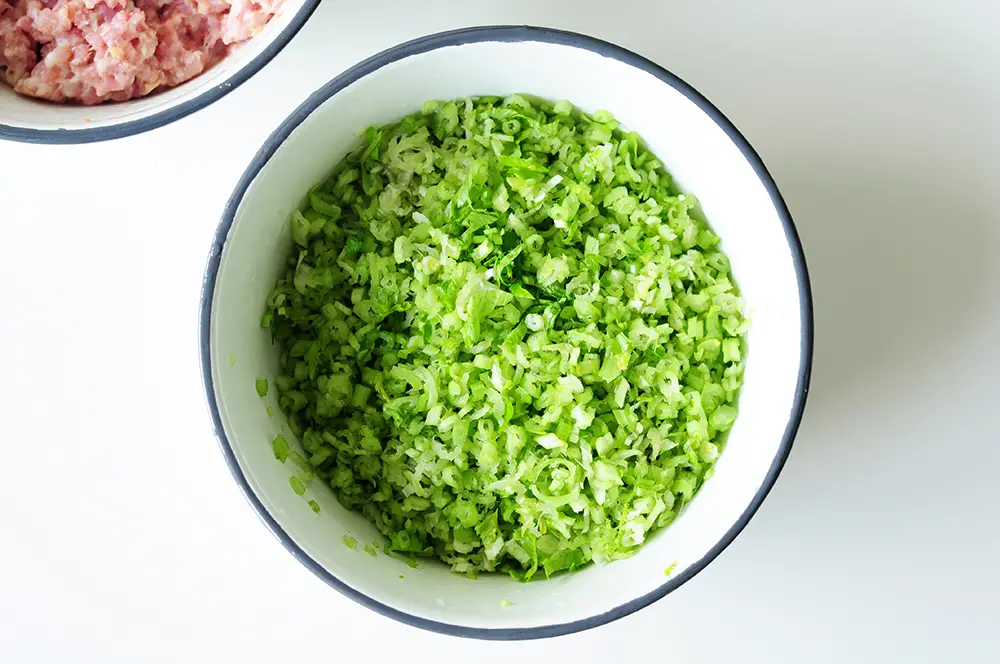
You see, we have crunchy celery to complement the ground pork. The problem is that celery has a high water content, which will make our filling too wet to work with, rather than a paste with the right consistency. The solution, however, lies in a couple of simple steps:
- Remove both ends of the celery along with the strings. Finely chop it and place in a bowl.
- Add a pinch of salt to the celery, mix, and let it sit for 10-15 minutes to extract the liquid from the vegetable.
- Wrap the celery in cheesecloth and squeeze out as much water as possible.
Now your celery is ready to be mixed with the rest of the filling ingredients. Follow the same steps to prepare other high-moisture vegetables, such as zucchini, bell peppers, lettuce, and spinach if you want to add some variety to your fillings.
Step 2: Wrap the Potstickers: How to Fold Potstickers, Mom’s Way
Once your filling is ready to go, here comes the fun part—wrapping the potstickers.
Unlike square-ish wonton wrappers, potsticker wrappers, also known as dumpling wrappers, are round.
My mom taught me how to wrap potstickers and wontons. Even though I know how to do it myself, I still enjoy watching her in action. I got a chance to film her wrapping potstickers the other day. Watch the video below if you’d like to learn how it’s done in my street-smart kitchen.
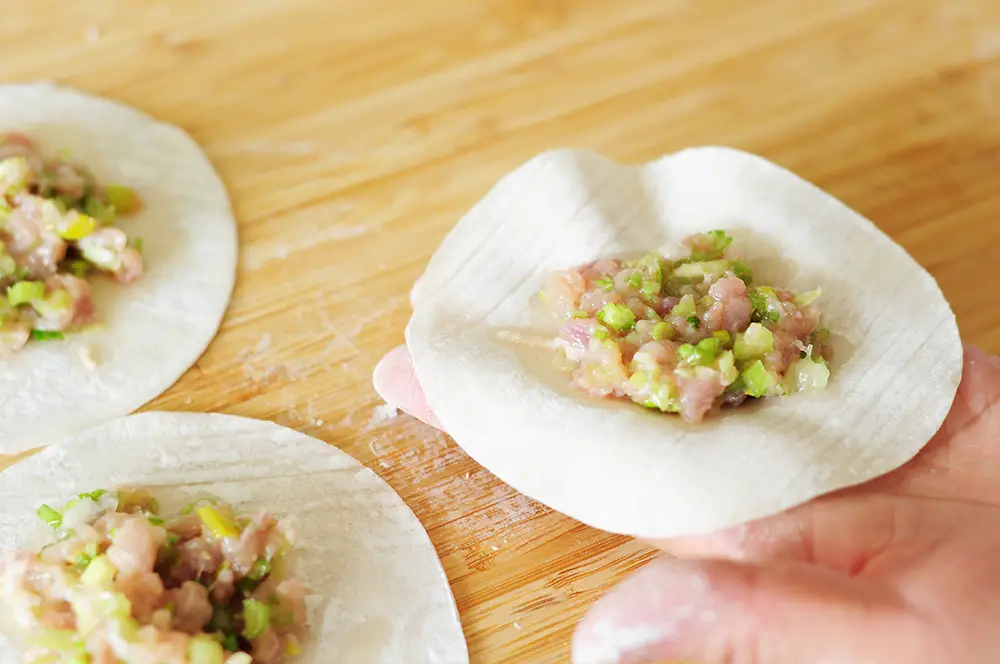
- Place a heaping tablespoon or so of filling onto the center of a potsticker wrapper.
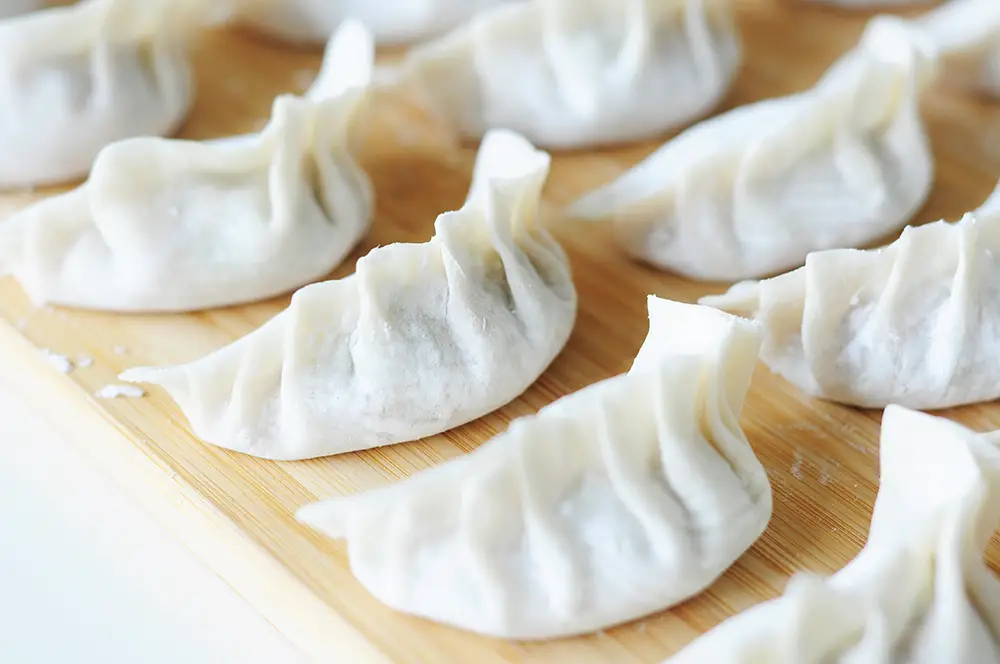
- Holding the wrapper flat on the palm of one hand, dip the thumb and index finger of your other hand into a bowl of water, and then begin pinching the edges of the wrapper together. Move across the wrapper, connecting and sealing the edges of the circle. You should be able to form a seam that is ½ inch or so. If you have too much filling, the seam won’t hold—you may need to practice and make a couple of adjustments.
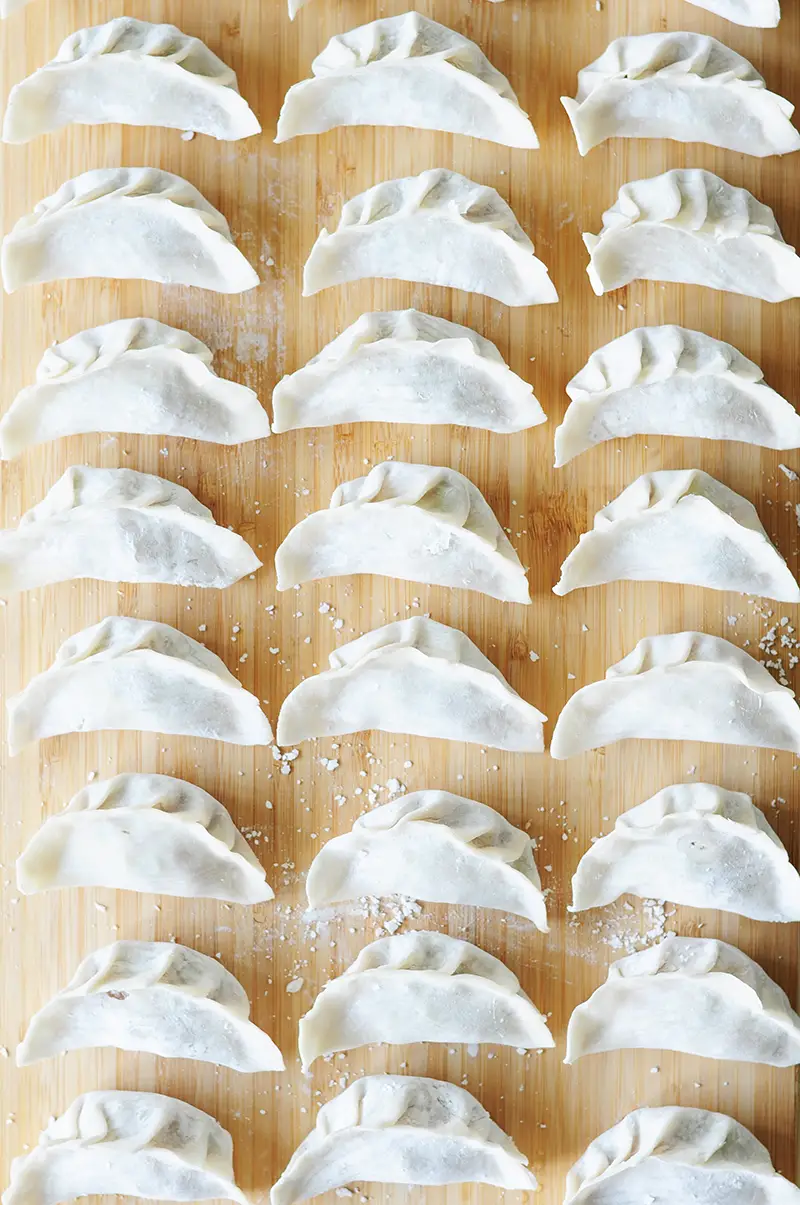
- The end result should be a pleasantly plump, slightly crescent-shaped potsticker that sits up smartly.
Step 3: Cook the Potstickers
The best-tasting potstickers are obviously freshly wrapped ones. But they also freeze easily. To cook the potstickers to perfection, we want the top part of the potstickers (where you seal the wraps) to be soft and transparent, the filling cooked through, and the bottom of the potstickers to be nicely crispy. How do we achieve that? Let’s take a look at how to cook both fresh and frozen potstickers.
Things you need to cook potstickers:
- A flat-bottom, heavy-duty nonstick pan (cast-iron skillet would be a great choice in this case)
- Good-quality cooking oil
- Water
- A lid that covers the pan completely
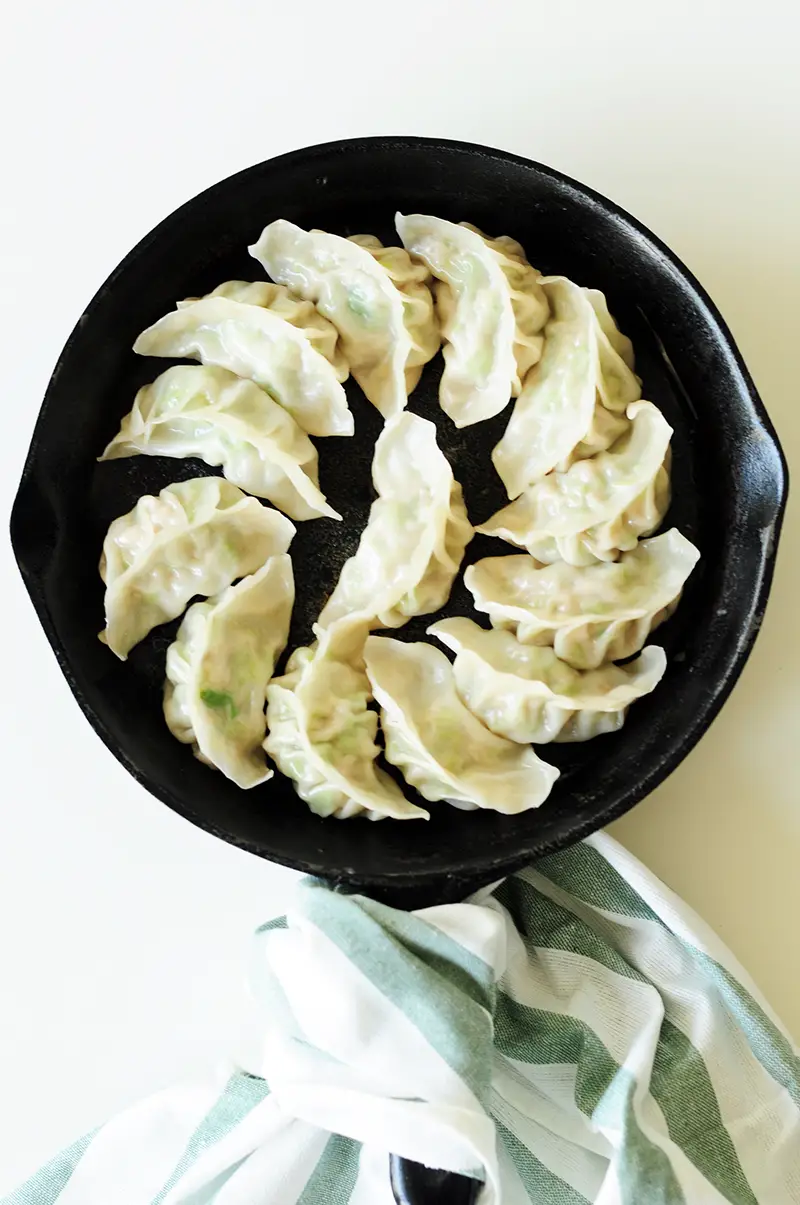
To cook fresh potstickers:
Heat your nonstick, flat-bottom pan over high heat until hot. Add some high-quality cooking oil to coat the entire bottom of your pan, followed by the potstickers in one single layer, flat side down. Cook in batches.
Now pour some water over the top of the potstickers, allowing the water line to climb up to about one inch from the bottom of the pan. Cover with a lid immediately.
Essentially, this means that we steam the top of the potstickers and pan-fry the bottom to get the results we are looking for.
About two minutes later, the water in the pan should be almost gone. Uncover, switch heat to medium; continue cooking until the water is completely evaporated, and the bottoms of the potstickers are golden brown. Voila!
To cook frozen potstickers:
The beauty of frozen meals like wontons and potstickers is that you don’t have to thaw them before cooking!
Just follow the exact steps as if you were cooking fresh potstickers. The only difference is that you need at least double the amount of the water once you place the frozen potstickers in the heated pan with oil. The cooking time will be a bit longer, accordingly.
Step 4: Make the Dipping Sauce
Now that you’ve got your gorgeous potstickers ready to serve, complete the meal with a quick Chinese dipping sauce. It’s not absolutely necessary, but if you are going for the full experience of creating authentic Chinese potstickers at home, you should do it.
Here are the ingredients of my go-to dipping sauce, which yields quite a bit, about 4 servings. The leftovers can be stored in the fridge for up to two weeks. Feel free to adjust the flavor according to your liking.
- 3 tablespoons soy sauce
- 1 tablespoon rice vinegar
- 2 tablespoons brown sugar
- 6 cloves garlic, minced
- 1 tablespoon homemade hot chili oil

StreetSmart Cooking Tips
How Much Filling Should You Put in One Wrapper?
It depends on the size of your potsticker wrapper. The diameter of my wrappers used in this guide is 3 inches. For that size, 1-1 ½ tablespoons of filling is a good amount.
The rule of thumb here is to have enough room left on the edge of a potsticker wrapper to securely seal the filling inside after folding.
- If the filling gets easily squeezed out the edge of a potsticker wrapper, it means you put too much filling in it. The wrapper won’t seal well, which will cause the potstickers to fall apart when cooking.
- If your potstickers can’t stand up after folding, it probably means that you’ve put in too little filling, which isn’t a deal-breaker, but we want a satisfying bite from each potsticker as well as a nice and crispy flat bottom, don’t we? So don’t be too afraid of adding the filling. You can always remove some if it’s too much.
How to Properly Place the Wrapped Potstickers
Say that you are ready to wrap some awesome potstickers. Before you do so, make sure to dust your work surface with some all-purpose flour to prevent the bottom of your potstickers from sticking to it.
You also want to keep some distance between the potstickers to prevent them from sticking to each other.
The store-bought dumpling wrappers are normally a bit dry, but remember, we dip our thumb in water to seal the potstickers when wrapping. If the water accidentally gets on the bottom or other parts of the surface of your potstickers, they’ll likely stick. It’ll be difficult to pick them up without breaking them. Therefore, it’s better to be careful with the water.
How to Freeze and Store Potstickers
If you are like me, you probably want to wrap a big batch of potstickers and keep some for later use. To properly store potstickers, here are some simple steps to follow.
- Make sure to lay the freshly wrapped ones in a single layer with a little room between each one on a baking sheet lined with parchment paper, big plates, or anything with a flat surface that can fit into your freezer.
- Cover with plastic wrap and freeze for an hour or so until the potstickers are frozen.
- Now you can transfer the potstickers into containers or large Ziploc bags. Then put them back into the freezer to enjoy later. I recommend that you divide them into single serving sizes to store. That way, you know that one container or one bag is for one person.
Now you have it—the complete guide to making a famous Asian dim sum at home. I hope this is helpful, and if you have any questions or want to tell me about your experience making potstickers according to this guide, feel free to leave a comment below. I’d love to hear from you.
As always, I’d be really glad to see your creations. Snap a photo of your potstickers and share on social media using the hashtag #streetsmartkitchen. Can’t wait to see them!
Happy potsticker-making!
Print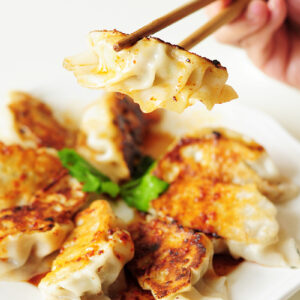
Homemade Potstickers
- Prep Time: 40 minutes
- Cook Time: 10 minutes
- Total Time: 50 minutes
- Yield: 4 servings 1x
- Category: Main, Dim Sum, Cooking Tips
- Method: Stove
- Cuisine: Chinese
Description
A step-by-step guide to making authentic Chinese potstickers at home. They also make a wonderful, healthy freezer meal for a whole family.
Ingredients
For the potsticker filling:
- 1 pound ground pork (80% lean)
- 1 1/2 tablespoons fresh ginger, minced
- 1 tablespoon Chinese cooking wine
- 2 tablespoons light soy sauce
- 2 teaspoons cornstarch
- 1 teaspoon brown sugar
- 1 pound celery, ends trimmed and very finely chopped (about 4 cups)
- 1 teaspoon kosher salt, divided
- 3 tablespoons extra-virgin olive oil
For the potstickers:
- 40 large potsticker (dumpling) wrappers, about 3-inch diameter
- 1 cup water
For cooking the potstickers:
- Extra-virgin olive oil or other good-quality cooking oil
- Water
For the dipping sauce:
- 3 tablespoons soy sauce
- 1 tablespoon rice vinegar
- 2 tablespoons brown sugar
- 6 cloves garlic, minced
- 1 tablespoon hot chili oil or sesame oil
- Chopped green onions for garnishing (optional)
Instructions
- In a large bowl, combine ground pork, ginger, Chinese wine, light soy sauce, cornstarch, and brown sugar. Mix until all ingredients are evenly combined. Don’t overdo it. Set aside.
- Place prepared celery in another bowl. Add 1/2 teaspoon salt and combine. Let it sit for 10-15 minutes to draw out the liquid from the celery. Wrap the celery in a cheesecloth and squeeze out as much water as possible.
- Add the drained celery to the pork mixture, followed by another half teaspoon of salt and olive oil. Mix well.
- Now, wrap the potstickers. Place a heaping tablespoon or so of filling onto the center of a potsticker wrapper.
- Holding the wrapper flat on the palm of one hand, dip the thumb and index finger of your other hand into a bowl of water, and then begin pinching the edges of the wrapper together. Move across the wrapper, connecting and sealing the edges of the circle. You should be able to form a seam that is ½ inch or so. If you have too much filling, the seam won’t hold—you may need to practice and make a couple of adjustments. The end result should be a pleasantly plump, slightly crescent-shaped potsticker that sits up smartly.
- To cook the potstickers, heat a large skillet (flat-bottom and nonstick) or a cast- iron skillet over high heat until hot. Add enough cooking oil to coat the entire bottom of your pan, followed by the potstickers in one single layer, leaving some space between each one, flat side down. (Cook in batches.)
- Pour some water over the top of the potstickers, allowing the water line to climb up to about one inch from the bottom of the pan. Cover with a lid immediately.
- Bring to a boil and continue cooking, allowing most of the water to be cooked off, about 2 minutes.
- Uncover, switch to medium heat; continue cooking until the water is completely evaporated and the bottom of the potstickers are golden brown.
- Combine all sauce ingredients in a small bowl. Serve the potstickers hot with the dipping sauce. Enjoy!
Notes
- Cabbage can be substituted for celery, and that doesn’t require water content extraction. You can add all filling ingredients in one bowl and mix together all at once.
- If using napa cabbage, I recommend using only the leafy part for less water content.
- Other filling ideas include shrimp potstickers or vegetarian potstickers with shiitake mushrooms and bok choy, etc. Get creative!
About the Author

Sharon Chen is an Integrative Nutrition Health Coach and author of the Complete Sous Vide Cookbook. She believes food not only brings healing but also connection. As the creator of StreetSmart Kitchen, she aims to make meal prep easier than ever and help you find balance, ease, joy, and simplicity in the kitchen as you improve your well-being.
I haven’t tried pot stickers but have heard so much about them. This is a brilliant tutorial to get anyone started. Thanks. Just pinned this.
Yum! I love potstickers! What a great informative post. I especially love the tip on how to remove the water from vegetables. I can’t wait to try your recipe!
I absolutely love potstickers, and they are SO much better homemade! This is a great recipe and tutorial! Thanks for the lesson!
These are absolutely perfect! I love the flavorful filling! Yum!
Wow there is nothing like homemade potstickers. My neighbor makes them and I always want an invite when she does because you just can’t replicate the taste. These sound delicious and I am anxious to try to make them myself. This recipe is a keeper.