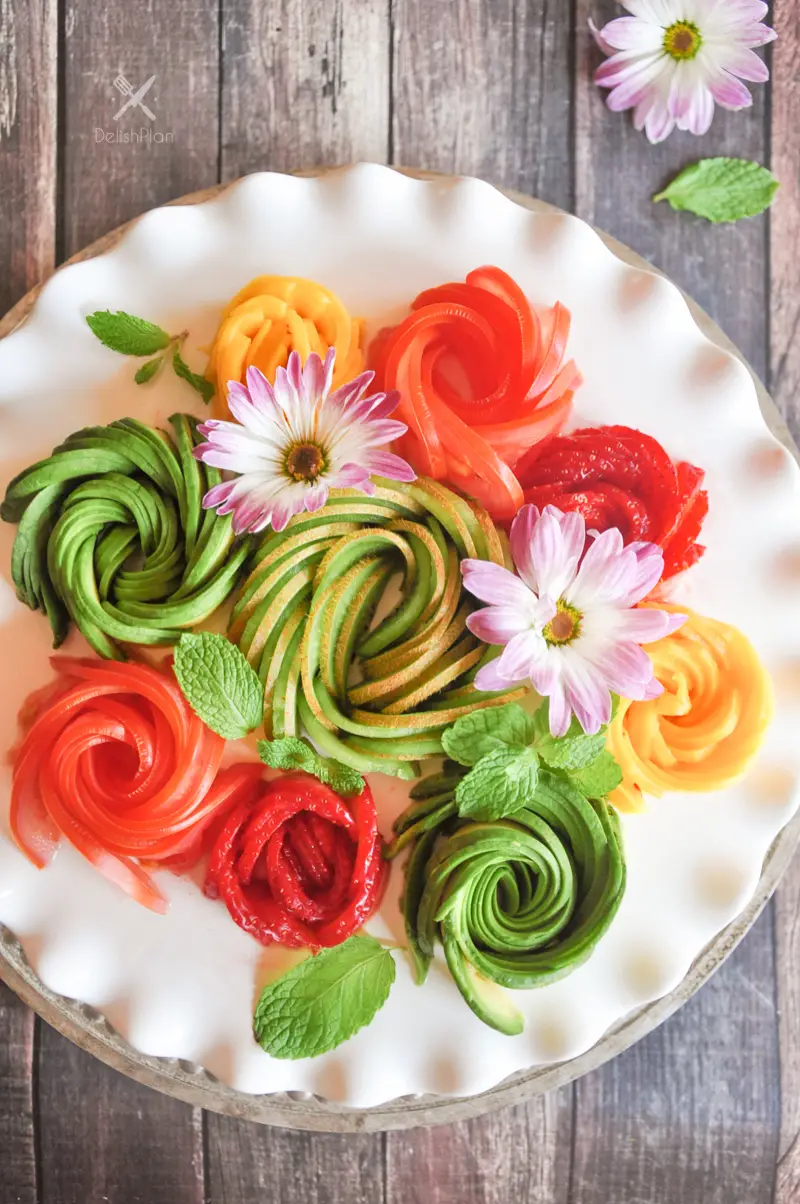
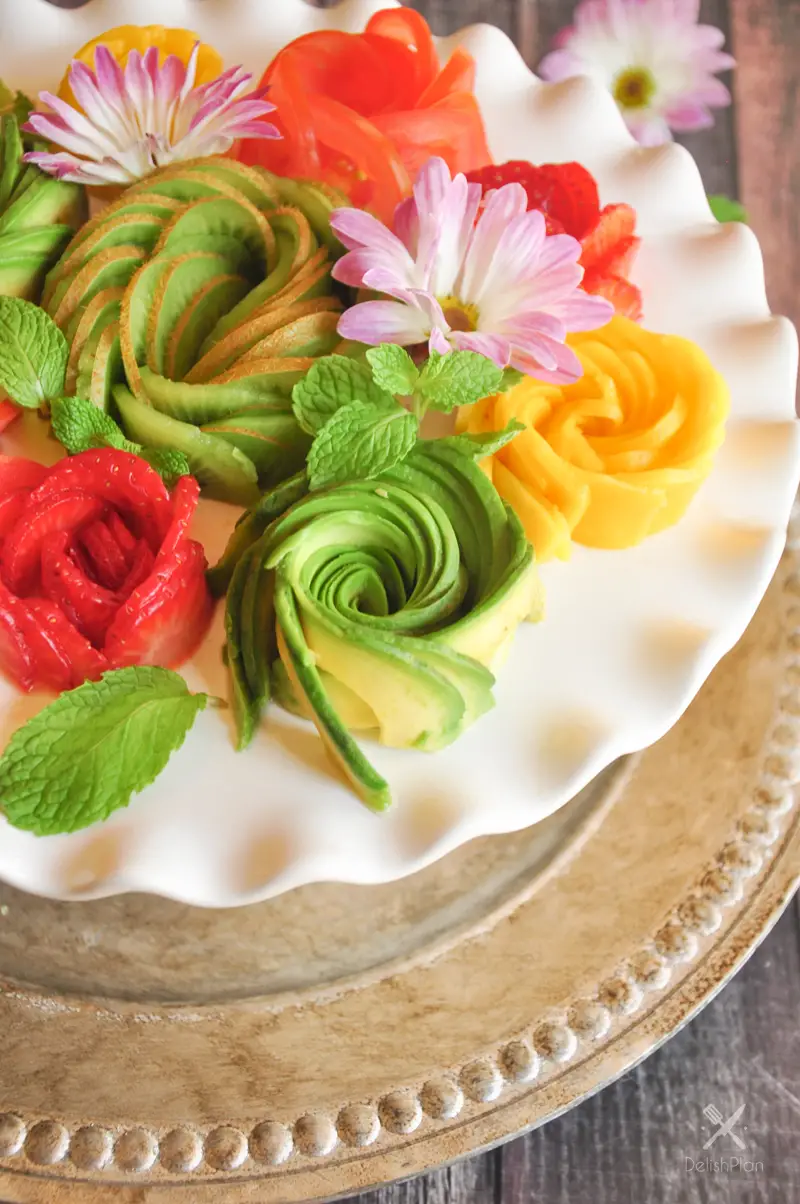
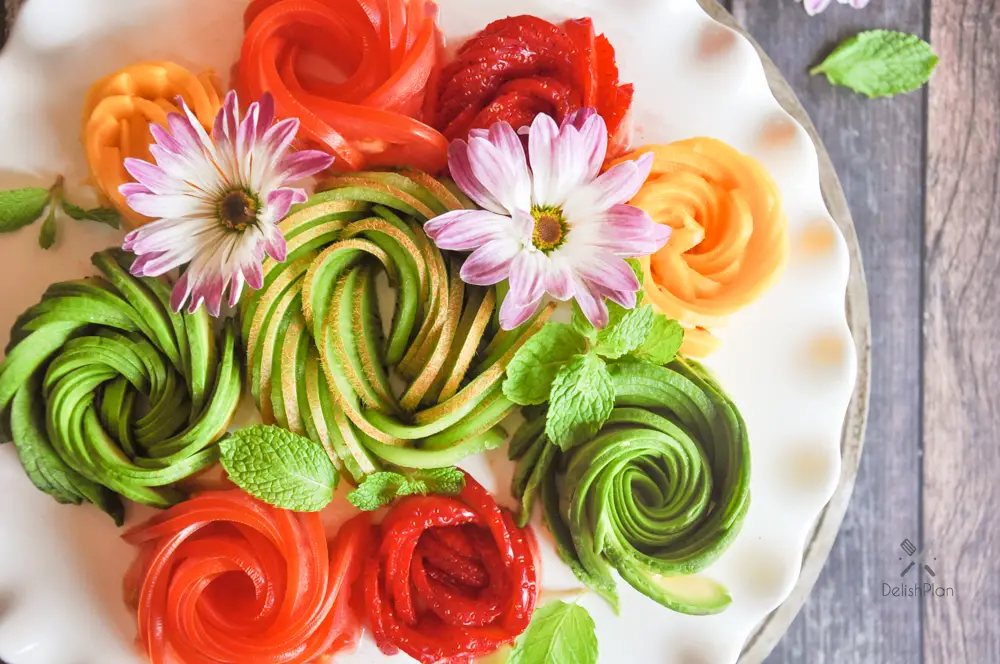
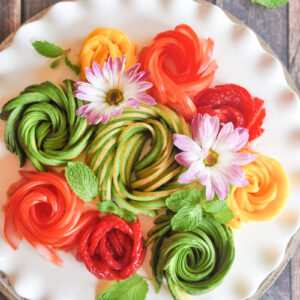
How to Make Food Flowers
Making food flowers like avocado roses is easier than you thought it would be. Watch our video to see how you can roll up a food rose in just a few minutes.
You read the title. You might think, “Who on earth have the luxury of the time to even think about how to make food flowers these days?”
I know, I know, most of the time, putting dinners on the table after work is already a struggle. Stuff like food flowers just seems to be utterly unnecessary. I don’t disagree. Honestly, I don’t decorate my food this way often, just occasionally, when I am in a good mood or I want to impress someone.
So feel free to pin this post onto one of your Pinterest boards, bookmark it, or do whatever you need to do to keep it somewhere accessible. Whenever you are in the mood to make everything pretty including your food, you’ll have this guide to refer to.
You can’t learn a language overnight. Finger picking your favorite song with a ukulele ain’t gonna happen overnight either. However, I am telling you that making food flowers is a skill you can totally master with a few tries.
There are a few details you should know in advance to ensure your success.
Choose Ripe Foods
The key to successfully make a food flower is to choose foods that can turn ripe. Foods like avocados, tomatoes, mango, kiwi, strawberries, peaches, nectarines, etc would be great choices. But don’t wait until the foods get too ripe. Here’s how you can find out if your food is in the best condition to be shaped into a rose.
Take avocado as an example. Cut a slice. If your knife comes out with avocado sticking on the side, it means it’s too ripe, which is going to be hard to work with. Say your knife comes out clean and you try to shape the slice into a curve. If the slice doesn’t bounce back but stays at the curve shape that you formed, then you are ready to go. The same principles apply to other foods.
Sharpen Your Knife
You need a sharp knife to do a dedicated job on slicing. The thinner the food slices are, the easier it is to roll up and make it look like a rose. The bottom of each slice should be completely unattached and you don’t want any slice to fall down flat. You want the slices to stay at where they are so that you can line them up.
Take Your Time with Food Flowers
When finishing slicing, use both of your hands to carefully spread out the slices into a curve, making sure each slice is not completely separated from the one before it and the one after it. Be patient with yourself and take your time. It might take you a few tries to get the curve ready to roll, but you will get there. Again, this is something you can definitely pick up with a little practice.
Here you have it. Next time you want to add an avocado or a tomato to your dish, show off your food decoration skills and make a food flower to lighten up your day. After watching the video, when you get a chance to practice, let us know which food flower you decide to make and how it goes in the comment below! I’d love to hear from you.
PrintAvocado Rose
The step-by-step guide to make an avocado rose anytime you want.
- Prep Time: 10 minutes
- Total Time: 10 minutes
- Yield: 2 roses
- Cuisine: Food Art
Ingredients
- 1 ripe avocado
Instructions
- Choose a ripe avocado. It should be ripe enough that a slice keeps its curve instead of bouncing back when you shape it, yet not so ripe that it sticks to the knife after slicing.
- Sharpen your knife so it can expertly cut thin, perfect slices of avocado that are not attached at the bottom. Cut your avocado in half longways around the pit. Pull the two pieces apart, and remove the pit. Peel the skin from the avocado while maintaining the fruit’s integrity.
- Place one half on the cutting board with the flat side down. Use the sharpened knife to cut thin, even slices vertically across the avocado. Aim to keep the slices standing up without any falling over.
- When the entire half is sliced, use both hands to slowly slide and shape the row of slices. With a hand on each side to guide the shaping, gently slide each piece down slightly from the one to its left so the pieces are no longer lined up in a row but move into a long column. The pieces should be slightly separated but overlapping. As you slide, shape the column into a slight curve. Be patient with the sliding and shaping step – it might take practice to get it right.
- Next, take the bottom end of the column and slowly roll it up to the left in a clockwise motion until you have a swirl design. Now you have your avocado “rose.” Use your knife to gently lift the bottom of the avocado “flower” from the cutting board and onto your serving dish.
- Do the same with the other half of the avocado.
Notes
The same instruction applies to other food flowers like mango rose, kiwi rose, strawberry rose, peach rose, etc.
About the Author

Sharon Chen is an Integrative Nutrition Health Coach and author of the Complete Sous Vide Cookbook. She believes food not only brings healing but also connection. As the creator of StreetSmart Kitchen, she aims to make meal prep easier than ever and help you find balance, ease, joy, and simplicity in the kitchen as you improve your well-being.
Good tips for making food flowers – Sure we will give it a try
These are so cool and would definitely impress guests! #MakingHome
They for sure will impress guests. Glad that you like them. Thank you for stopping by, Annie!
Pingback: How to Make Food Flowers – Edible Crafts
Pingback: Friday Favorites #63 - Morgan Manages Mommyhood
Very pretty! Thank you for the tips.
This is seriously amazing! They would be perfect for a bridal shower or baby shower. So pretty and feminine!
Such a beautiful display! Kids would love to eat a flower too! I’m a vegetarian so I just love this:)h
Omg this is so cool!!!
SO BEAUTIFUL!! It’s artwork 🙂
Thanks so much, Mal!
They look really nice! I bet you need a bit of practice to end up making them!
Yes, I tried with 2 avocados and got the mojo. Thought it’s going to be difficult, but it’s surprisingly easy. 🙂
This is so awesome! I always wondered how this was done, thanks for sharing!
Wow, love how you make the food flowers. They look so great.
Thanks for sharing,
Bev
These are sooooo pretty!!!! I totally want to make these but I feel like it would be one of those pinterest fails for me and it wouldn’t look this pretty.
Thanks, Sally! If I can do it, you can totally do it too. The first one might not turn out well. I failed a couple times mainly because the food was either too ripe or not ripe enough. Once you are familiar with the steps, it’s actually surprisingly easy. Hope you give it a try! 🙂
This is just the coolest how-to I’ve seen today. So loving the festive and vibrant colors and the creativity.