How to Make and Store Homemade Broth
Achieve excellent flavor in every dish with these easy-to-make homemade broth recipes, including chicken, vegetable, and bone broth.
Of all the foods in the world, broth is one of the most versatile. There are three fundamental broths that will take you a long way in the kitchen. From there, you can experiment with adding different ingredients to your essential broth recipes. The three basic broths are chicken broth, bone broth, and vegetable broth. If you can master the art of making rich broths, you will have laid the groundwork for achieving superlative flavor in every dish you make from now on.
A good broth can be the foundation for hundreds of soups, gravies, and sauces. Broth can even supplement medical care for colds, flu, stomach upsets, and more. Certain broths are known as a superfood, meaning they have a high density of vitamins and micronutrients.
It’s so easy to make your broth at home. And when you make your own broth, you can omit or reduce the salt. You can make it as spicy or bland as your taste prefers, and of course, you get the benefit of controlling the quality of the ingredients. I recommend you try making your homemade broth at least once and compare the flavor to your favorite commercial brand. Let me know in the comments section which one you liked more!
Homemade Chicken Broth
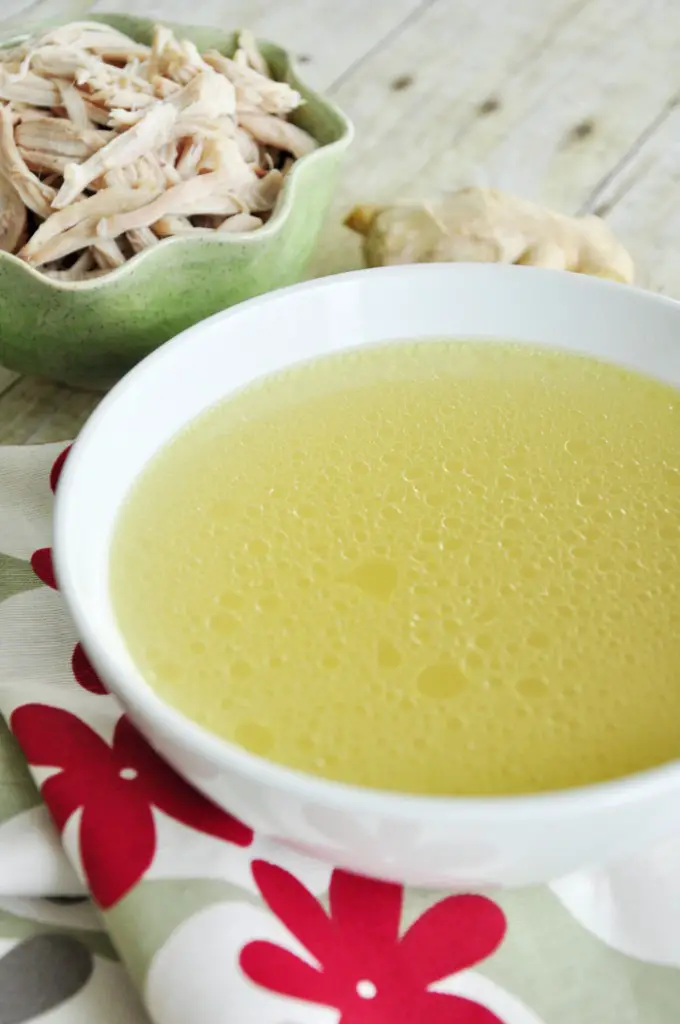
The finished chicken broth tastes like a subtle version of chicken soup. This broth can be made with almost any chicken parts, but most cooks agree that the wings and thighs with bones impart the most flavor. The bones, tendons, and skin add flavor and collagen to your chicken broth, and it’ll taste better, too.
It’s crucial to start with clean chicken. Raw chicken is susceptible to contaminants that you don’t want on your kitchen counter or in your broth.
- To wash chicken safely, begin with a clean sink.
- Next, set a dish next to the sink to place the raw chicken after rinse it. (You don’t want to fumble in the cabinets with unwashed hands after handling the raw chicken.)
- Turn your faucet on so you have a very low stream of warm water. The key is to avoid splattering.
- Place the chicken in the bottom of the sink (again, if you hold it up high near the faucet, the water may splatter), and rub it gently under the running water. Be sure to rinse inside the crevices and folds.
- Place the raw chicken on the platter for use in the chicken broth recipe.
- Scrub out the bottom of the sink, wipe down the faucet, and wash your hands thoroughly.
I prefer to cook my broth nice and slow in a slow cooker to ensure a rich flavor. You can also set and forget it for a few hours. Here’s my all-time favorite chicken broth recipe for you to try.
Print
Slow Cooker Chicken Broth Recipe
- Prep Time: 10 minutes
- Cook Time: 8 hours
- Total Time: 8 hours 10 minutes
- Yield: 12 cups 1x
- Category: Soup
- Method: Slow Cooker
- Cuisine: Chinese
- Diet: Gluten Free
Description
Easy slow cooked chicken broth with a few ingredients to bring out the depth of the flavor and nutrients.
Ingredients
- 3 pounds chicken thighs/wings, bone-in and skin on
- 1 medium onion, coarsely chopped
- 1 ounce fresh ginger, sliced
- 1 teaspoon sea salt
- 2 bay leaves
- 3 quarts water
Instructions
- Rinse chicken thoroughly and place them at the bottom of a 6-quart slow cooker.
- Add onion, ginger, sea salt, and bay leaves into the slow cooker and pour water over all ingredients.
- Cover and cook on low for 8-9 hours or on high for 4-5 hours until the broth is intensely flavored.
- Let the broth settle for 5 minutes, and remove as much fat as possible from the surface using a large spoon.
- Discard the solids and strain the broth through a fine-mesh strainer into a large container. Enjoy and refrigerate or freeze the leftovers for later.
Notes
- I used one teaspoon of salt in this recipe for some flavor. You can cook the broth without salt and add it later when ready to use.
- You may save the chicken for shredded chicken. To do so, remove the skin and bones, and tear up the chicken meat using your hands or two forks.
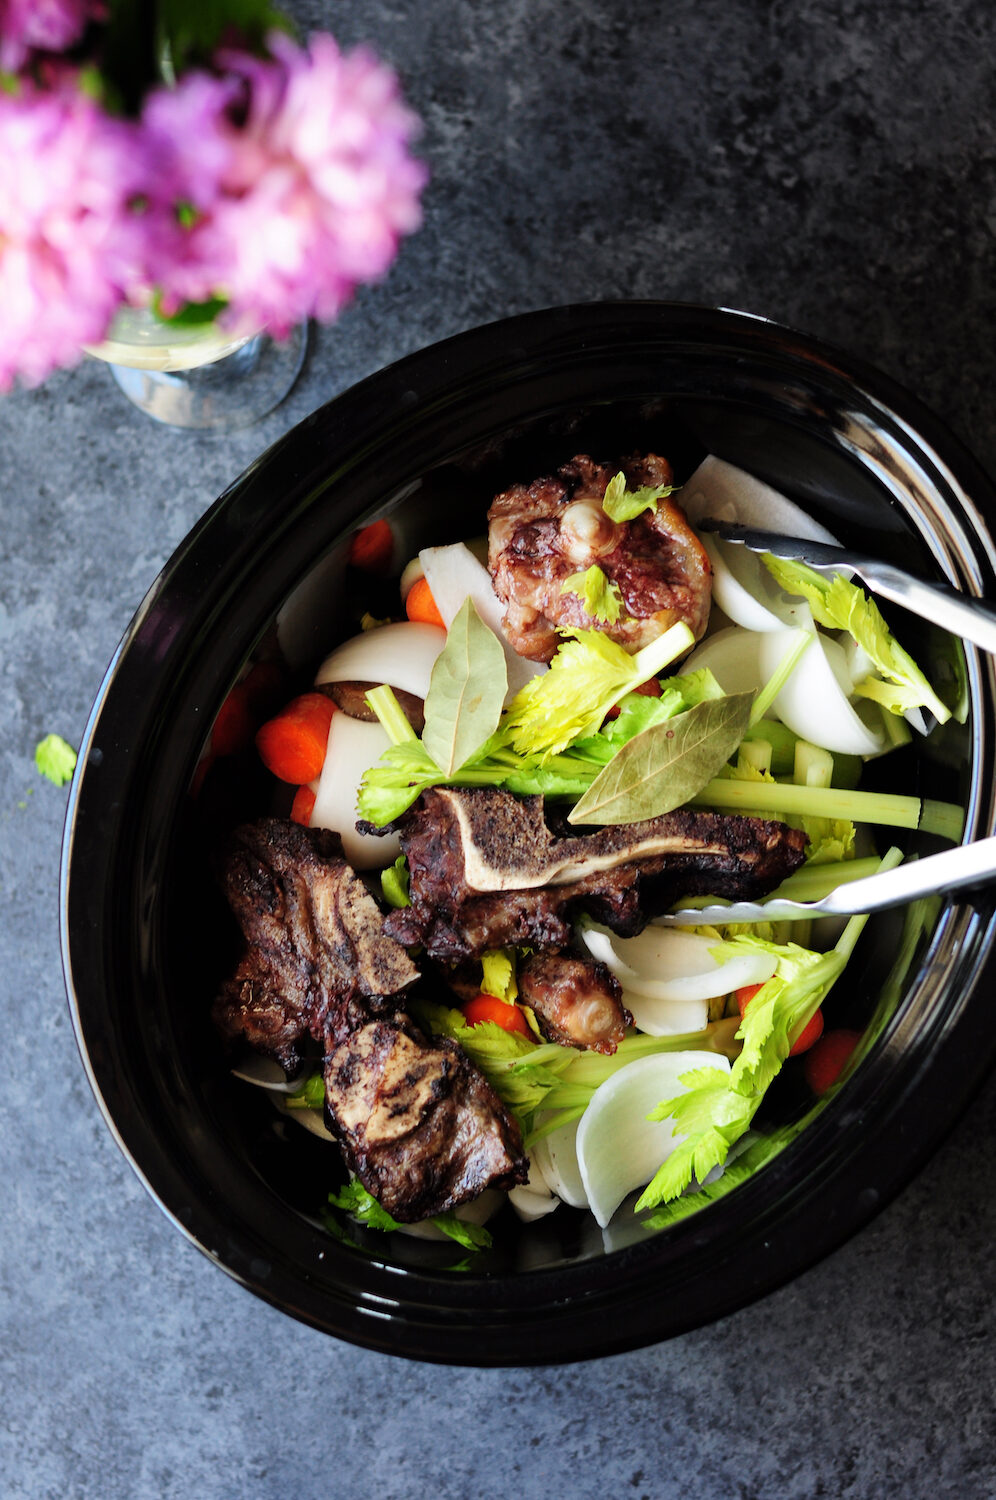
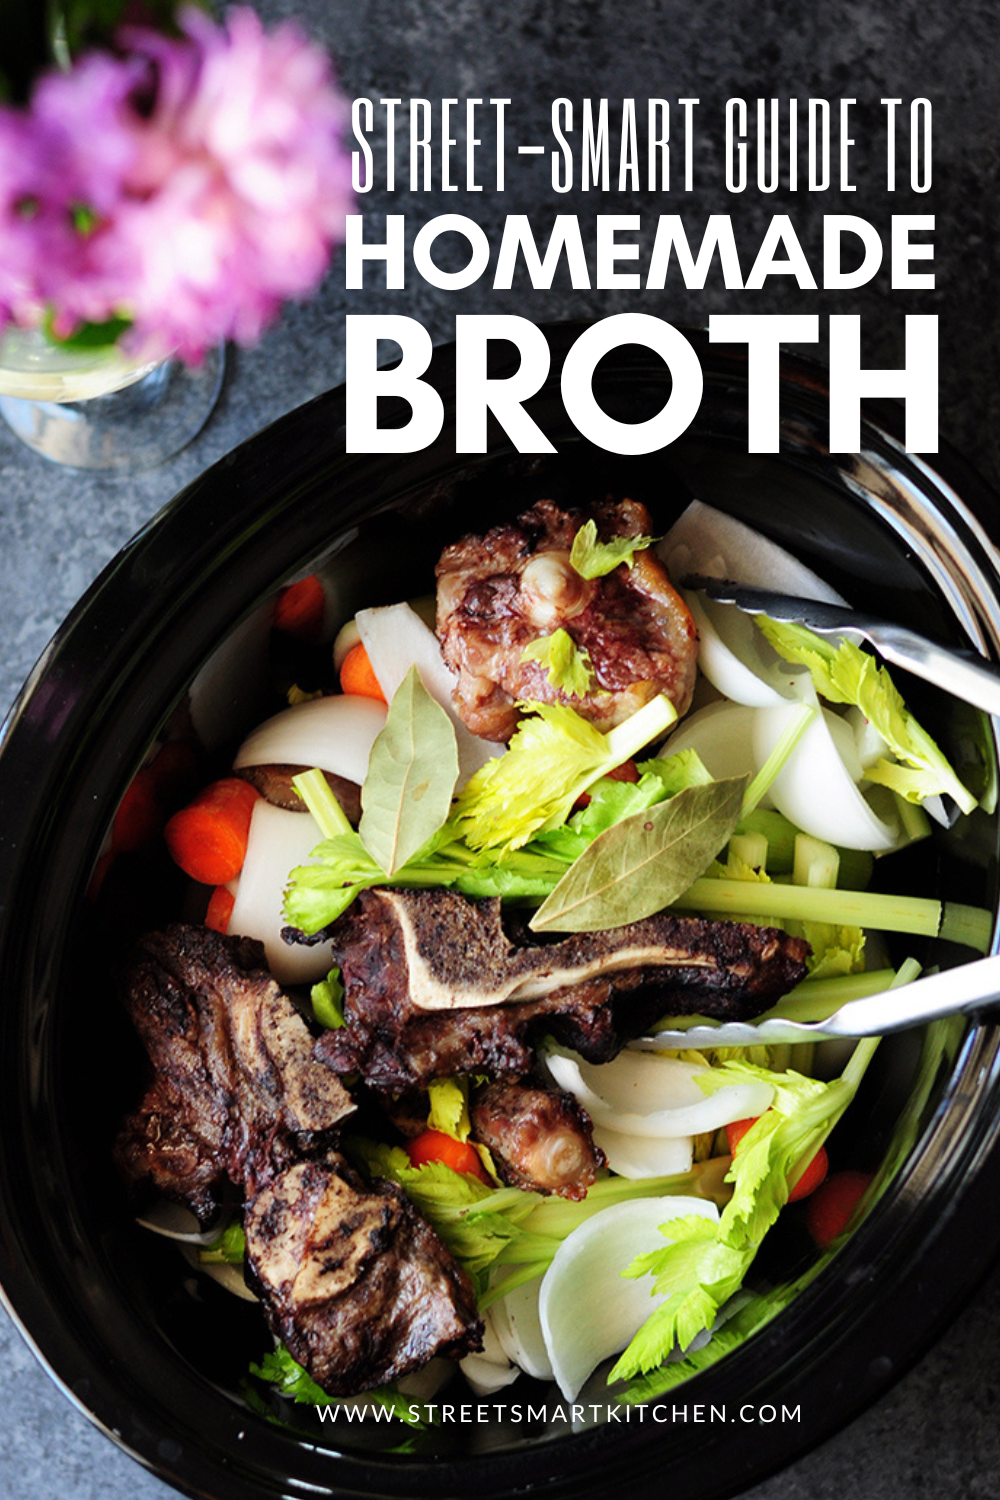
Homemade Bone Broth
Bone broth has been called a superfood due to its many health benefits. It has, among other things, calcium, collagen, and bone marrow. It’s been linked to reducing systemic inflammation, relieving joint pain, and improving hair and nail growth. Its amazing restorative properties can’t be valued highly enough.
If you can imagine what beef stew would taste like if you took out all the meat and vegetables, that’s what bone broth tastes like. Amazingly rich and satisfying, it’s completely gentle on the digestive system. It’s perfect for adults who are under the weather and can’t stomach a solid meal. Yet it’s also ideal for those cold winter days when you feel like more than a cup of tea to go with your book, but not a heavy snack.
So, where do you get the bone for the bone broth? Well, you can buy prepackaged beef bones from many grocery stores. They may offer oxtails or a few other types. But a less expensive source is to save the bones from your steak dinner. Grilled Porterhouse and T-bones are our favorite kinds of steak meals. Since you already spend the money on those, why not make the most out of them by saving the bones for a nutritious broth? You know there is always a bit of meat that you can’t quickly get on a T-bone, but it’s an excellent addition to bone broth, and the meat comes right off after the broth is done. See, absolutely no waste!
And if you buy a roast with bone-in, you can use that, too. Remember, bones can always be reused. They might yield less flavor but will still yield nutrition.
Just toss the bone in a freezer bag for use anytime you want to make bone broth in the future or make it right after dinner in your slow cooker. Serve the bone broth by itself in a mug for easy sipping. Or, keep it on hand for use as a base in your slow cooker recipes, beef gravies, soups, and stews.
For my go-to homemade beef bone broth recipe, find it here.
However, even if making bone broth at home isn’t difficult, sometimes marrow bones are not always accessible to us, and other times, we just simply don’t have the time to make it. That’s when I recommend stocking up on some 100% grass-fed bone broth from Kettle & Fire, America’s first and only USDA grass-fed bone broth.
Homemade Vegetable Broth
One of my favorite things about vegetable broth is that you can use endless ingredient combinations. If you like a more oniony taste, you can add more onion or shallots, or if you prefer a sweeter flavor, you can include sweet red or yellow peppers in the mix.
If you dislike wasting food (I do!), here’s a frugal way to source ingredients for a fine vegetable broth. Each time you cut vegetables for supper, save the ends and peels. Just toss them into a large freezer bag and keep adding to it. When the bag is full, use these “scraps” to make a big batch of vegetable broth. Here are some suitable vegetables that you can save the cut ends from:
- Asparagus ends
- Broccoli stalks
- Bell pepper tops
- Cauliflower stems
- Onion tops and bottoms (sans skin)
- Carrot tops, bottoms, and peels
- Carrot greens
- Celery bottoms, and the celery bulb and leaves
- Leek’s green part
- Tomato tops and bottoms
This homemade vegetable broth recipe below will get you started making delicious broth, and you can alter it according to the ingredients you have on hand.
Print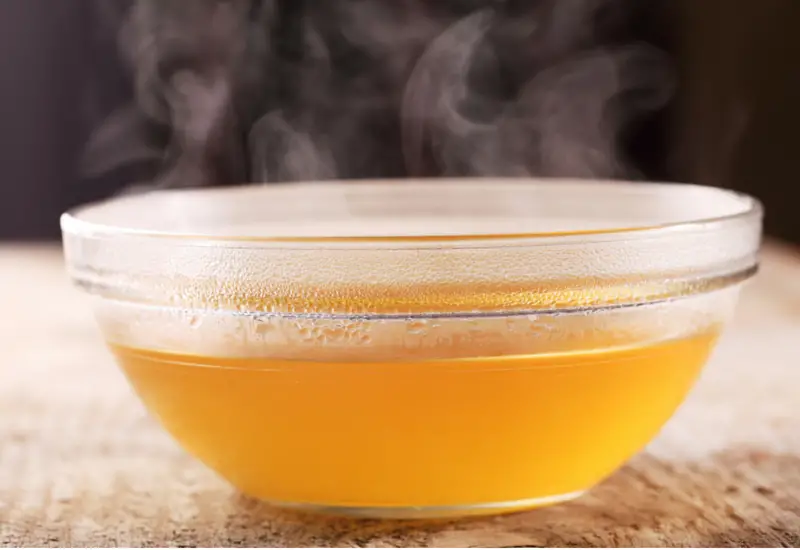
Slow Cooker Vegetable Broth Recipe
- Prep Time: 5 minutes
- Cook Time: 8 hours
- Total Time: 8 hours 5 minutes
- Yield: 8–12 cups 1x
- Category: Soup
- Method: Slow Cooker
- Cuisine: American
- Diet: Vegan
Description
Homemade vegetable broth made with any vegetable scraps you have.
Ingredients
- 2 medium onions, chopped
- 2 to 3 carrots, chopped
- 3 to 4 celery stalks, chopped
- 1 large tomato, chopped
- 8 ounces mushrooms (or mushroom stems)
- 4 sprigs fresh thyme (optional)
- 1 bay leaf
- 1 small bunch parsley
- Salt, to taste
- 1 teaspoon whole peppercorns
- 8–12 cups water
Instructions
- Combine all ingredients in a 6-quart slow cooker. Cover and cook on low for 8-9 hours or on high for 4-5 hours until the broth is deeply flavored.
- Discard the solids and strain the broth through a fine-mesh strainer into a large container. Enjoy and refrigerate or freeze the leftovers for later.
Vegetable broth captures all the nutrients from the vegetables during their making. You can then deliver those nutrients to any dish via the broth. For example, when you use vegetable broth as the liquid to make rice or pasta, those nutrients are absorbed into the grain. You and your family will then reap all the added nutritive benefits when you enjoy your regular meals.
How To Store Homemade Broth Efficiently
Broth responds well to freezing, so you can make big batches at a time and have it readily available for enjoying on its own or in recipes. There are many ways to freeze broth, but in order to do it efficiently and conveniently when you are ready to defrost and use it, I’ve got some of our favorite methods to share with you.
Ziploc Bag Method
Ladle the broth into a coffee mug lined with a quart-size Ziploc bag. Seal the bag and repeat this step with the rest of the broth. Place the filled bags flat in a large shallow roasting pan, separate each layer with parchment paper, and put them in the freezer. Once the broth is solidly frozen, the bags can be removed from the pan and stored in the freezer. Watch the video below to see how it’s done.
Silicone Muffin Tin Method
If you have silicone muffin tins, ladle cooled broth into each muffin tin and freeze. When the broth is frozen, twist the muffin tin like you would twist an ice tray to get the frozen broth blocks out. Place the frozen blocks in a large Ziploc bag and seal it tightly. Store the bag in the freezer.
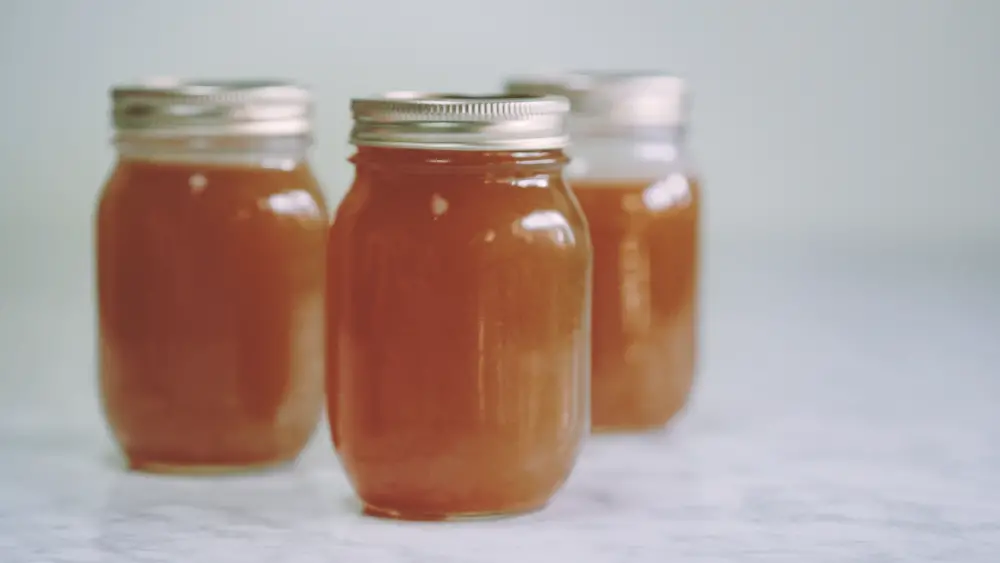
Mason Jar Method
If you invest in different Mason jar sizes, you can easily freeze different portion sizes. Ball is a quality brand, and you can often find these for sale in supermarkets in the canning section.
To freeze broth in glass Mason jars, start with clean jars—fresh out of the dishwasher is fine. Allow the finished broth to come to room temperature. Ladle into the jar, leaving at least an inch of headroom. Water expands as it freezes, so you are basically allowing space for expansion. Otherwise, the jar will crack in the freezer. Secure the metal canning lid to the top and label the jar with the name and date. You can store frozen broth for up to six months (but you’ll use it up long before that, we promise!).
Once you start using broth in your daily cooking, you’ll likely never want to go back to using plain water again when you cook. The broth is so nutritious that it may feel like you’re cheating yourself out of vitamins if you don’t use it every chance you get! Here you have it – slow cooker chicken broth, bone broth, and vegetable broth recipes, as well as how to store homemade broth efficiently.
Now, tell me which broth recipe is your favorite and how you use it in the comments below.
About the Author

Sharon Chen is an Integrative Nutrition Health Coach and author of the Complete Sous Vide Cookbook. She believes food not only brings healing but also connection. As the creator of StreetSmart Kitchen, she aims to make meal prep easier than ever and help you find balance, ease, joy, and simplicity in the kitchen as you improve your well-being.
That’s too finicky to do for large portions, my favorite way to store is to reduce to 1/5th if needed, pour into large rye bread containers and let it set, slice the stock into easily stack-able squares, freeze and then stack in square sauce container along with other sauce staples (mine is 5L with everything in squares, roux, cheongukyang, cream, duckfat and so on)
this is the way to do it. Freezing in bags is simple in theory but it becomes such a hassle over time. Also get a bigger pot.
Pingback: 10 Best Recipes with Vegetable Broth (Perfect for Leftovers) – A&C Accounting And Tax Services – Top Quality Accounting, Bookkeeping, Payroll And Tax Services- Oakland, CA
Pingback: 10 Best Recipes with Vegetable Broth (Perfect for Leftovers) - World Top Business Systems
Pingback: 10 Best Recipes with Vegetable Broth (Perfect for Leftovers)